It’s shipping day! My EX2 kit (wings and fuselage) officially left Yakima, WA today and are enroute to Colorado! It looks like shipping is going to take about a week with delivery currently slated for March 30th. While I’m waiting for it to arrive I thought it would be a good idea to summarize the work I did to prepare the workshop for building.
A lot of time went into this work shop preparation; however, it wasn’t directly part of the plane build-process and I didn’t keep good records of the time spent so I’m not including it in the total number of hours.
Starting Point
I’m using my detached 2-car garage as the workshop for the cub build. When I bought the house, about a year and a half ago, the garage was unfinished with a single 15A, 120V circuit, no insulation, and a bare concrete floor.
I wanted to be able to work year-round and Colorado winters can get quite cold so I knew I would need some insulation and heat at the very least. I also knew that I would need some more light so that I could see what I was working on. Finally, I knew I would be spending a lot of time in the workshop while building the plane so I wanted it to be comfortable and somewhere I enjoyed being.
With those things in mind I decided on the following list of projects:
- More lighting
- Work bench
- Additional electrical service
- Additional outlets
- Heating (and air conditioning)
- Finished (epoxied) floor
- Insulation
- Finished walls
- Tool storage/organization
- Air system
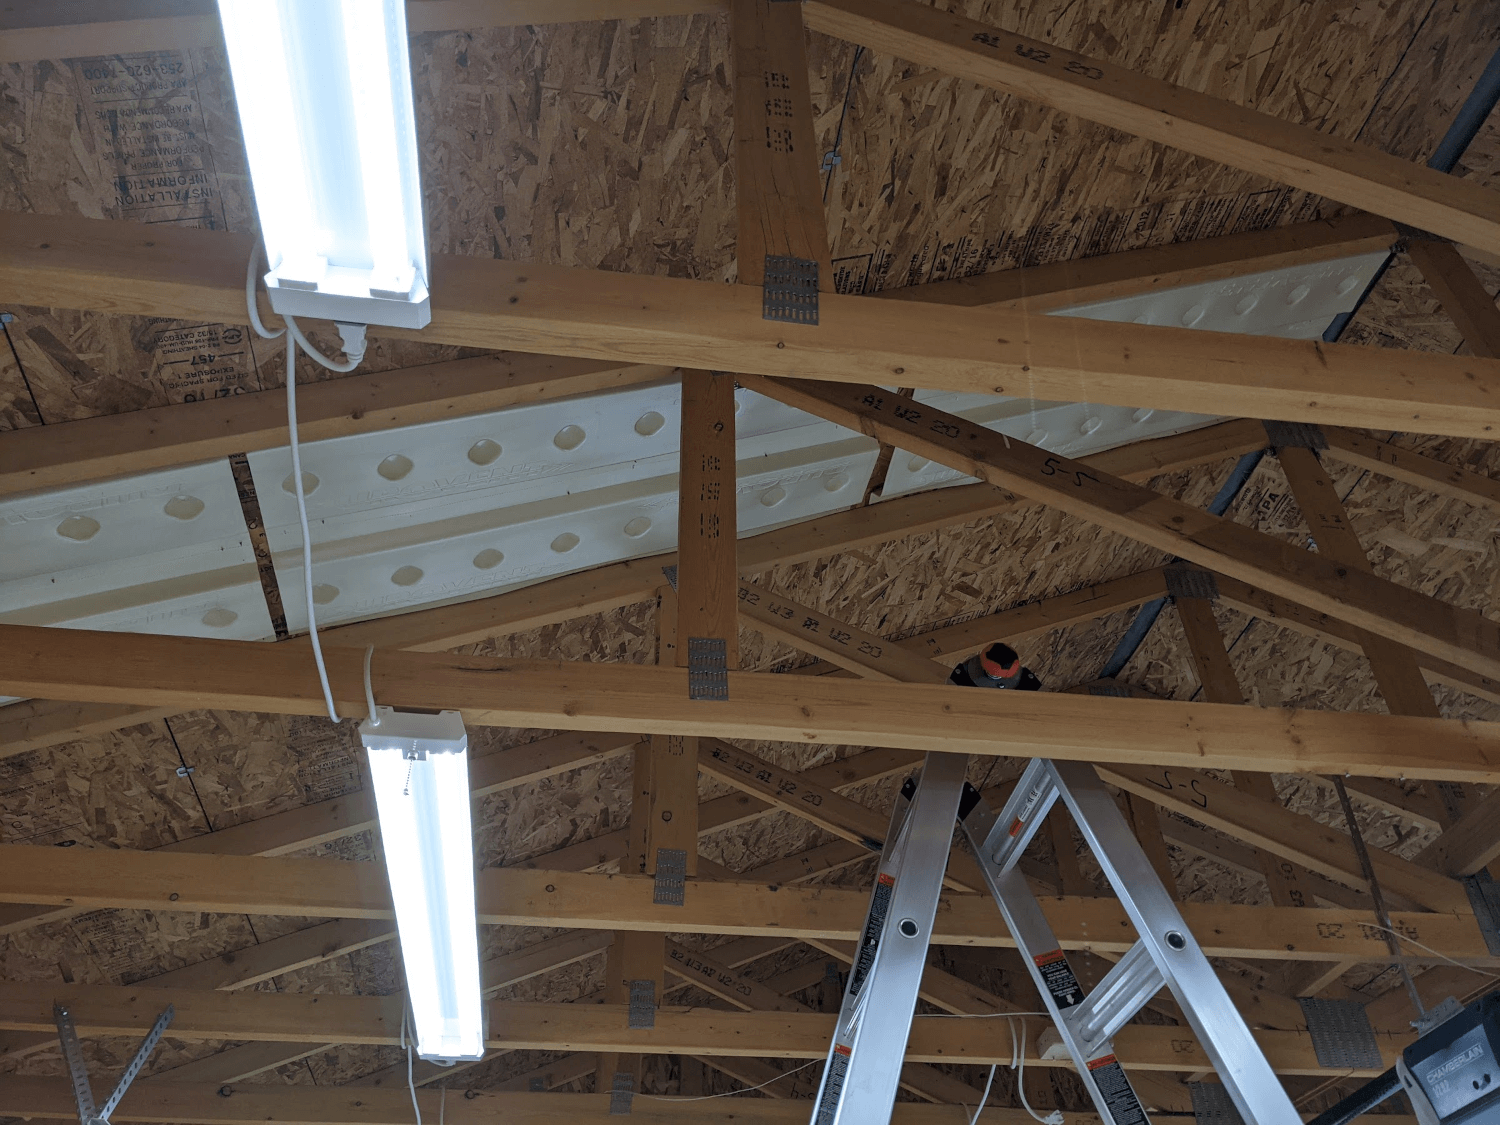
Lighting
I wanted the workshop to be bright enough to perform detailed work without difficulty. I decided on LED lights due to the light output, low power draw, and limited heat produced.
 The lights installed in the garage
I ended up installing 4 rows of 3 lights running from the front to the back of the garage and 2 additional lights running side-to-side at the back for 14 lights total.
The new lights were obviously not controlled by the light switch and turning them all on and off individually with the pull-chains was not a convenient option. To solve this I ended up adding 2 outlets to the ceiling that were controlled by a new switch. This involved replacing the existing double-gang box with a triple.
 Replacing the double-gang box and adding a switch
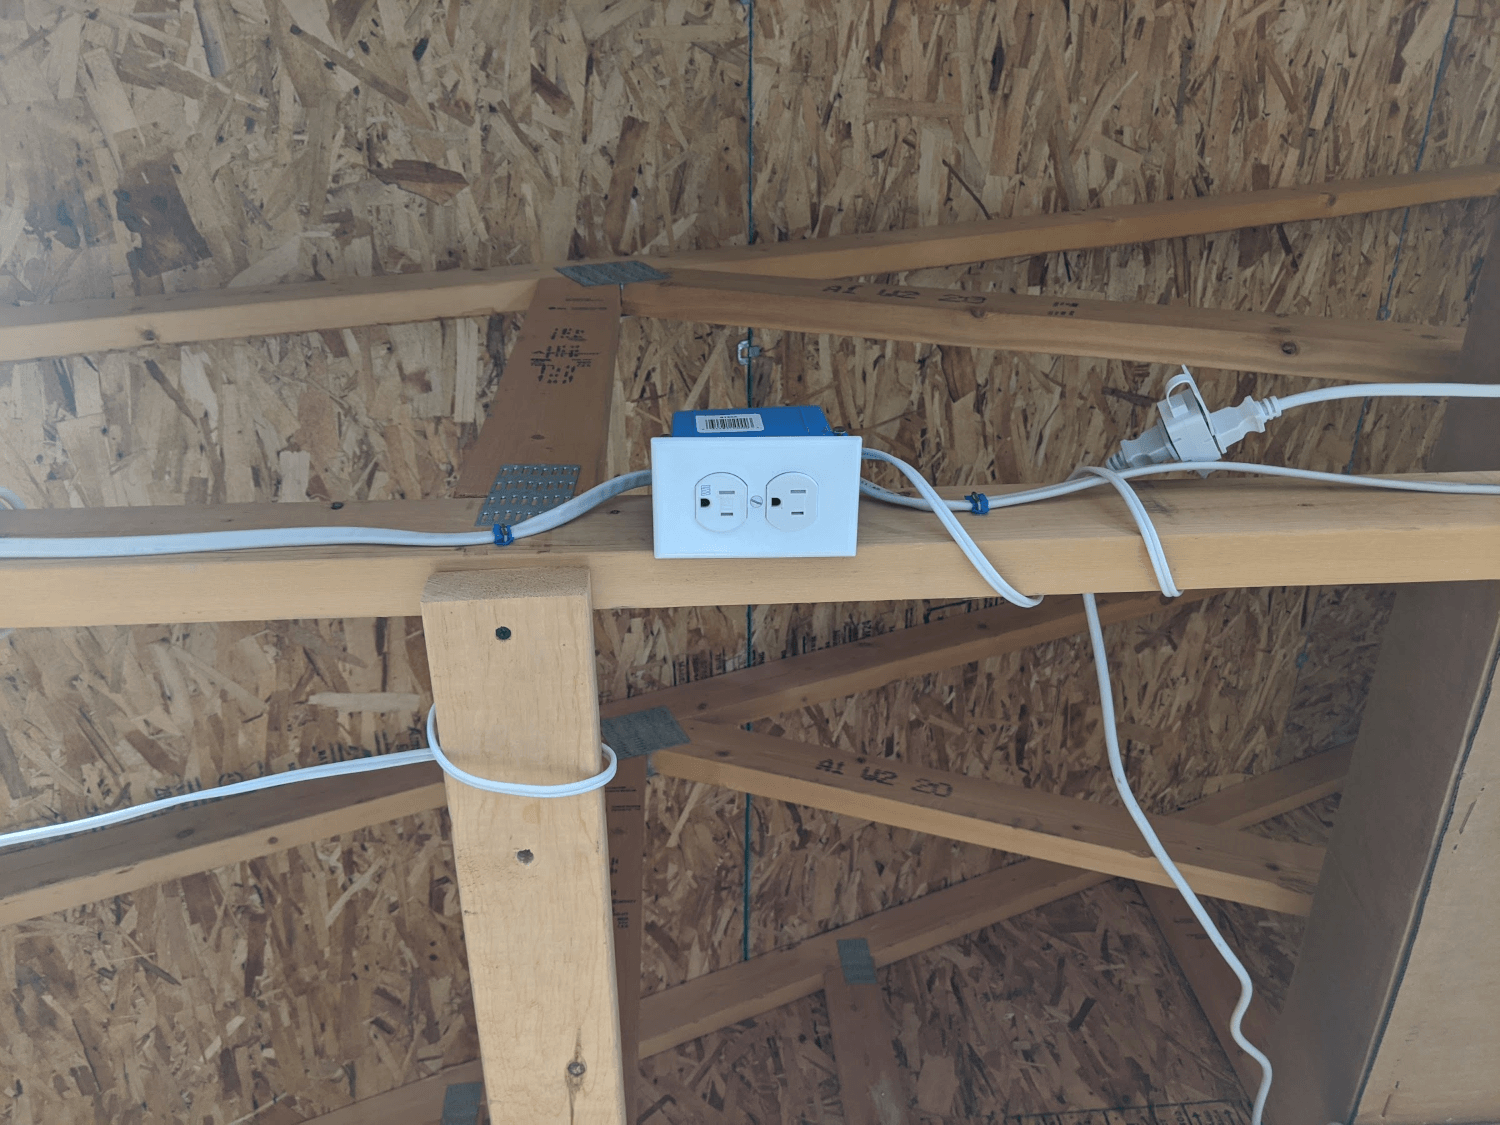 Outlet controlled by the new switch
Work Bench
I obviously also needed a work bench not just for the plane but also for other projects. My uncle had given me a commercial door core several years ago to use as a bench top along with another core cut in half to use as legs. Now that I finally had the space I was able to put it together.
I wanted to build a sturdy frame with a strong shelf below and casters so it could roll around the shop. I used 2x4s to attach the legs and create a strong box as a base. The boards on the top are set back several inches from the front of the bench to allow for clamping to the bench top.
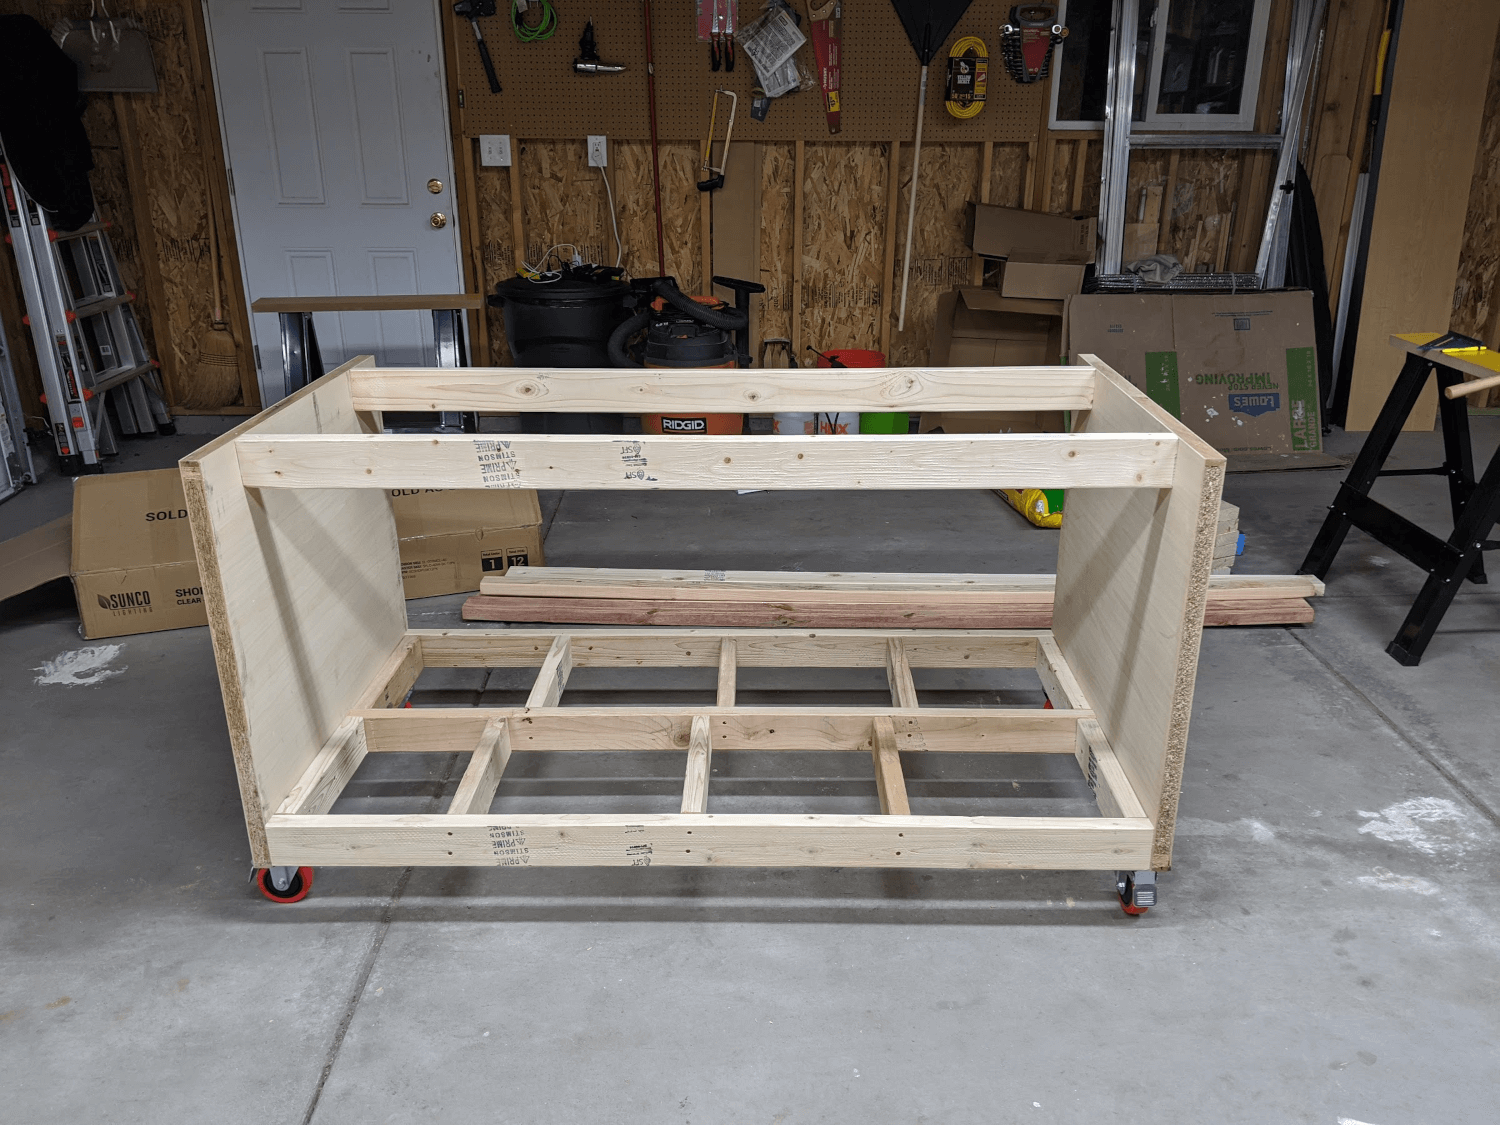 The bench without the top attached
While talking to my grandfather about the bench project he suggested adding drawers for storage. I made these with full-extension drawer slides and plywood. They came out great and add a lot of storage.
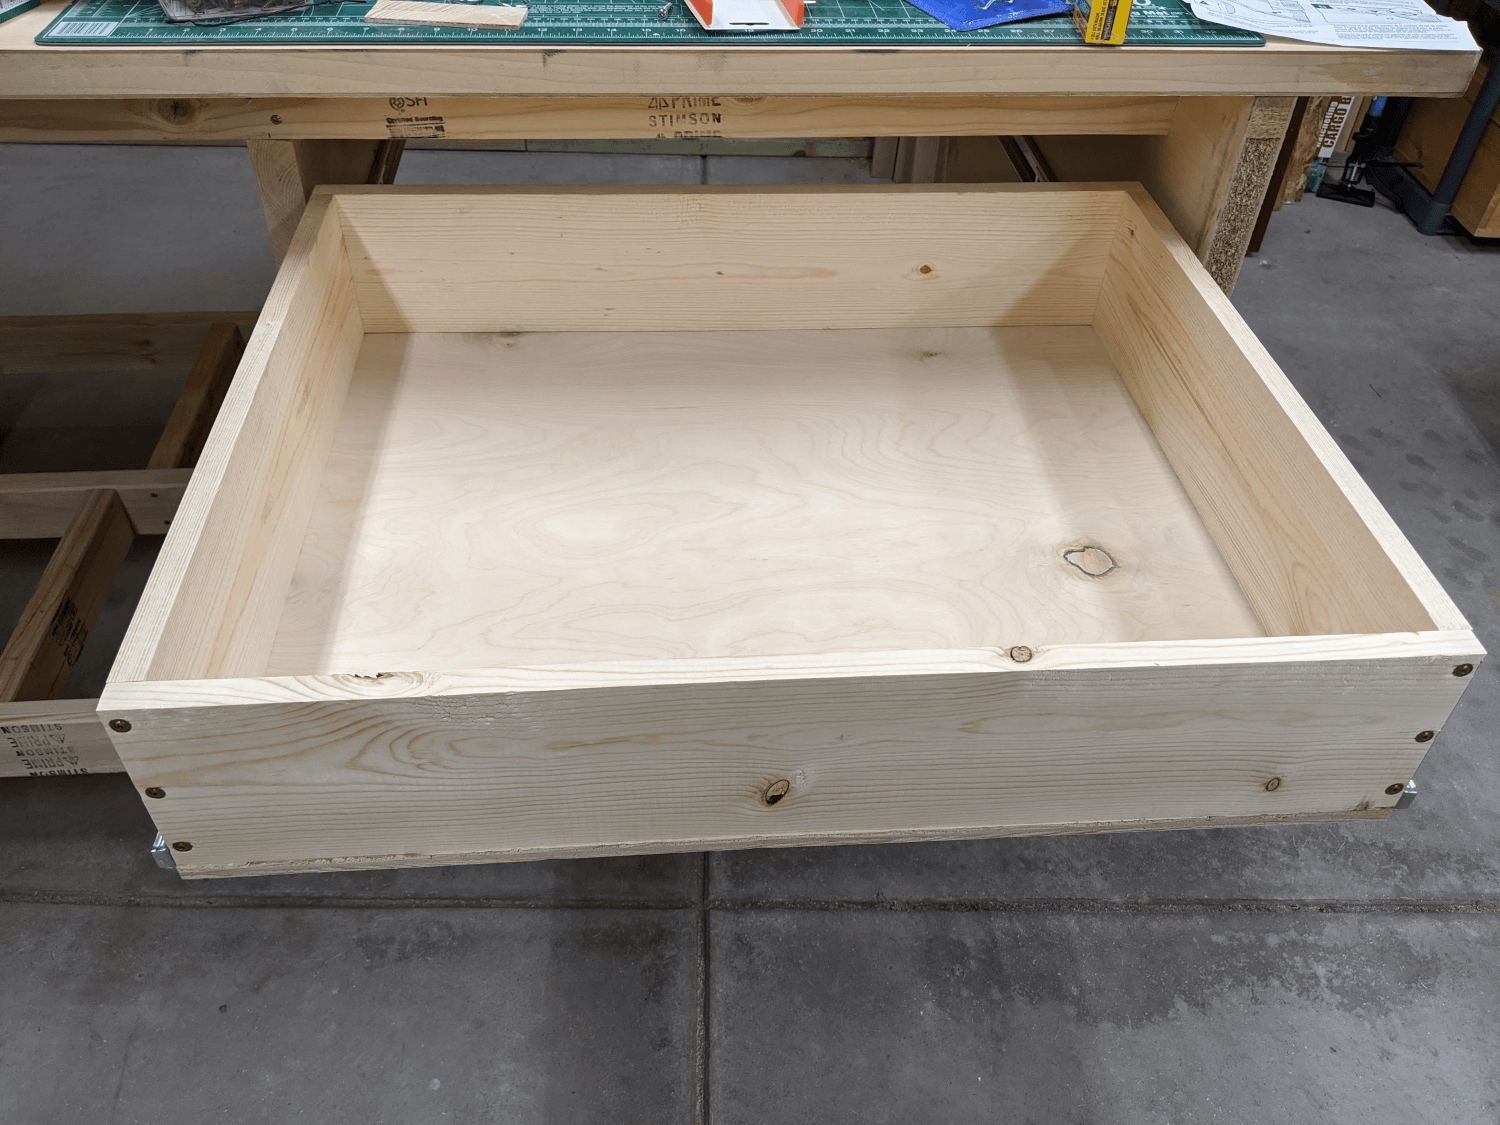 Work bench drawer
Finally, I added a sheet of plywood to the bottom shelf to finish up the bench.
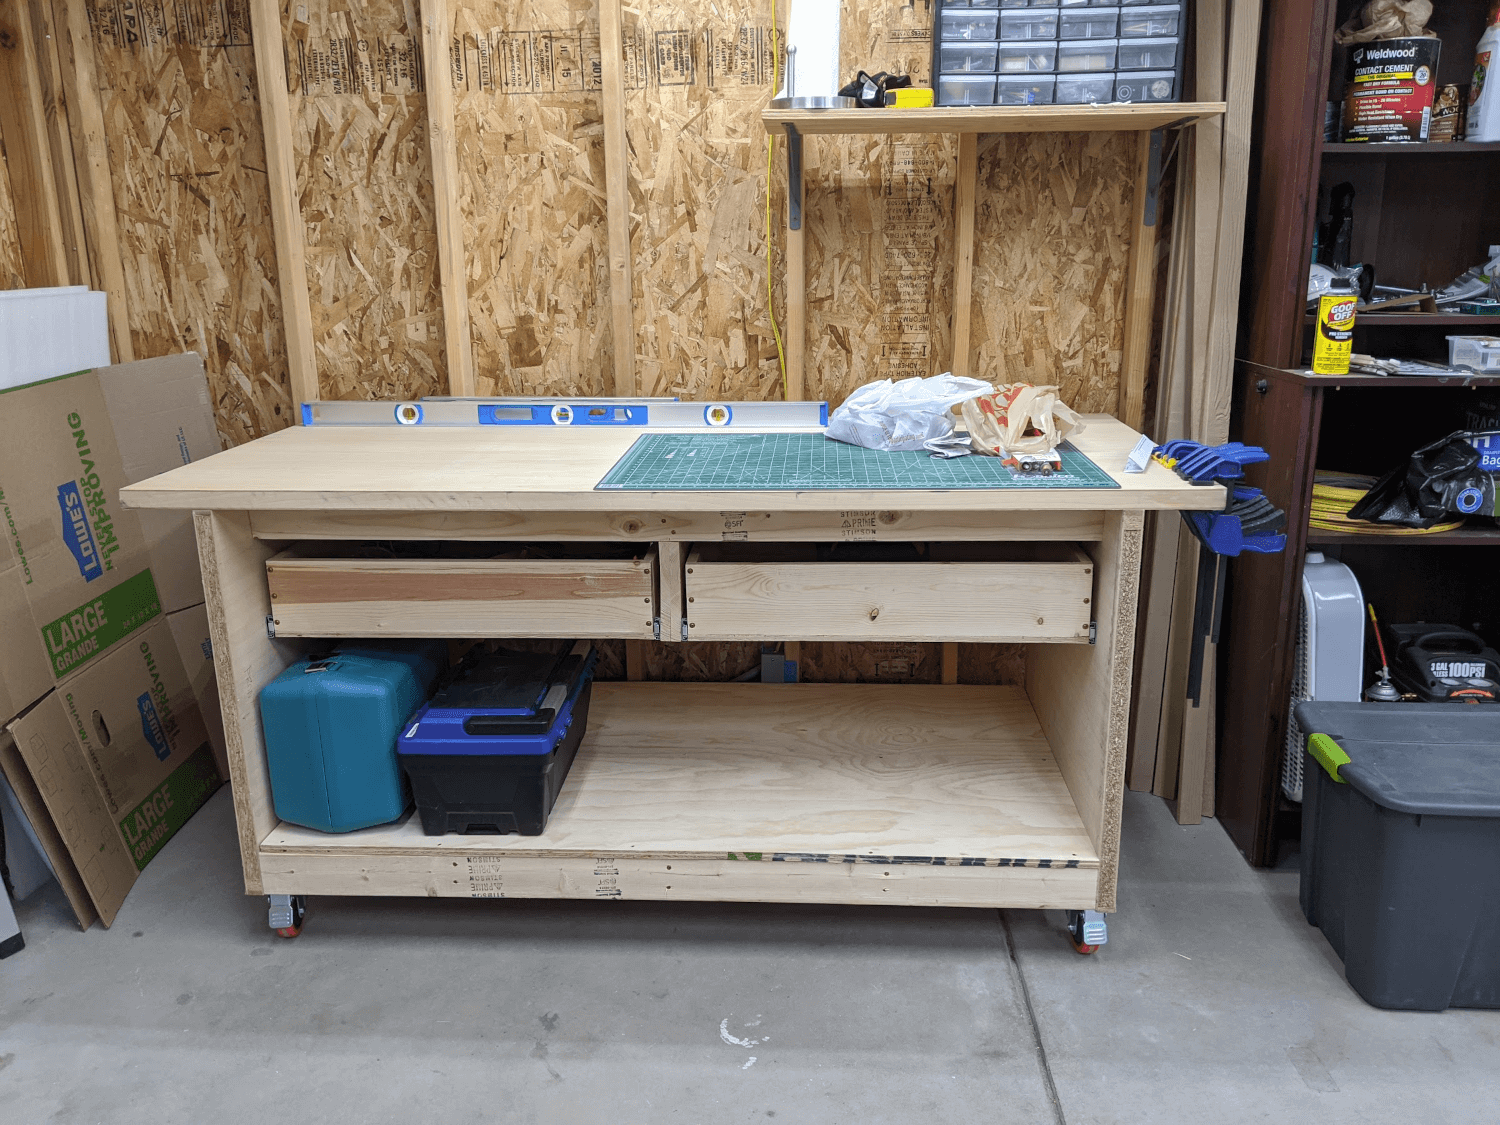 Finished work bench
Electrical
Additional Service
The electrical service to the garage was originally a single 15A circuit from the house run through buried 1/2” PVC conduit. I knew that this was not going to be sufficient service given the fact that I needed to run tools, lights, and some form of heating. Replacing the conduit was not a good option since it would have involved tearing up the concrete patio it was buried under.
Instead I talked to an electrician and determined that we could pull 10 gauge wire though the conduit for 30A, 240V service to a sub-panel. I had originally hoped for 50+A but thought that 30A would be sufficient so I went ahead with this option. It also helped that the conduit to the garage terminated in an unused disconnect with a 30A circuit at the back of the house. This meant that no new wire was required to be pulled through th house and helped keep the price down. The cost to install the sub-panel (including materials) was $600. That did include me helping the electrician perform the work.
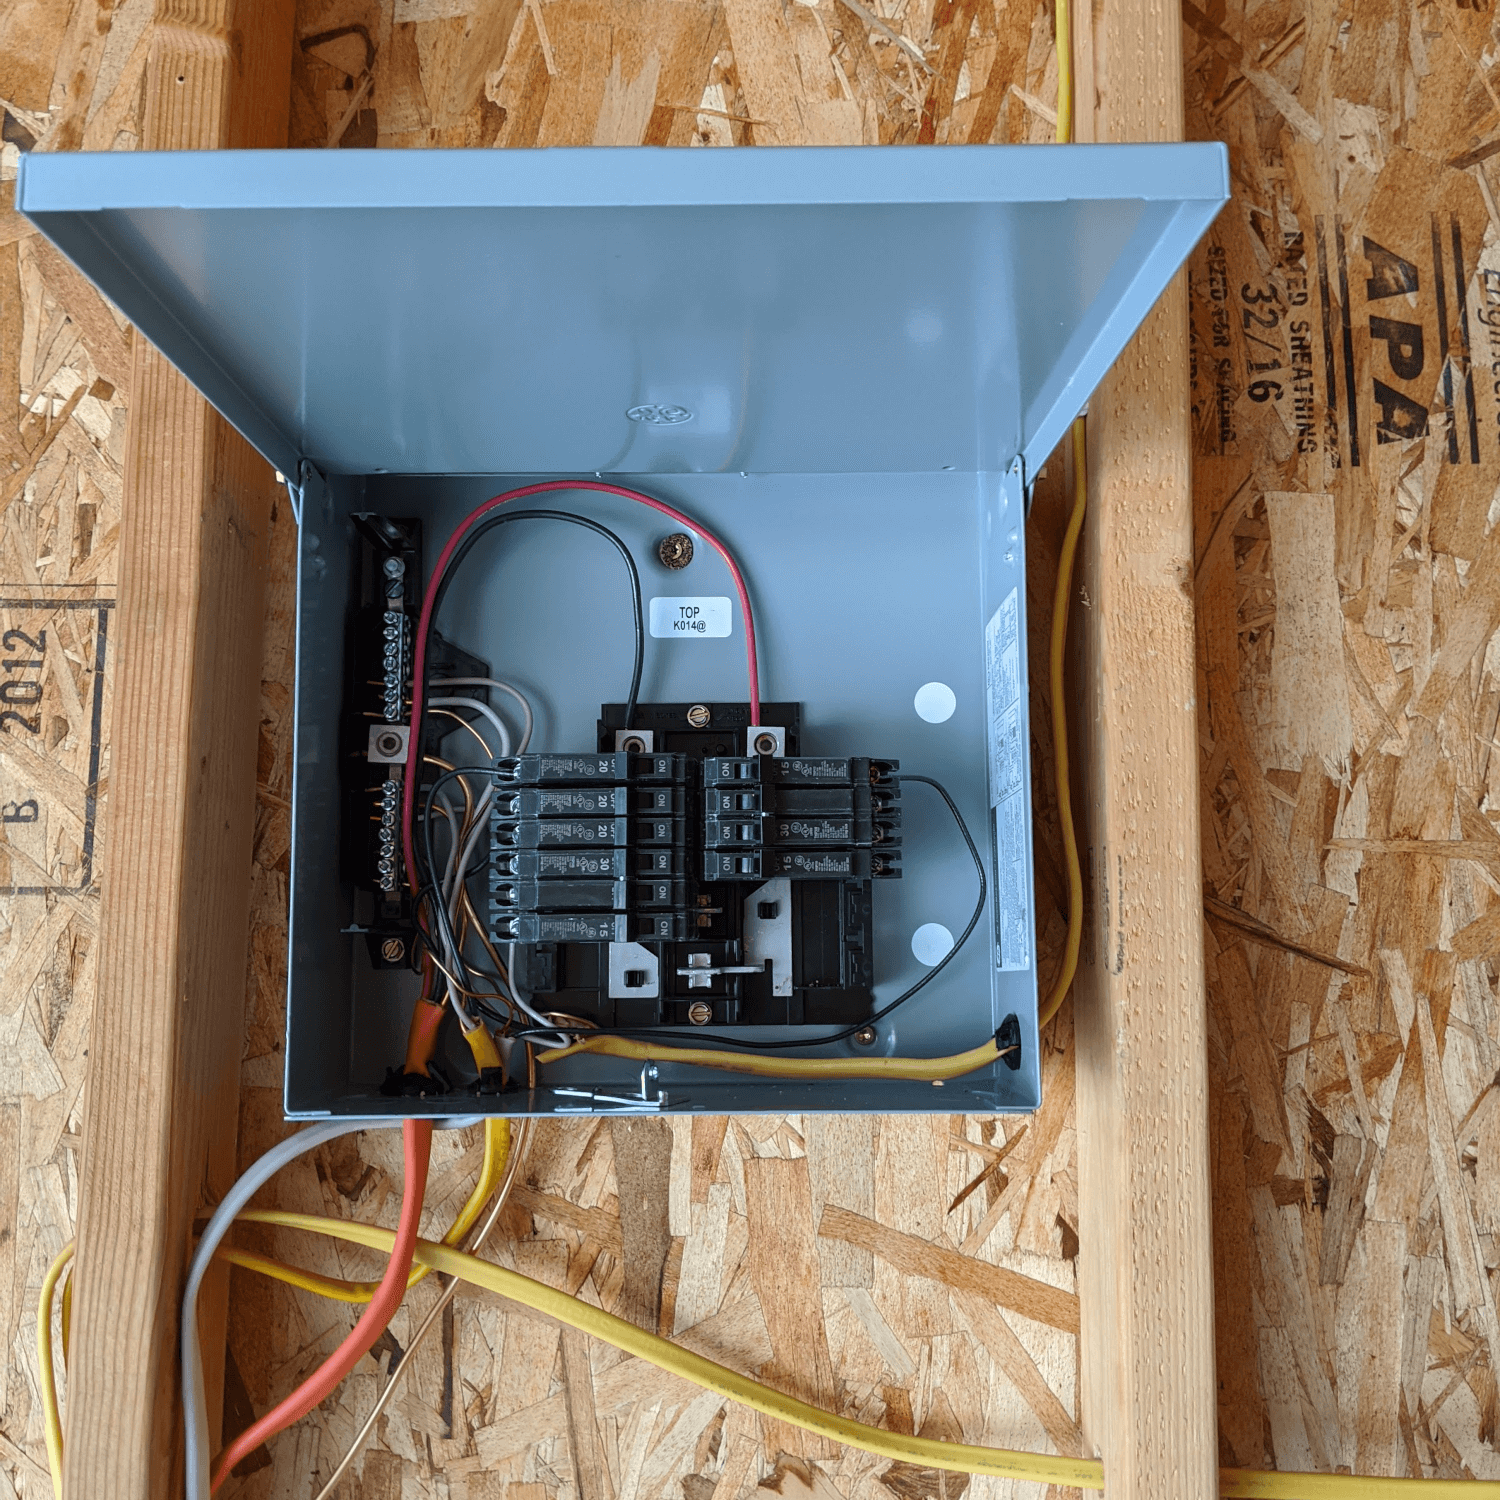 The new sub-panel
Wiring
After the sub-panel was installed I wired additional outlets to all parts of the garage. This included 5 outlets each on 2 walls and 3 on the wall with the window and door.
 New outlets
I put each of these walls, the lights, and the back shed (power comes from the garage) on separate circuits. I also installed 240V outlets on each wall and a disconnect (and another outlet) outside for an eventual mini-split install.
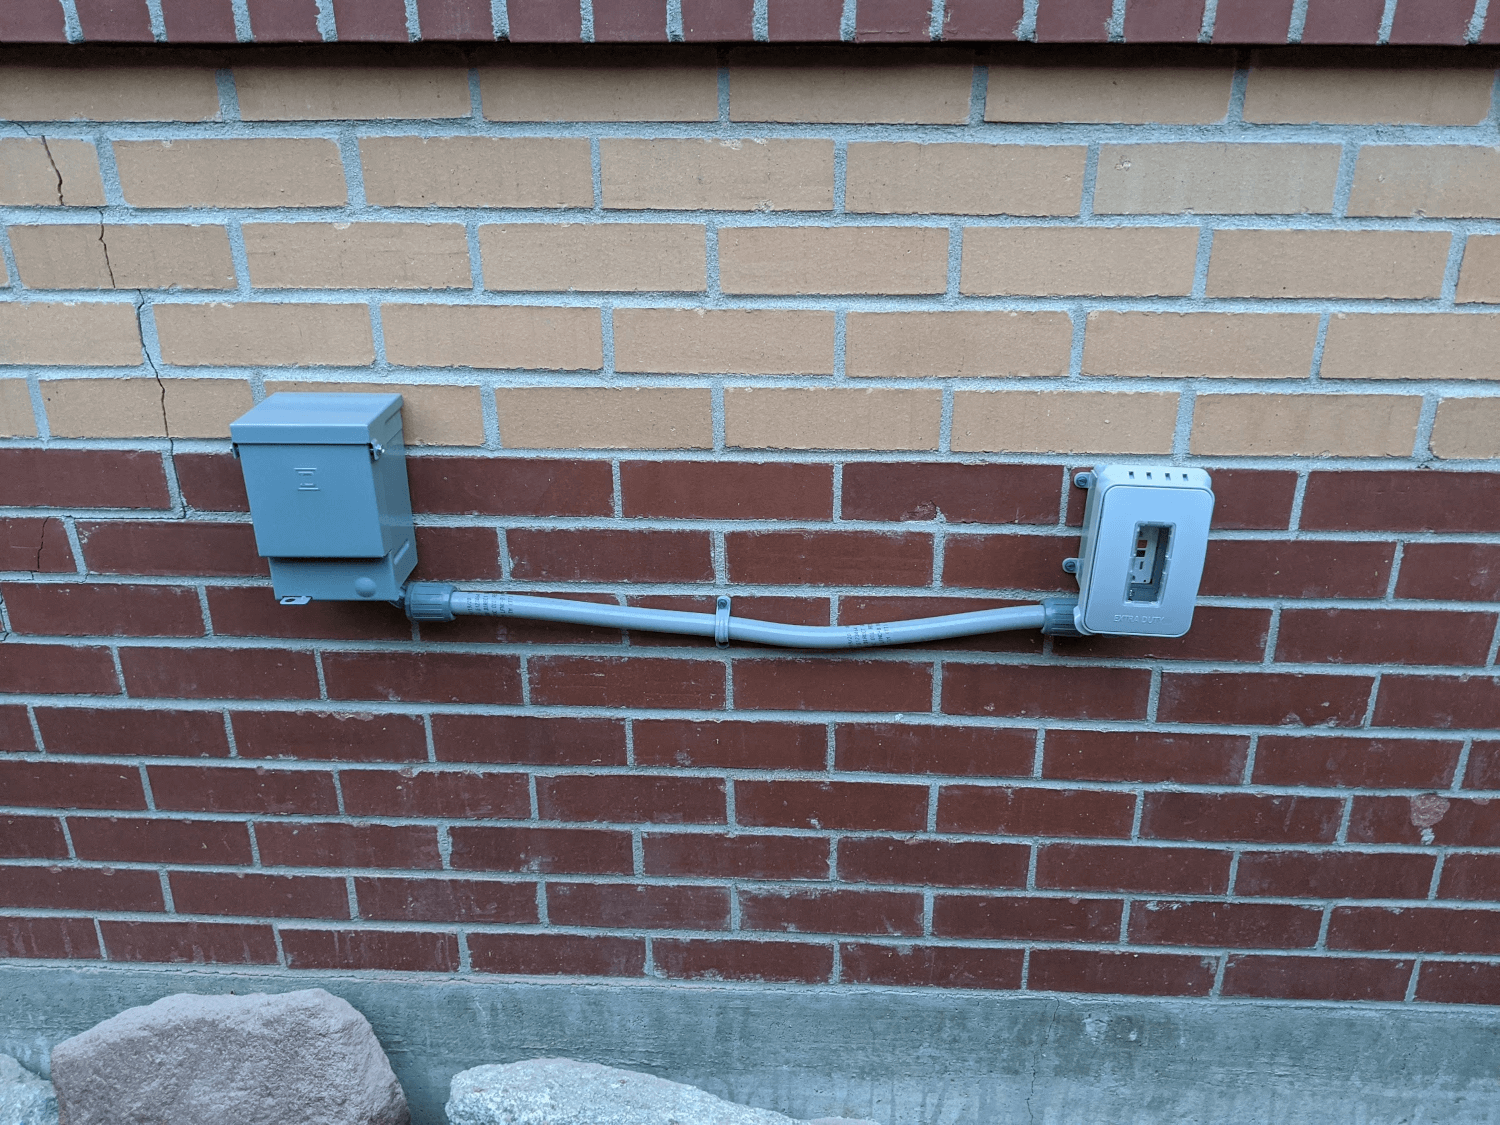 Disconnect
I also installed an overhead cord reel which has been incredibly useful.
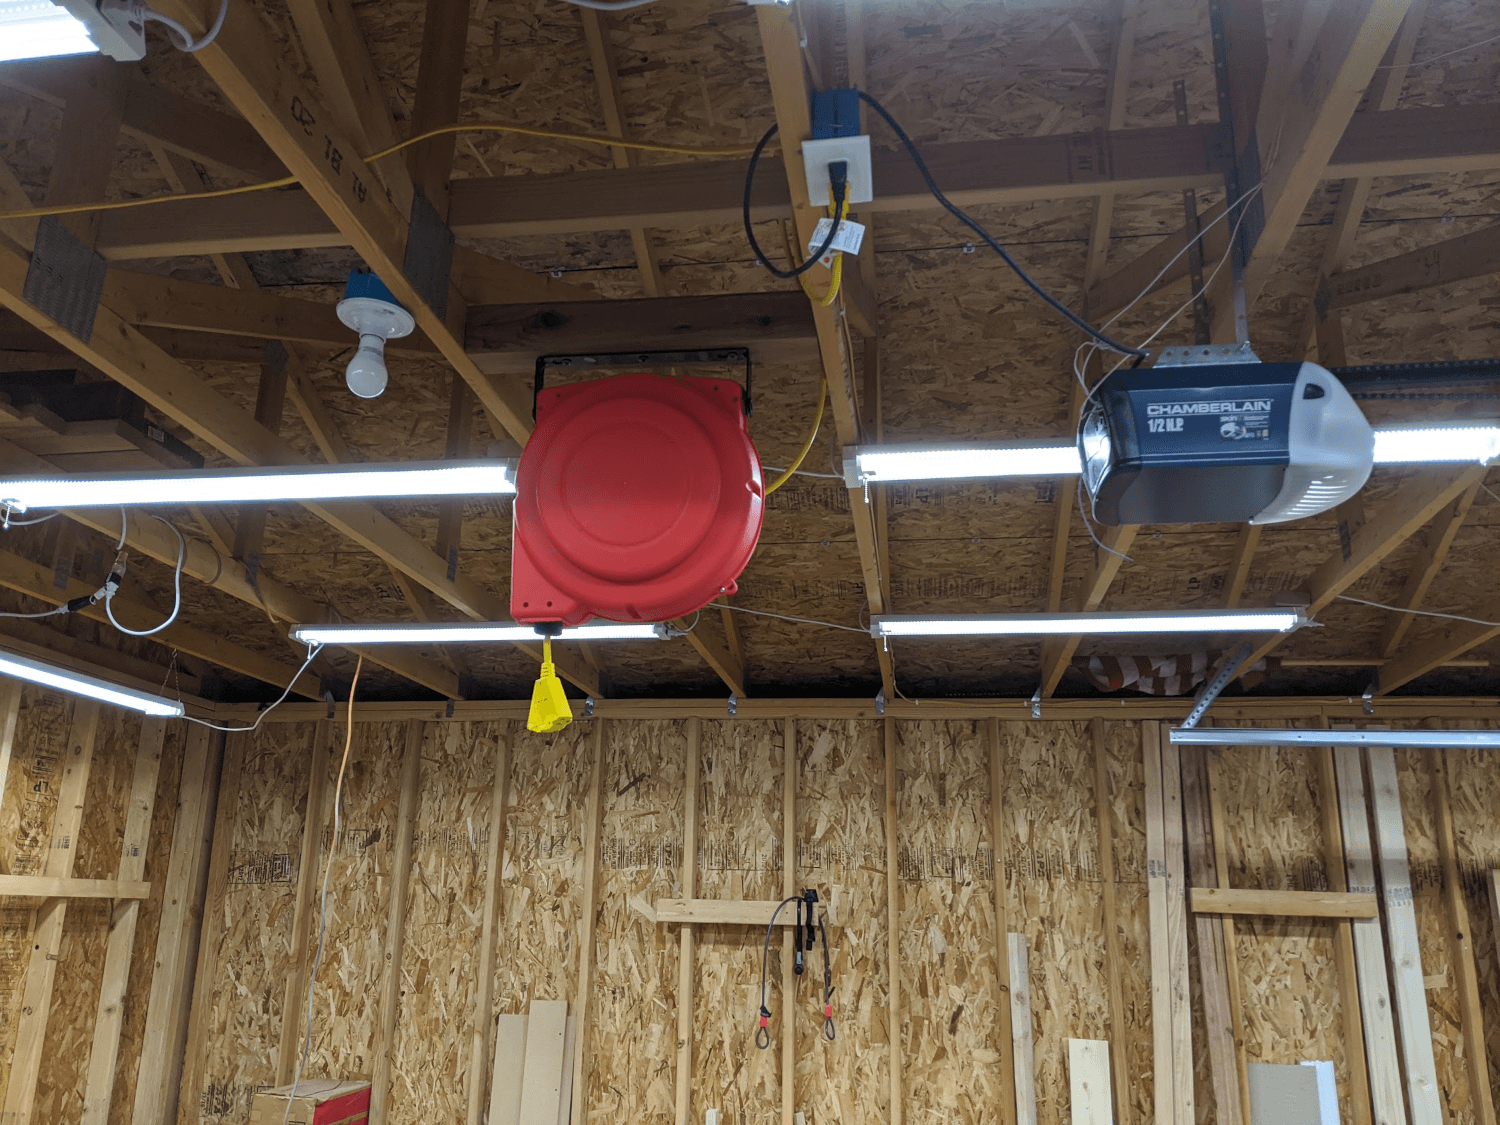 Overhead cord reel
Floor
I decided to have the floor professionally epoxied in order to make it a nicer place to work and easier to clean. I had this done professionally by Epoxy Colorado so that I wouldn’t have to worry about it coming up/being done well and because the cost delta over high quality materials wasn’t very large.
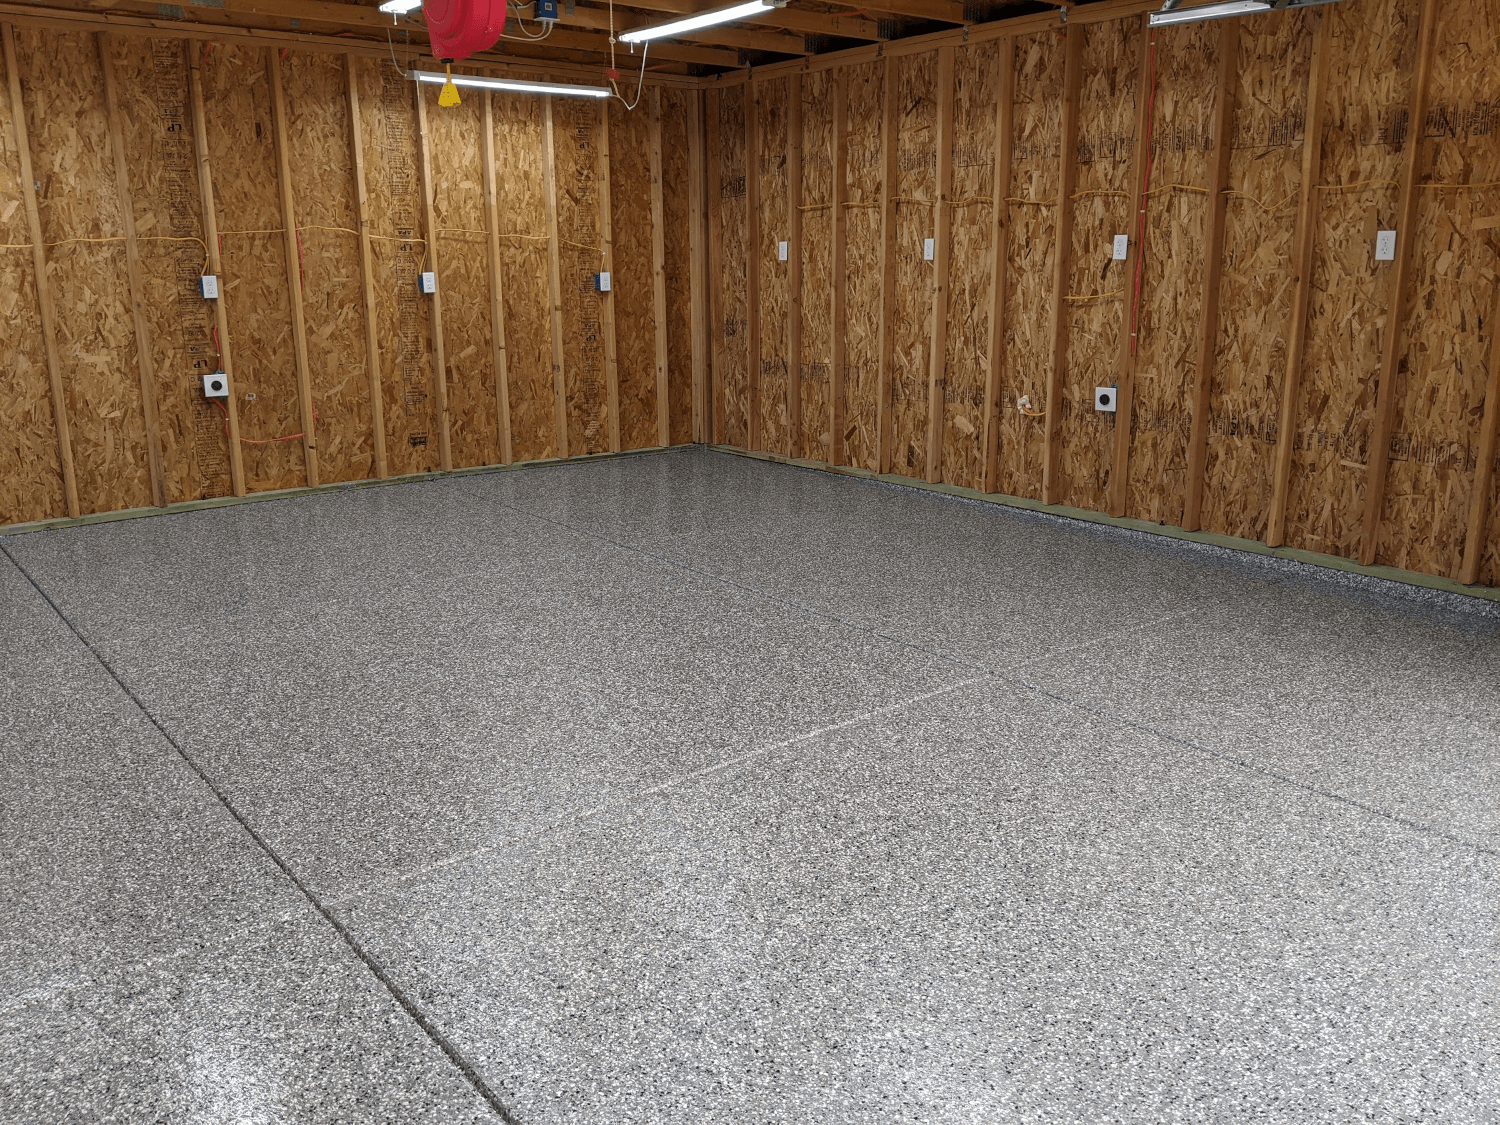 Finished floor
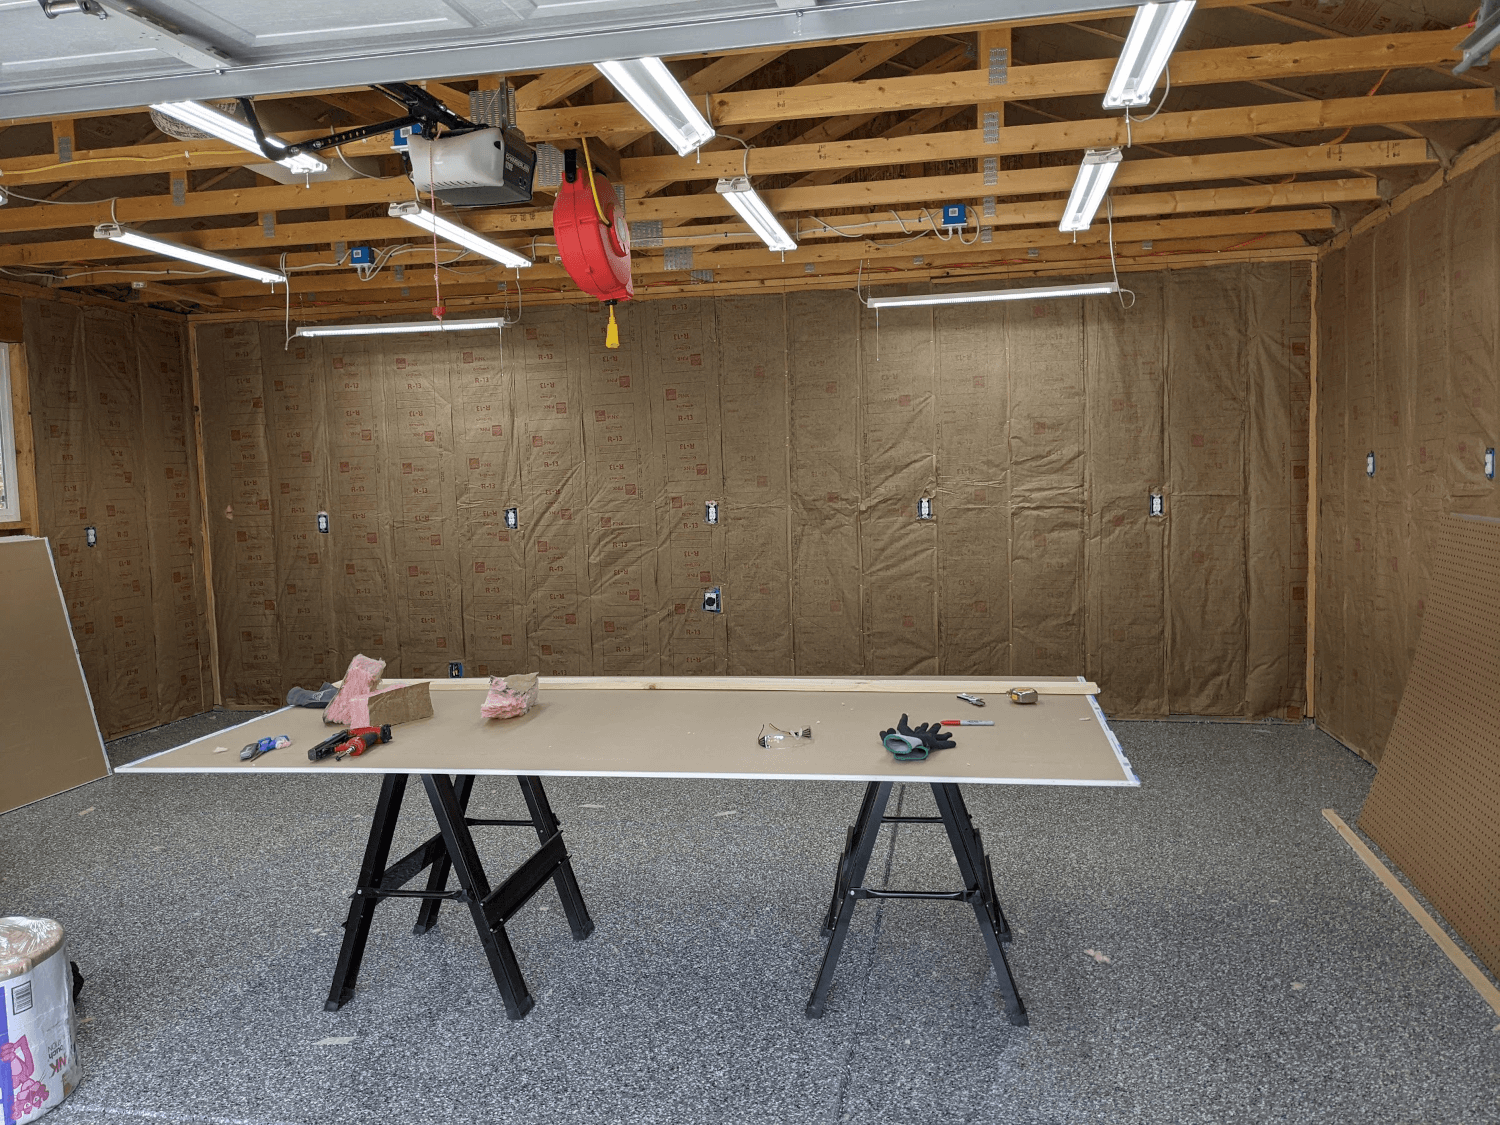
Insulation
The plan all along had been to heat the garage in the winter and I knew that I would need to add insulation in order to be able to accomplish this. I had a ridge vent and soffit vents professionally installed so that I could install vent chutes in the ceiling and R-13 batts over the top of that.
 Vent chutes
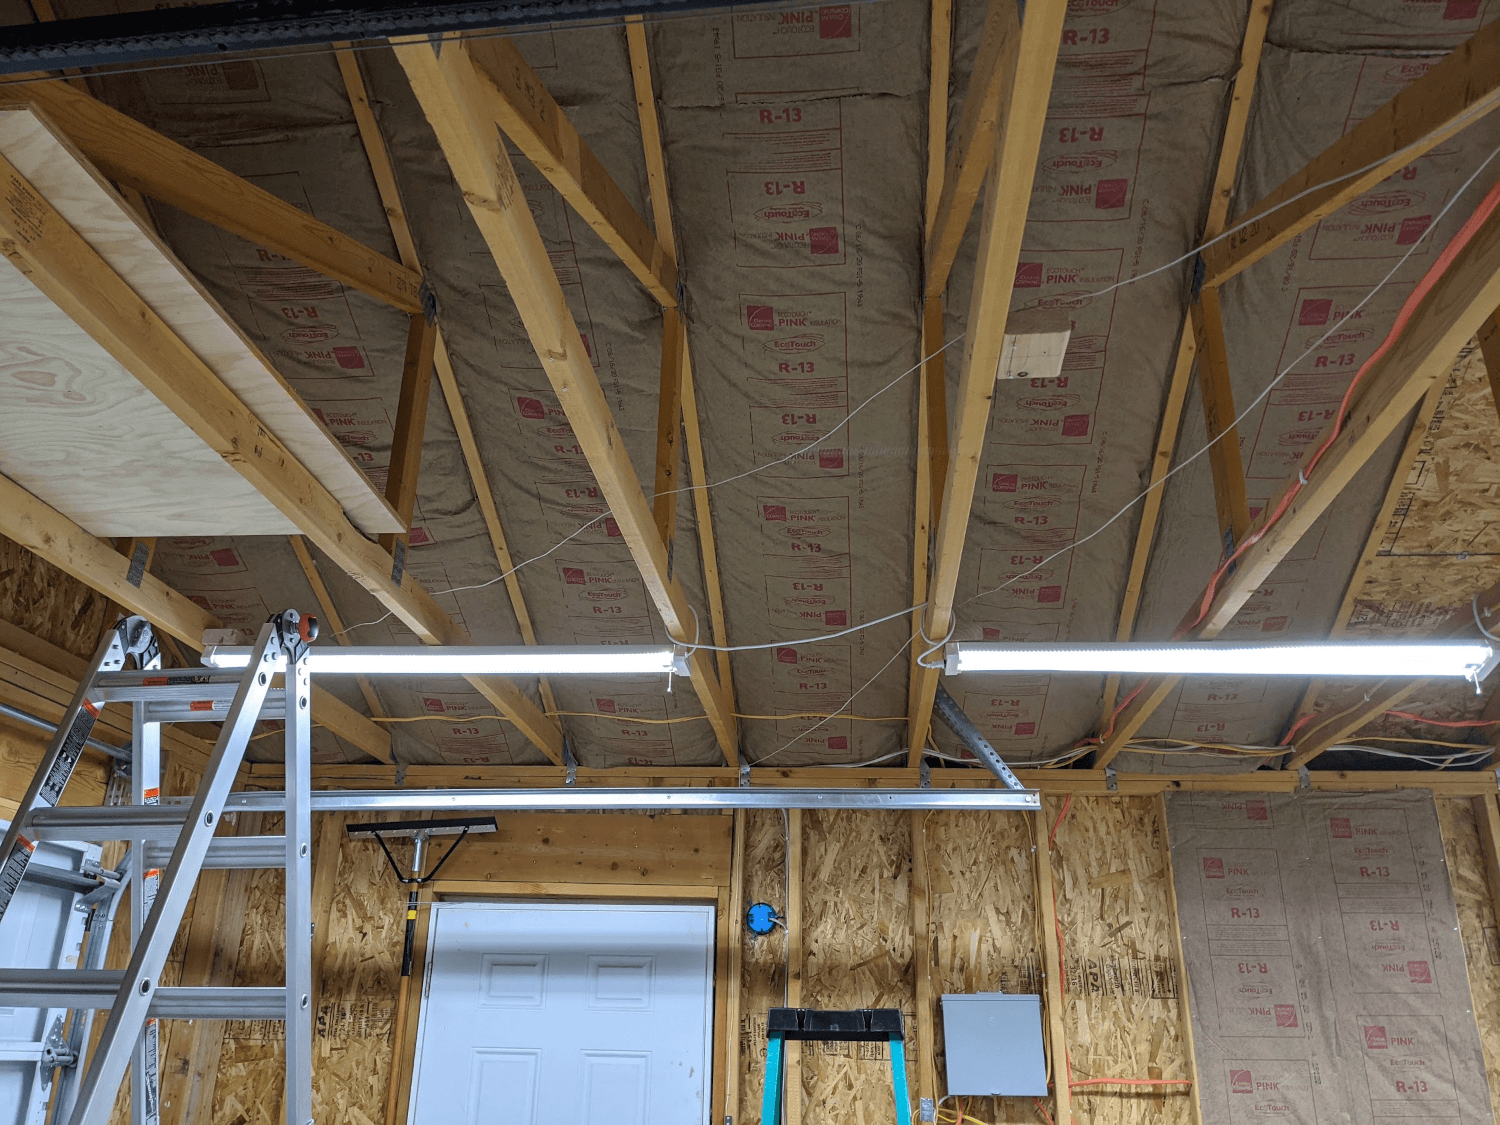 Ceiling insulation
I also installed R-13 insulation batts in the walls and my grandfather helped install 1.5” XPS insulation (R-7.5) on the garage door.
 Wall insulation
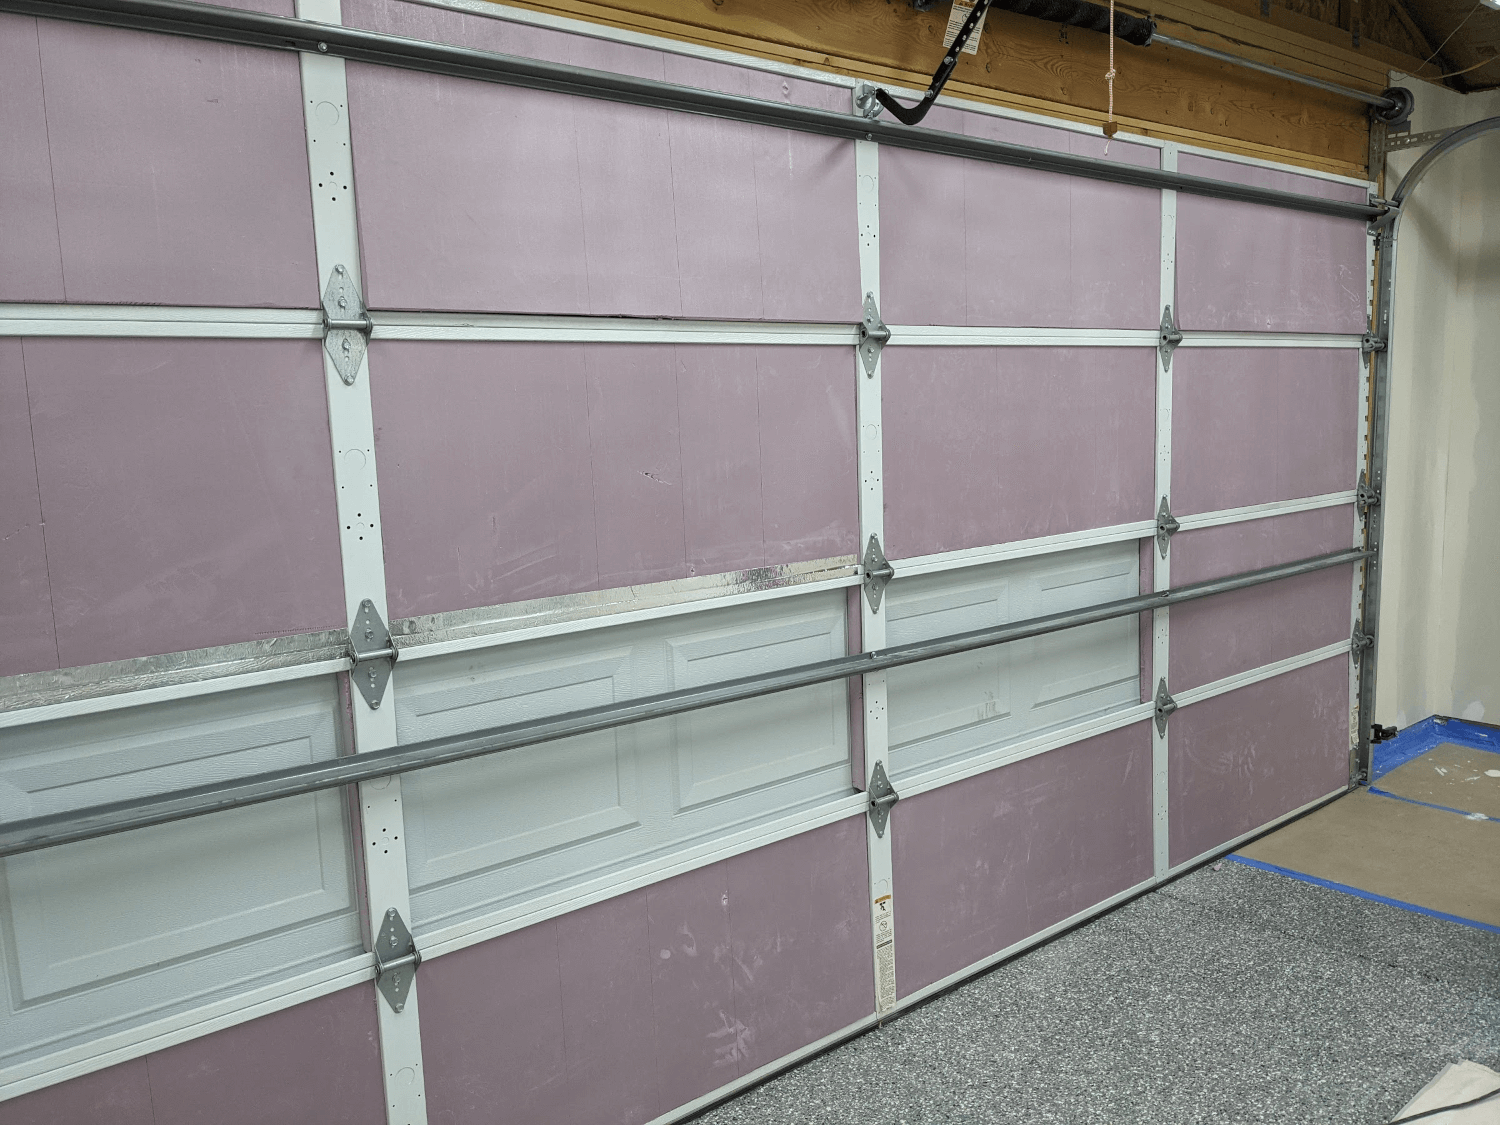 Garage door insulation
Finishing
In order to protect the drywall and make the workshop a little nicer, we decided to close up the walls with drywall. My parents and my grandfather all helped tremendously with this project and it came out great!
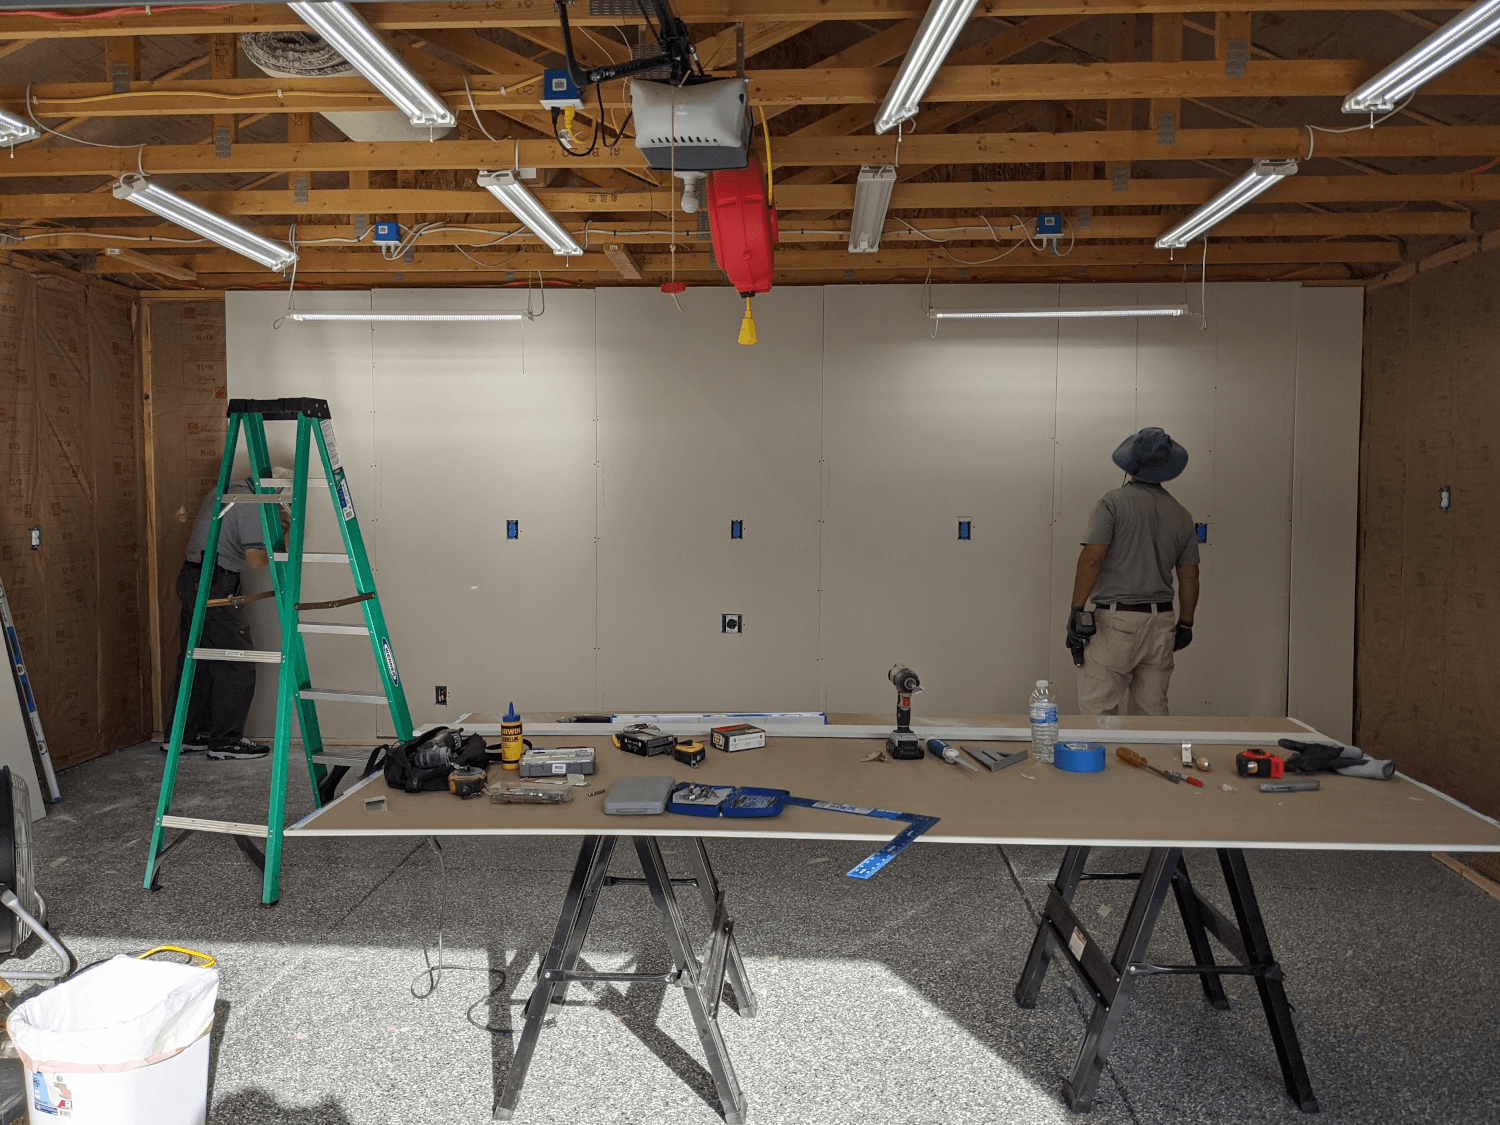 Hanging the drywall
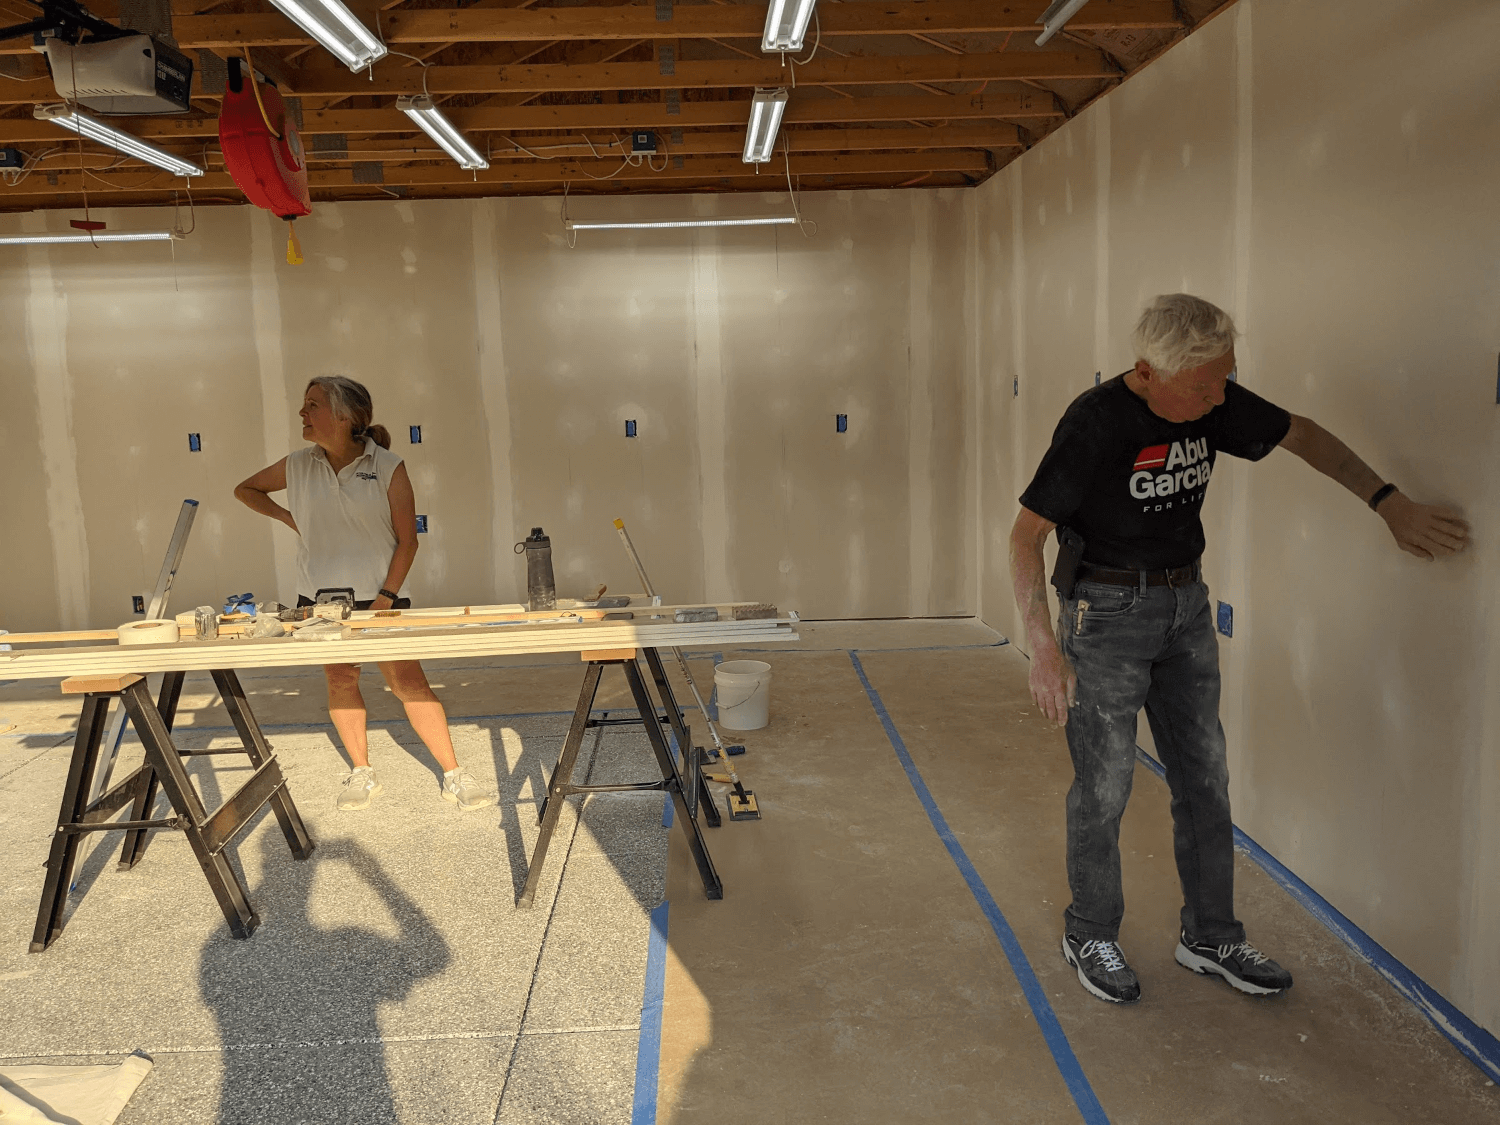 Mudding and sanding
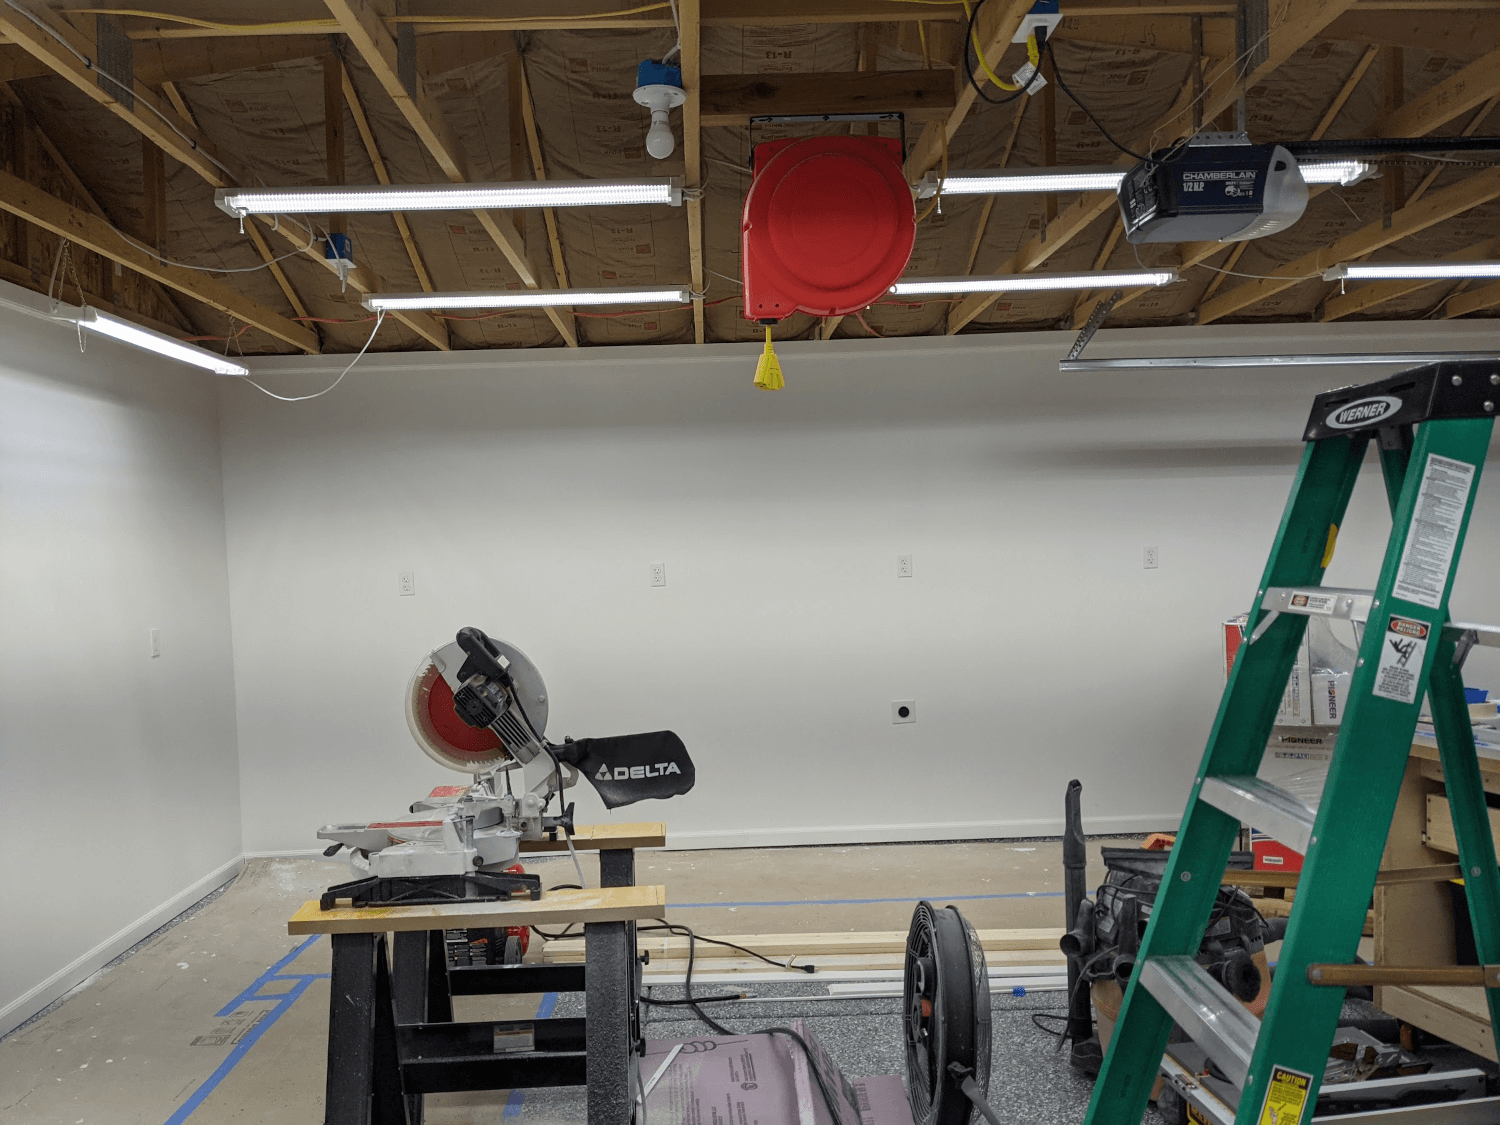 Trim and paint
Mini Split
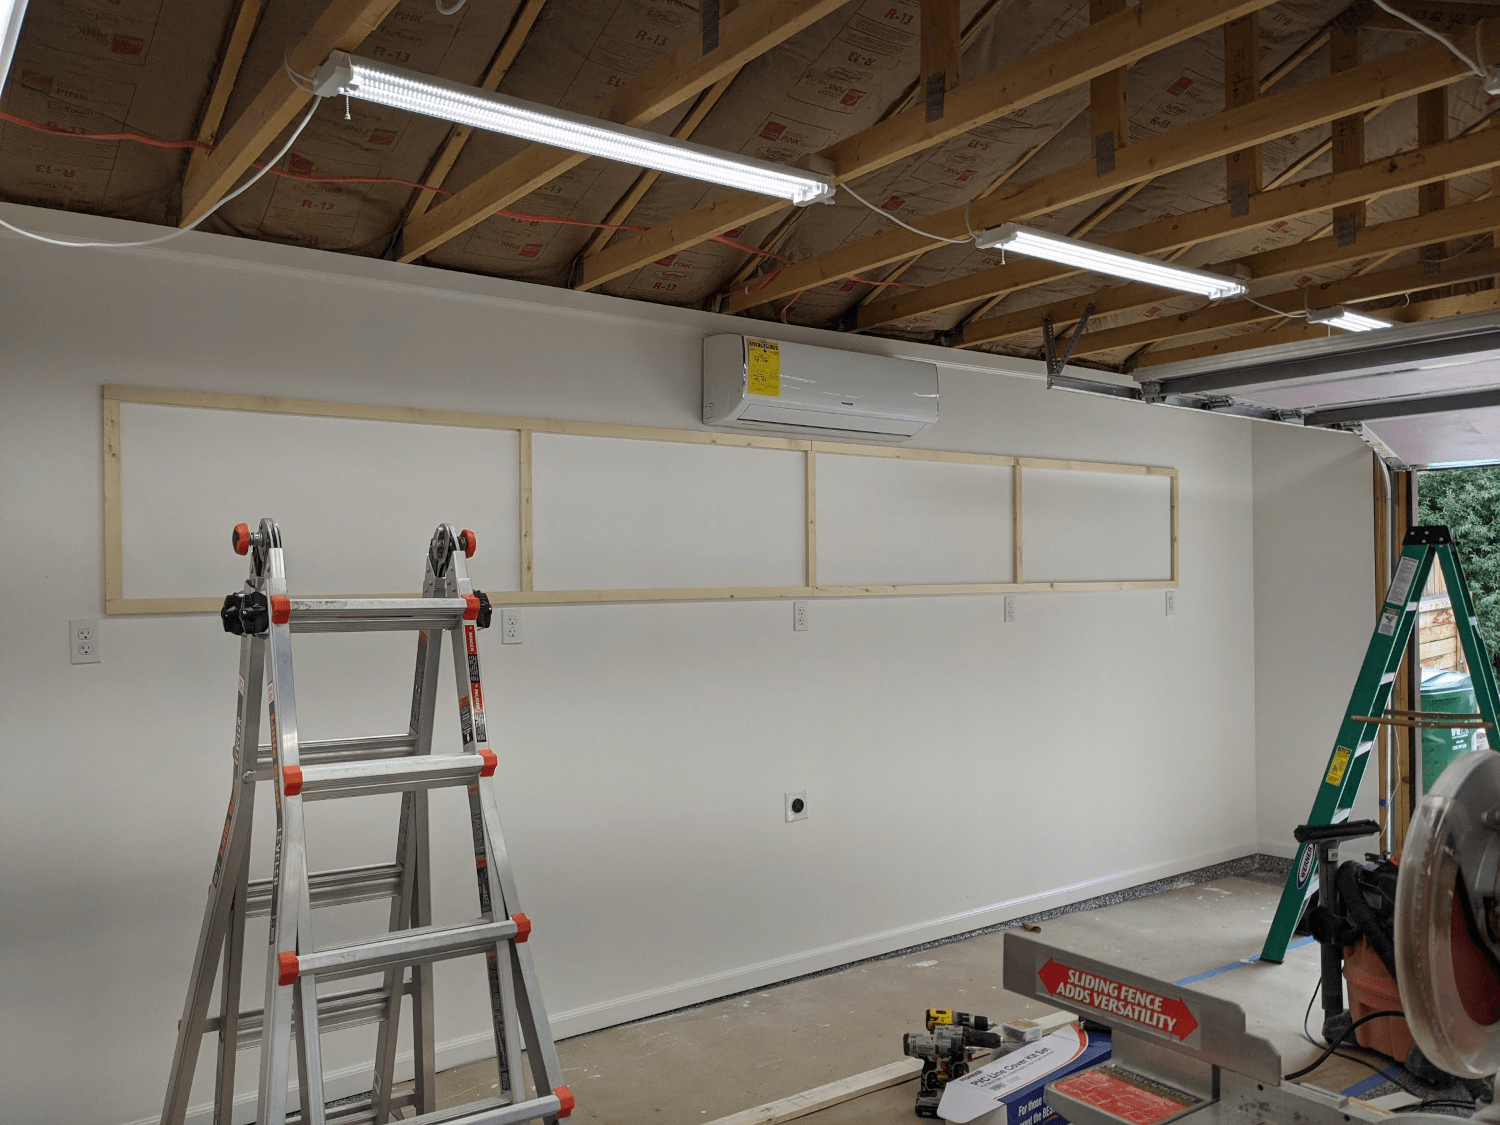
After evaluating options for heating, I decided to go with a mini split to provide both heat and air conditioning. I decided to do this since the A/C will make the shop a lot more comfortable in the summer and the unit heats relatively efficiently in the winter. This last point was especially important to me since I had a limited electrical supply in the garage and needed a solution with a low current draw. I ended up having an 18,000 BTU Pioneer mini split (7.8A rated current) installed professionally. The unit has been working great so far and provides sufficient heat well below freezing.
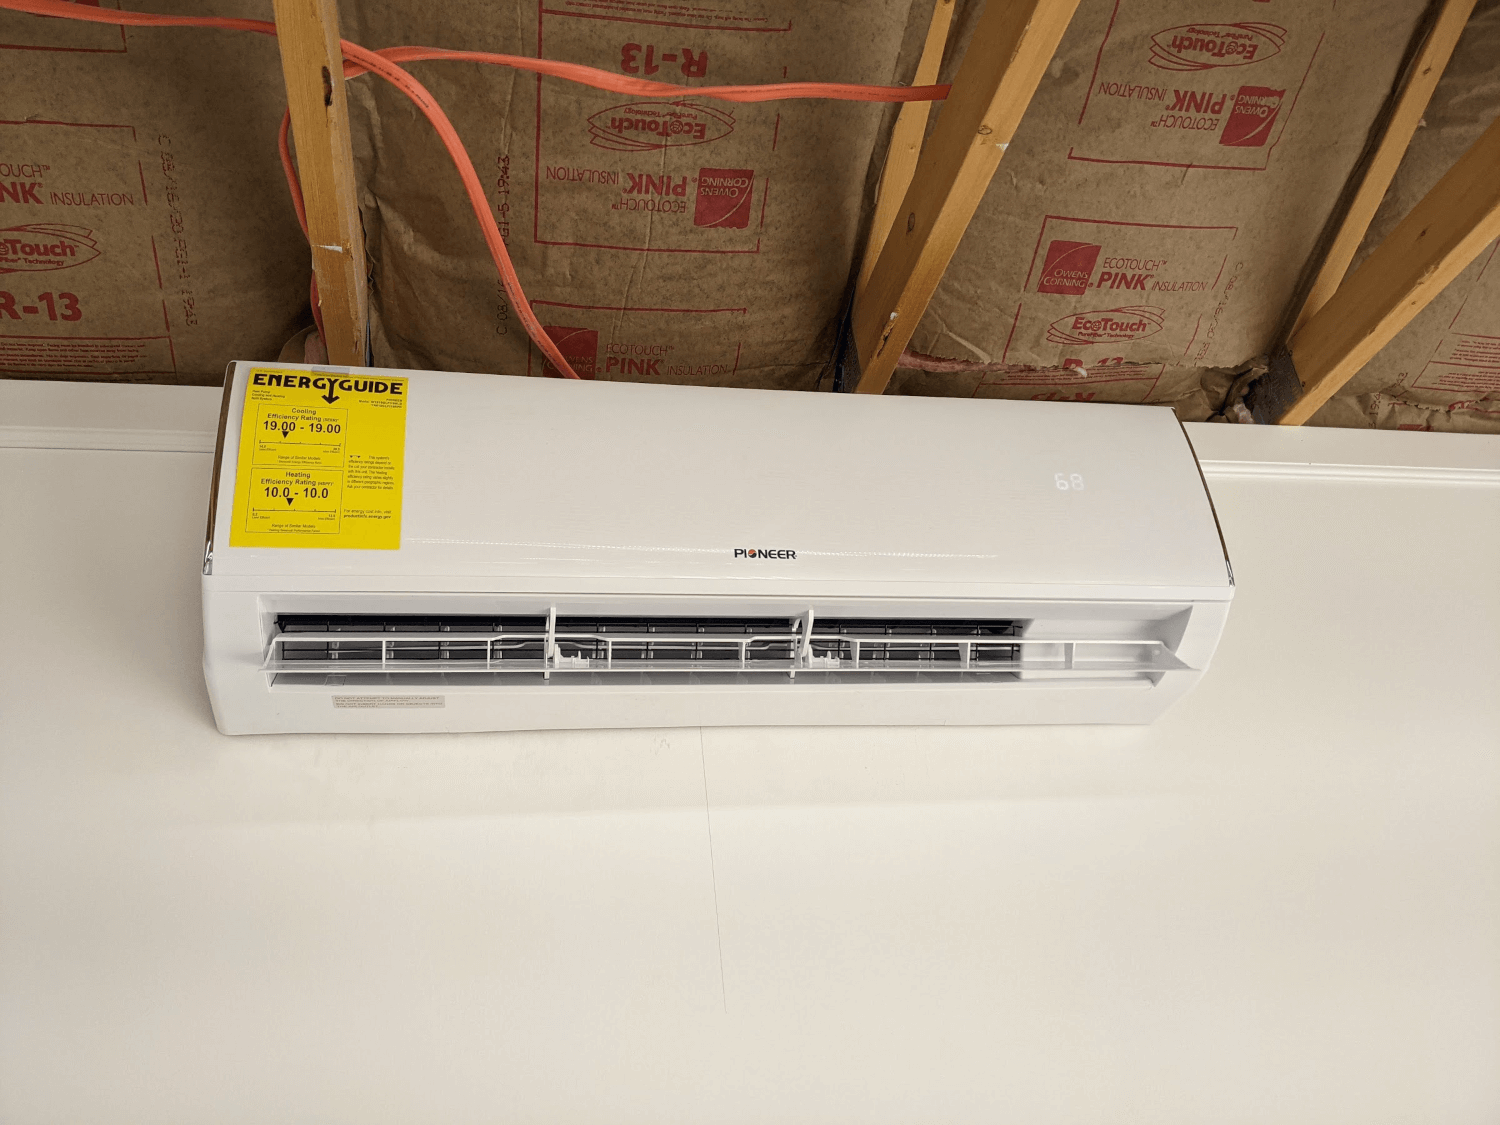 Indoor unit
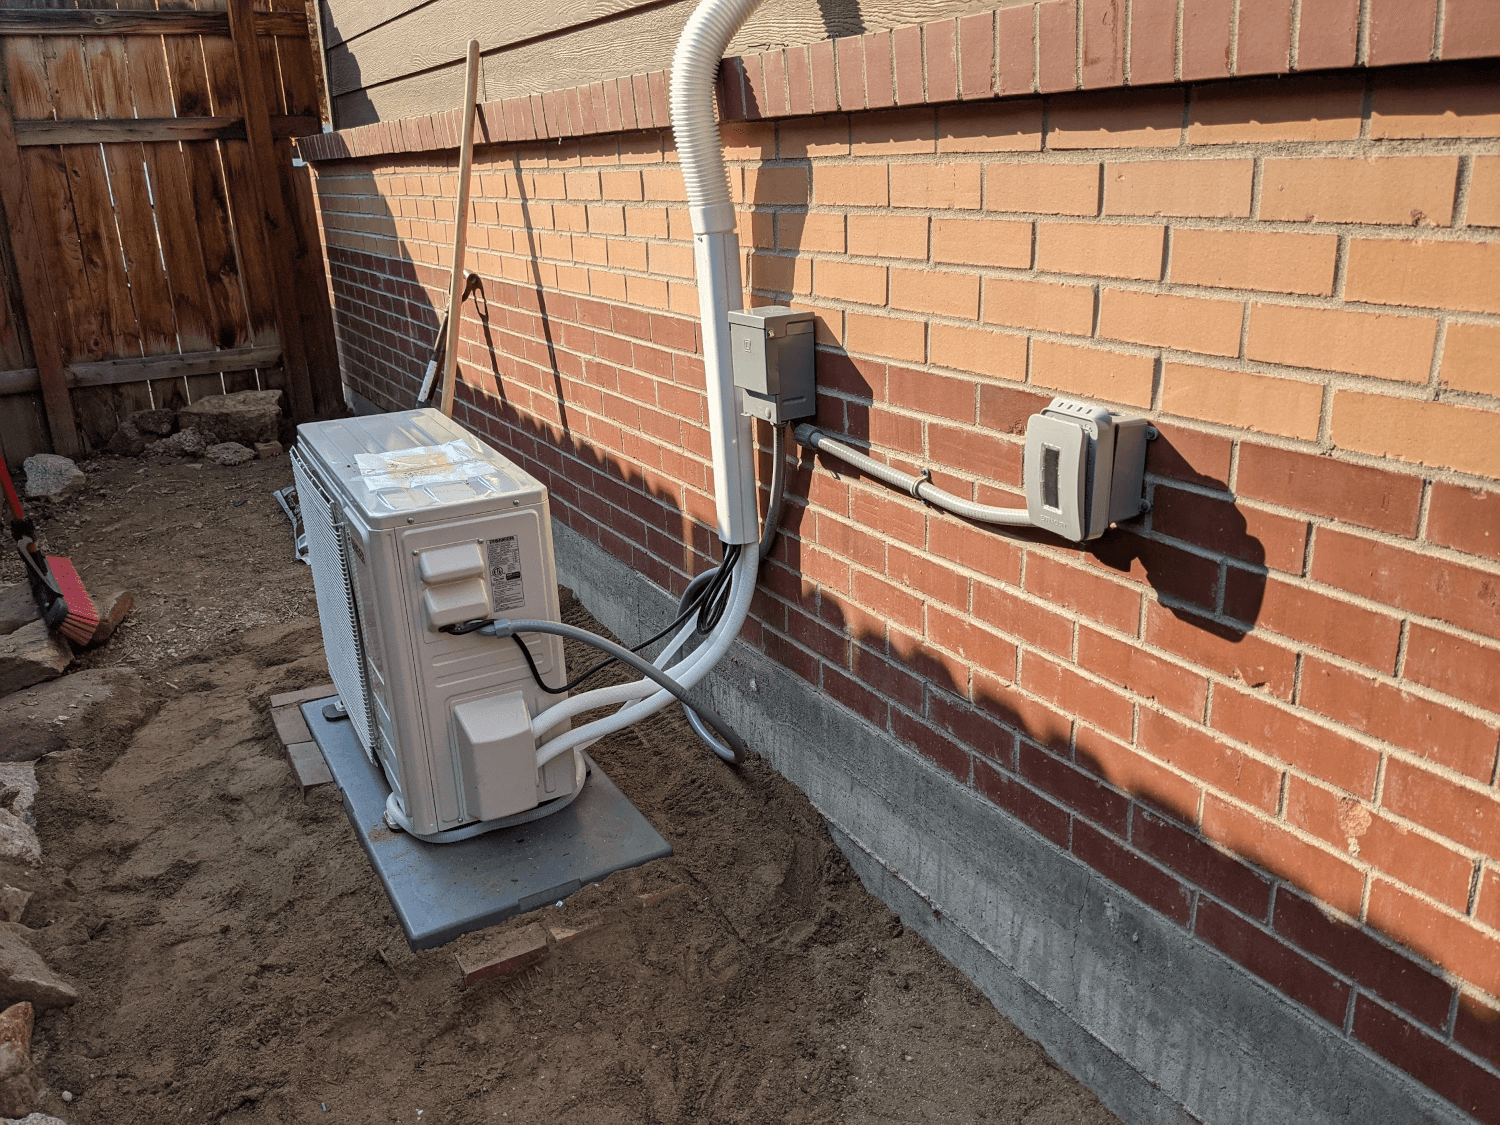 Outdoor unit
Organization
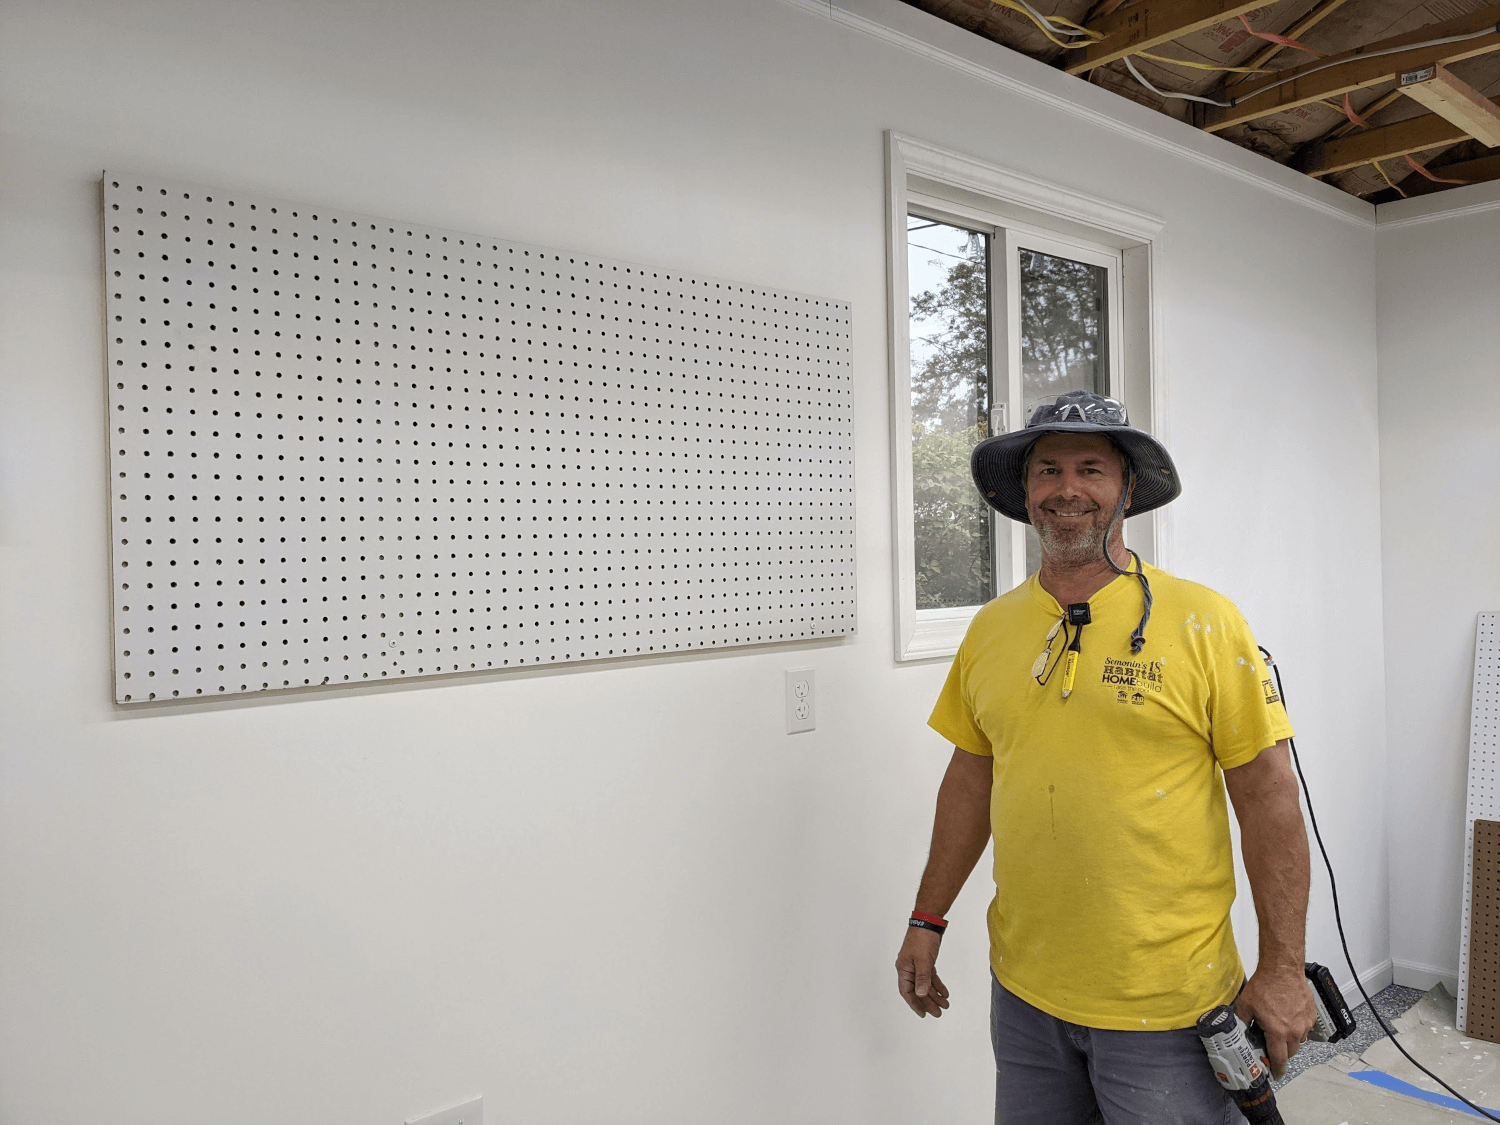
In order to store all of my tools and keep them organized we put a 2ft tall section of pegboard down an entire wall (16ft) and added another 2x4ft section on the opposite wall (by the door).
 Small pegboard
 Pegboard supports
 Large pegboard
I also purchased a US General 56” rolling tool chest for tool storage. Martha and I picked up the bottom chest in a rented U-Haul trailer but unloading it at the house was a bit of an adventure. After struggling for a while trying to figure out how to get it off the trailer we enlisted the help of some neighbors. The extra manpower made it much easier and we were able to do it quickly. Our friend, Craig (also building an EX2), helped us pick up the top chest with his pickup truck which went much more smoothly.
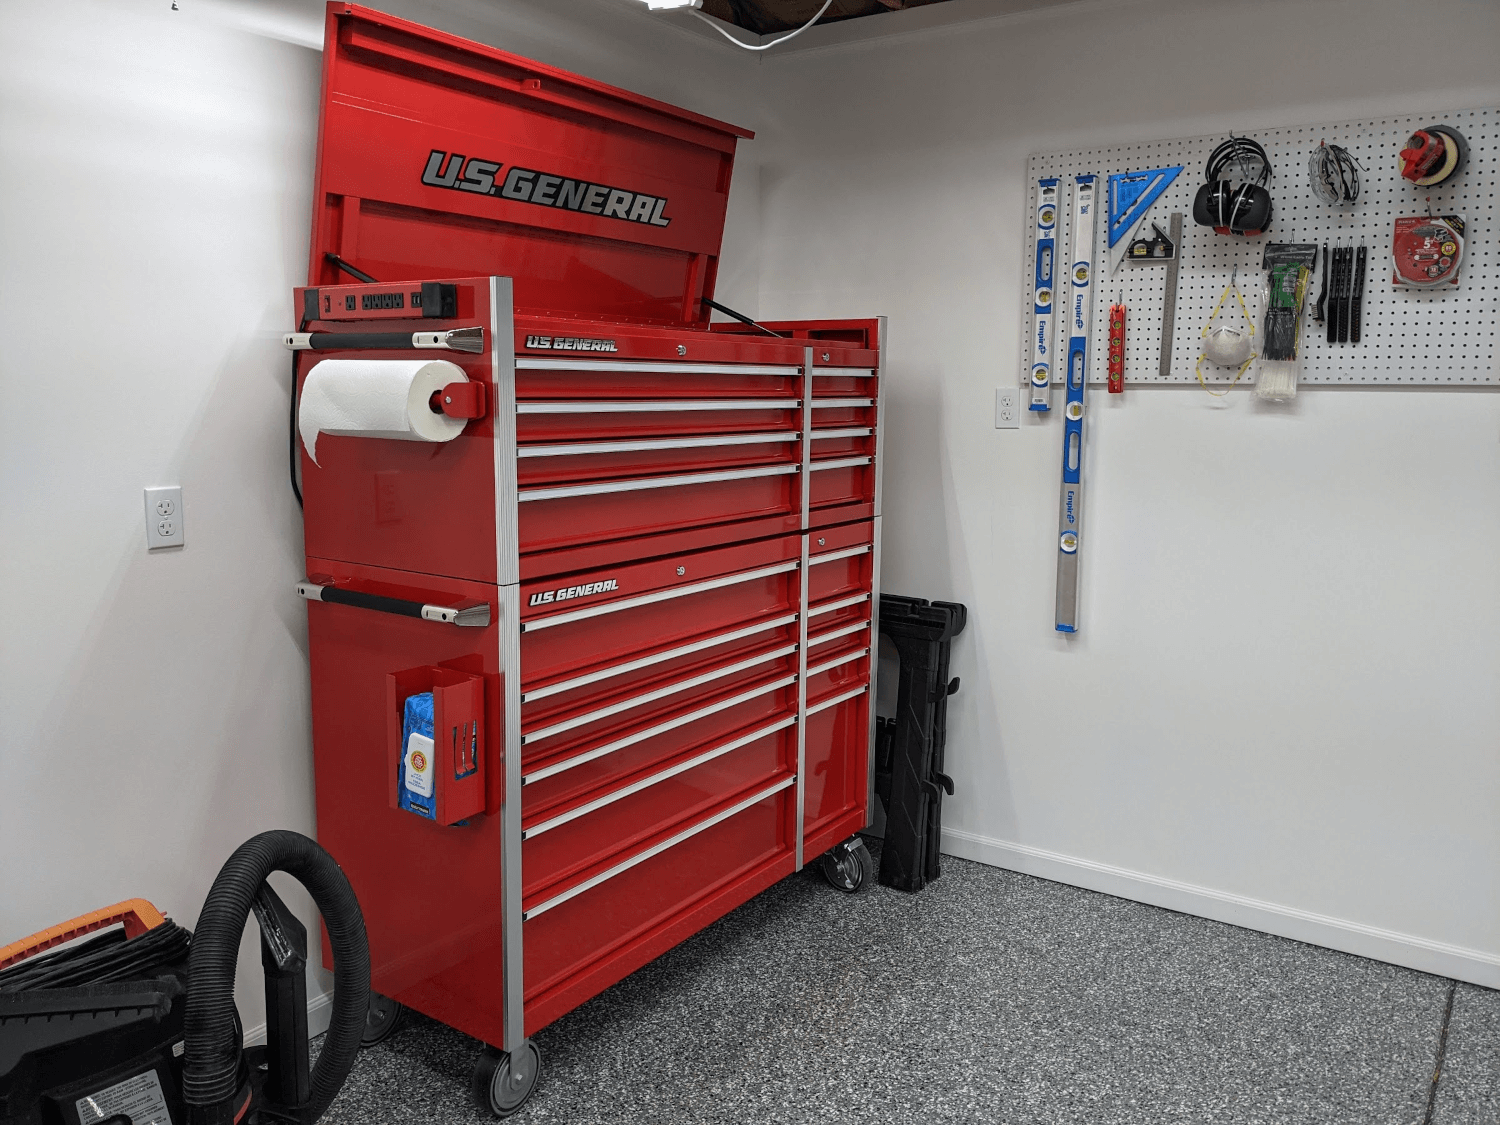 Tool chest
Air system
I am planning on painting the cub myself in the garage during the build so I knew I was going to need some sort of HVLP or compressed air system. I decided to use compressed air since it serves double duty by powering air tools as well. It also leaves more options open for painting down the road. Once again I needed to balance the power consumption with the air output. I chose a single-stage 5HP Rolair compressor that is rated for 16.4 CFM at 90 PSI. Its current draw is about 21A.
Getting the compressor off the shipping pallet without damaging it required a bit of creativity. Craig and I build a rig to lift it with a chain hoist and lower it down to the ground.
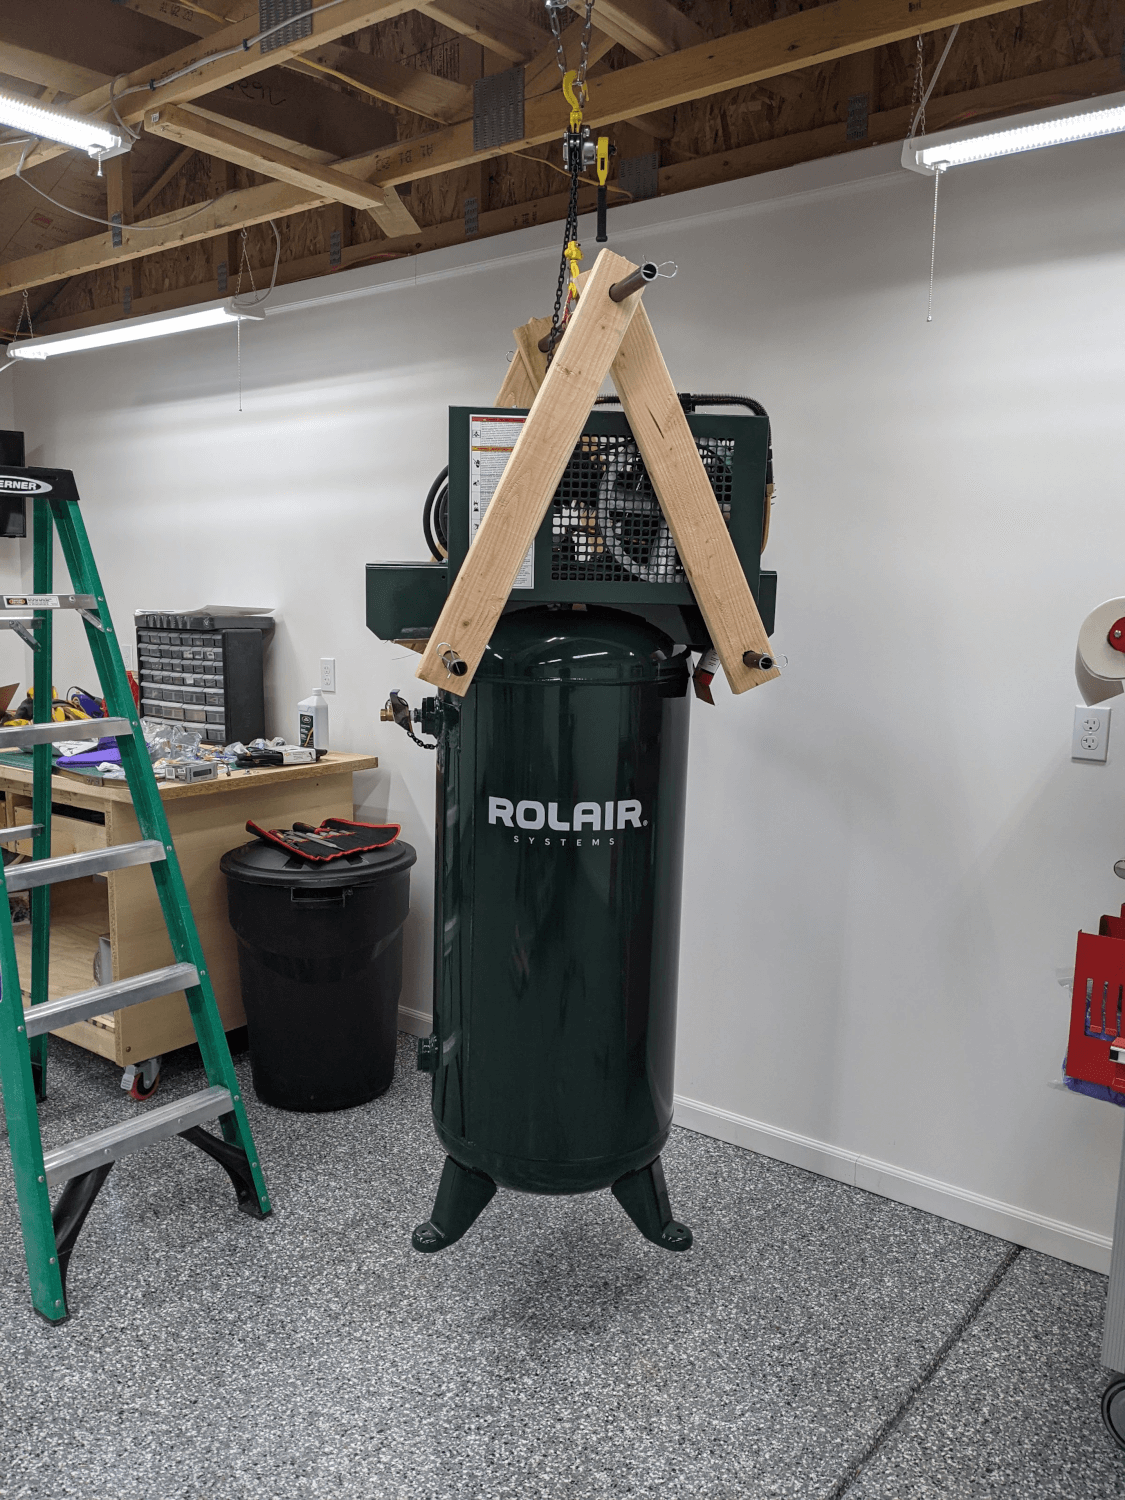 Lifting the compressor off the pallet
I mounted the compressor on rubber feet to minimize vibration and attached a sling to the rafters as a safety to prevent tip-over accidents. I also soldered together some copper pipe (a fun new skill to learn!) to hook up the whole air system. This includes a water separator and filter for the system along with an overhead hose reel, a regulator and air hookups on the wall near the bench, and a place to hook up additional filters for painting. I also added an automatic tank drain.
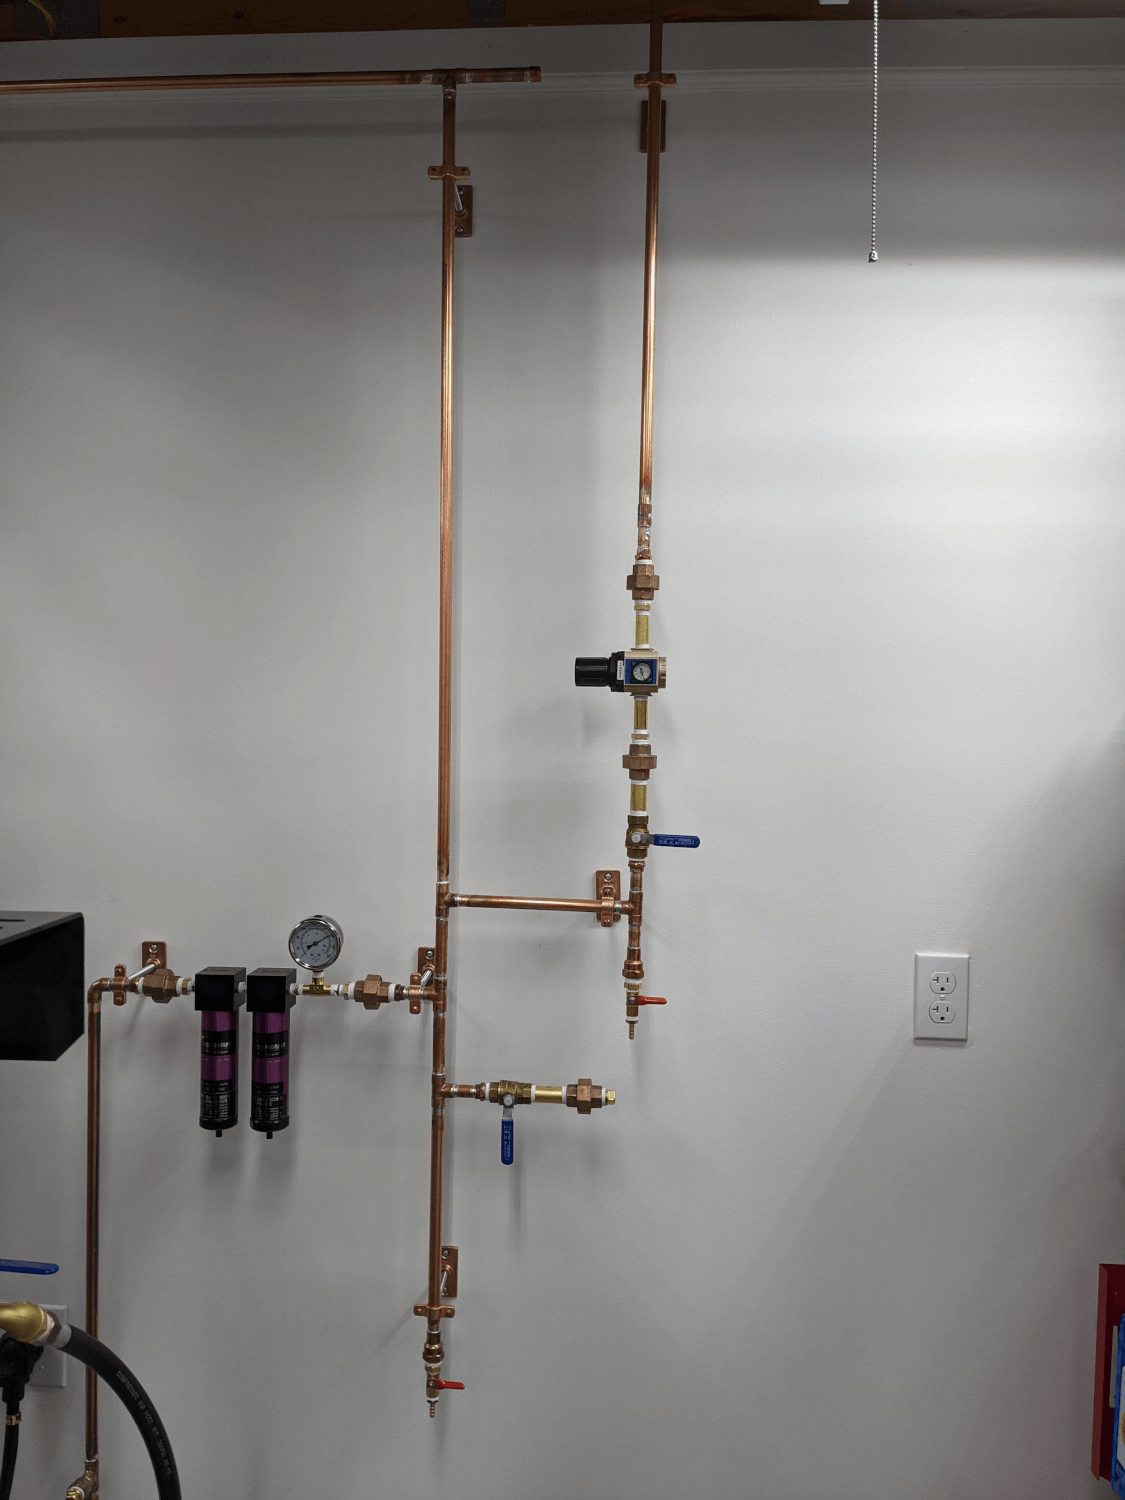 Filters and copper pipe on the wall
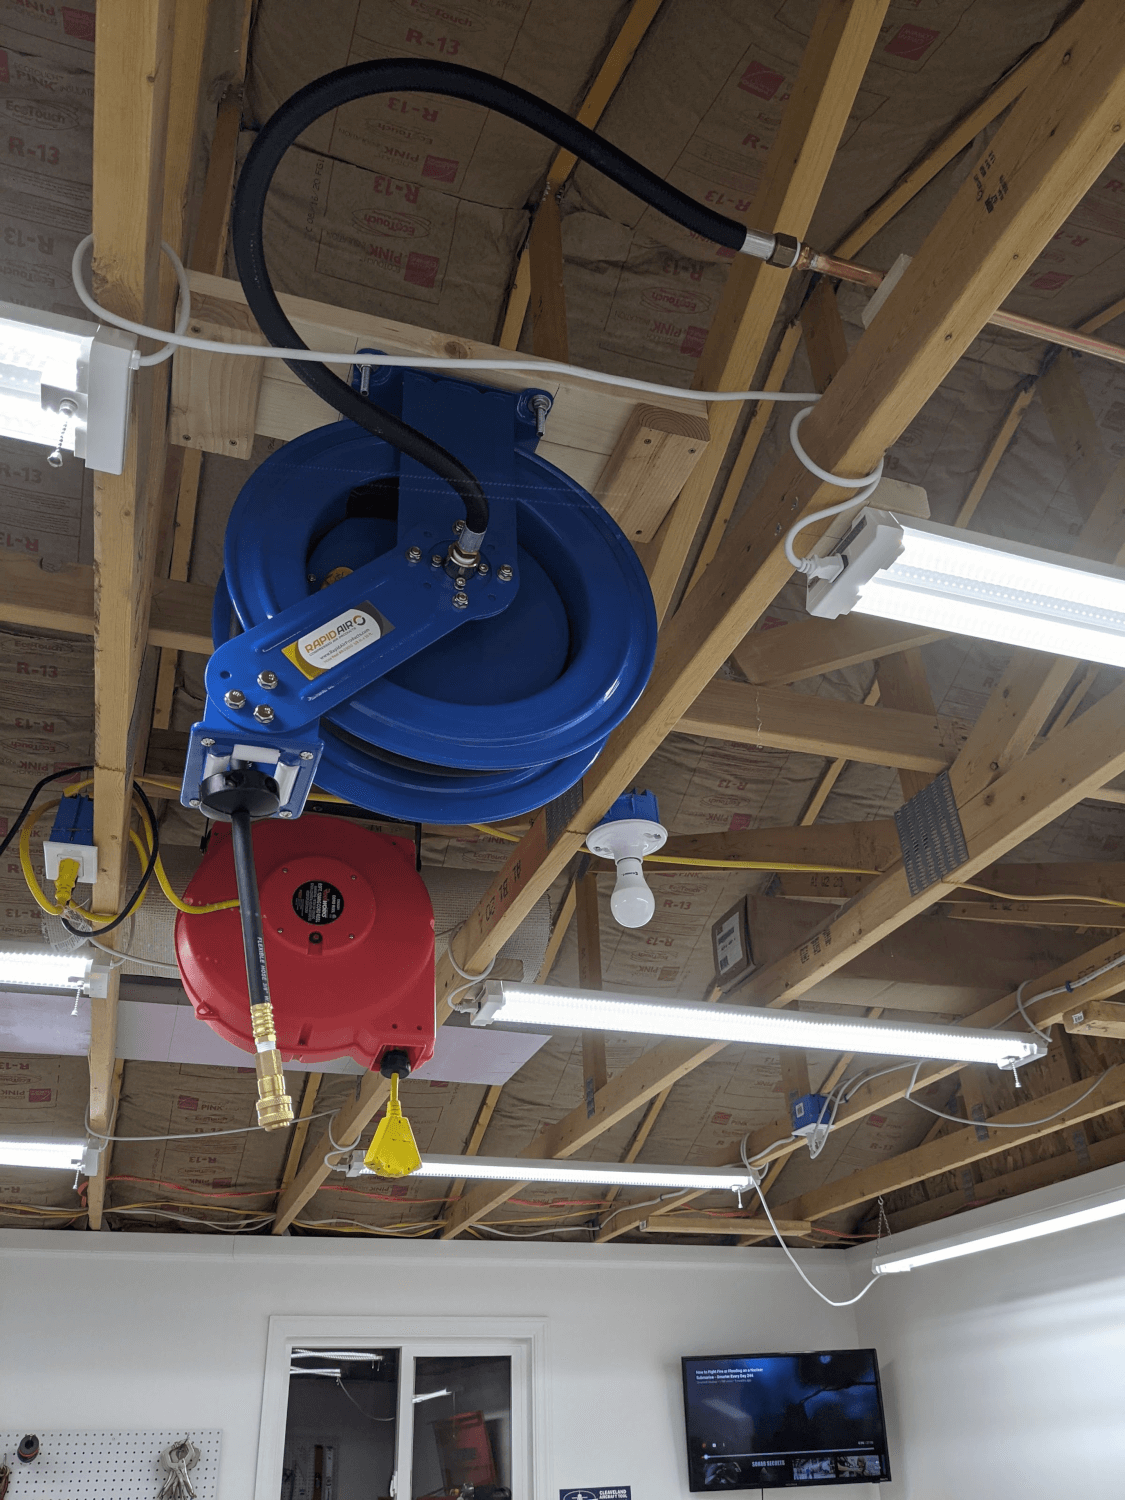 Hose reel
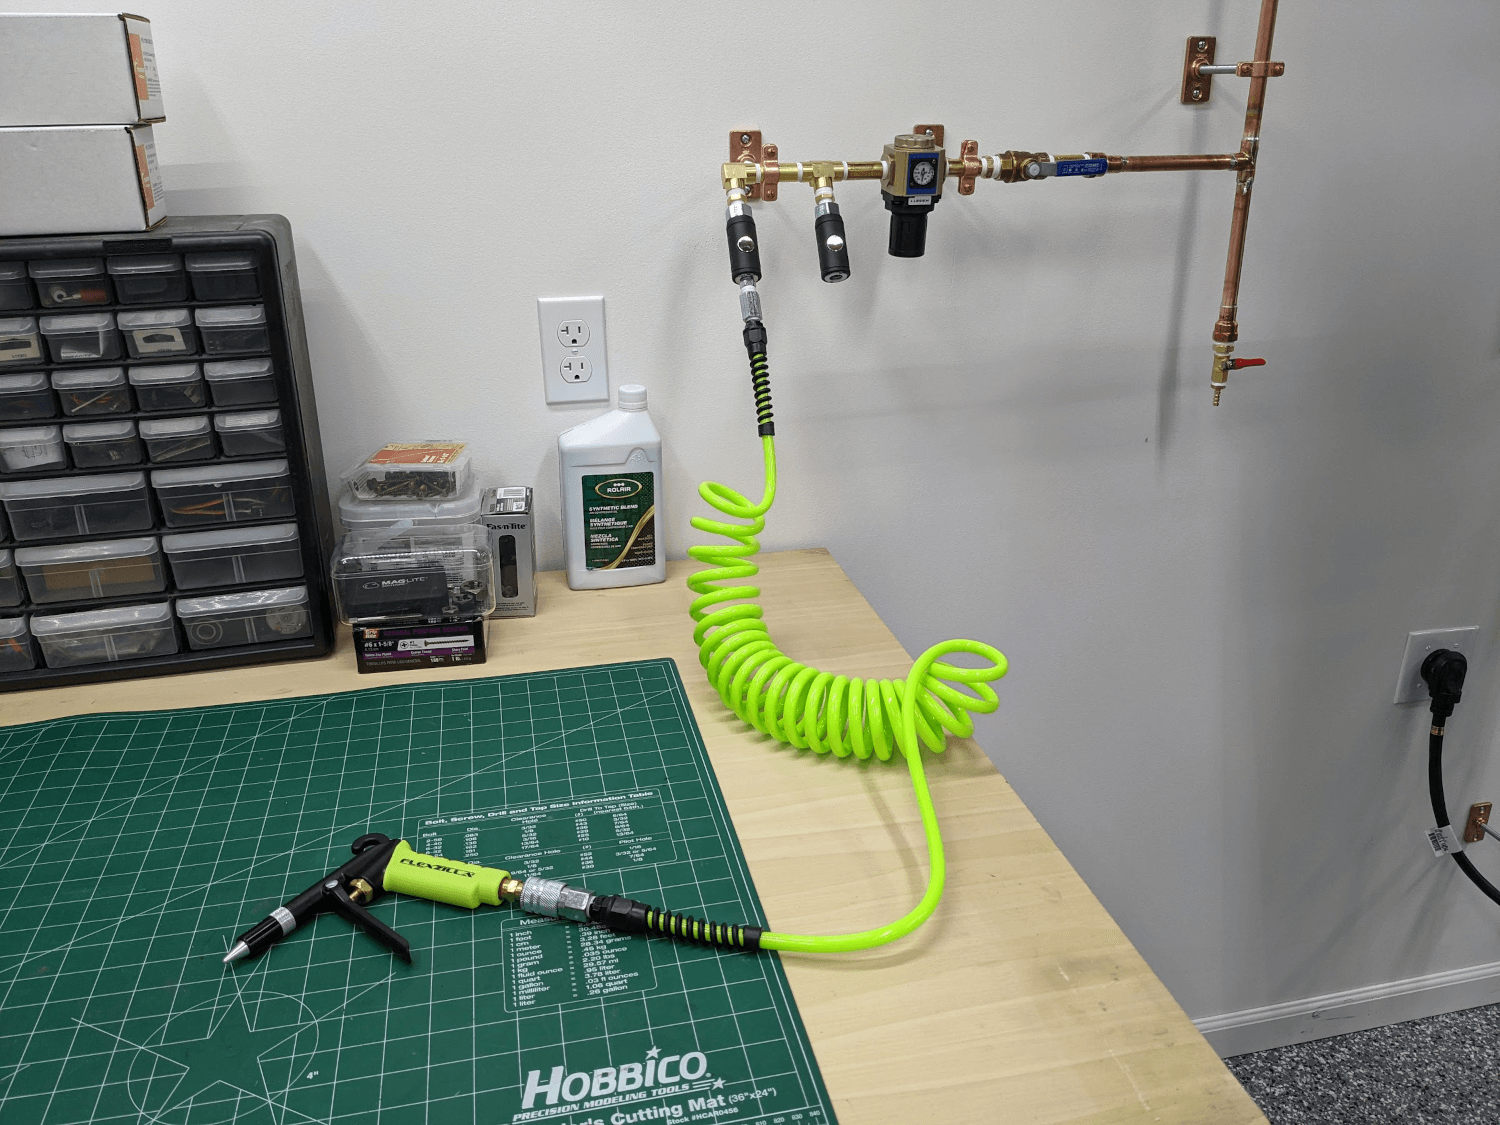 Work bench hookups
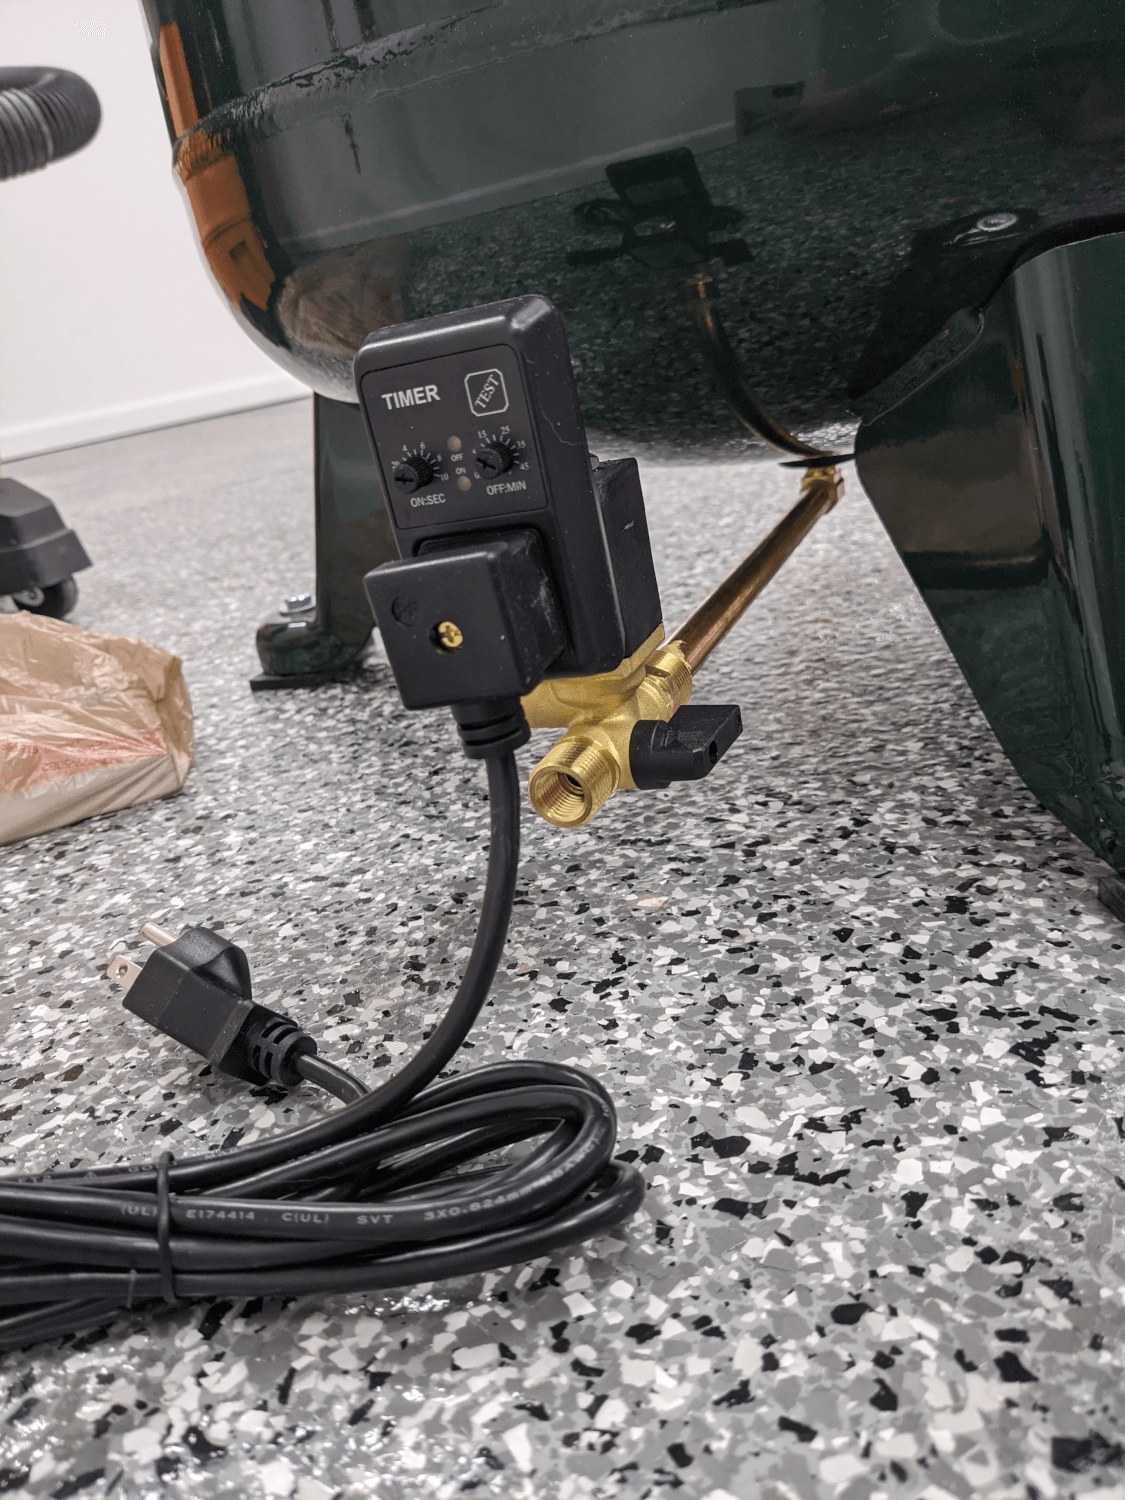 Automatic drain
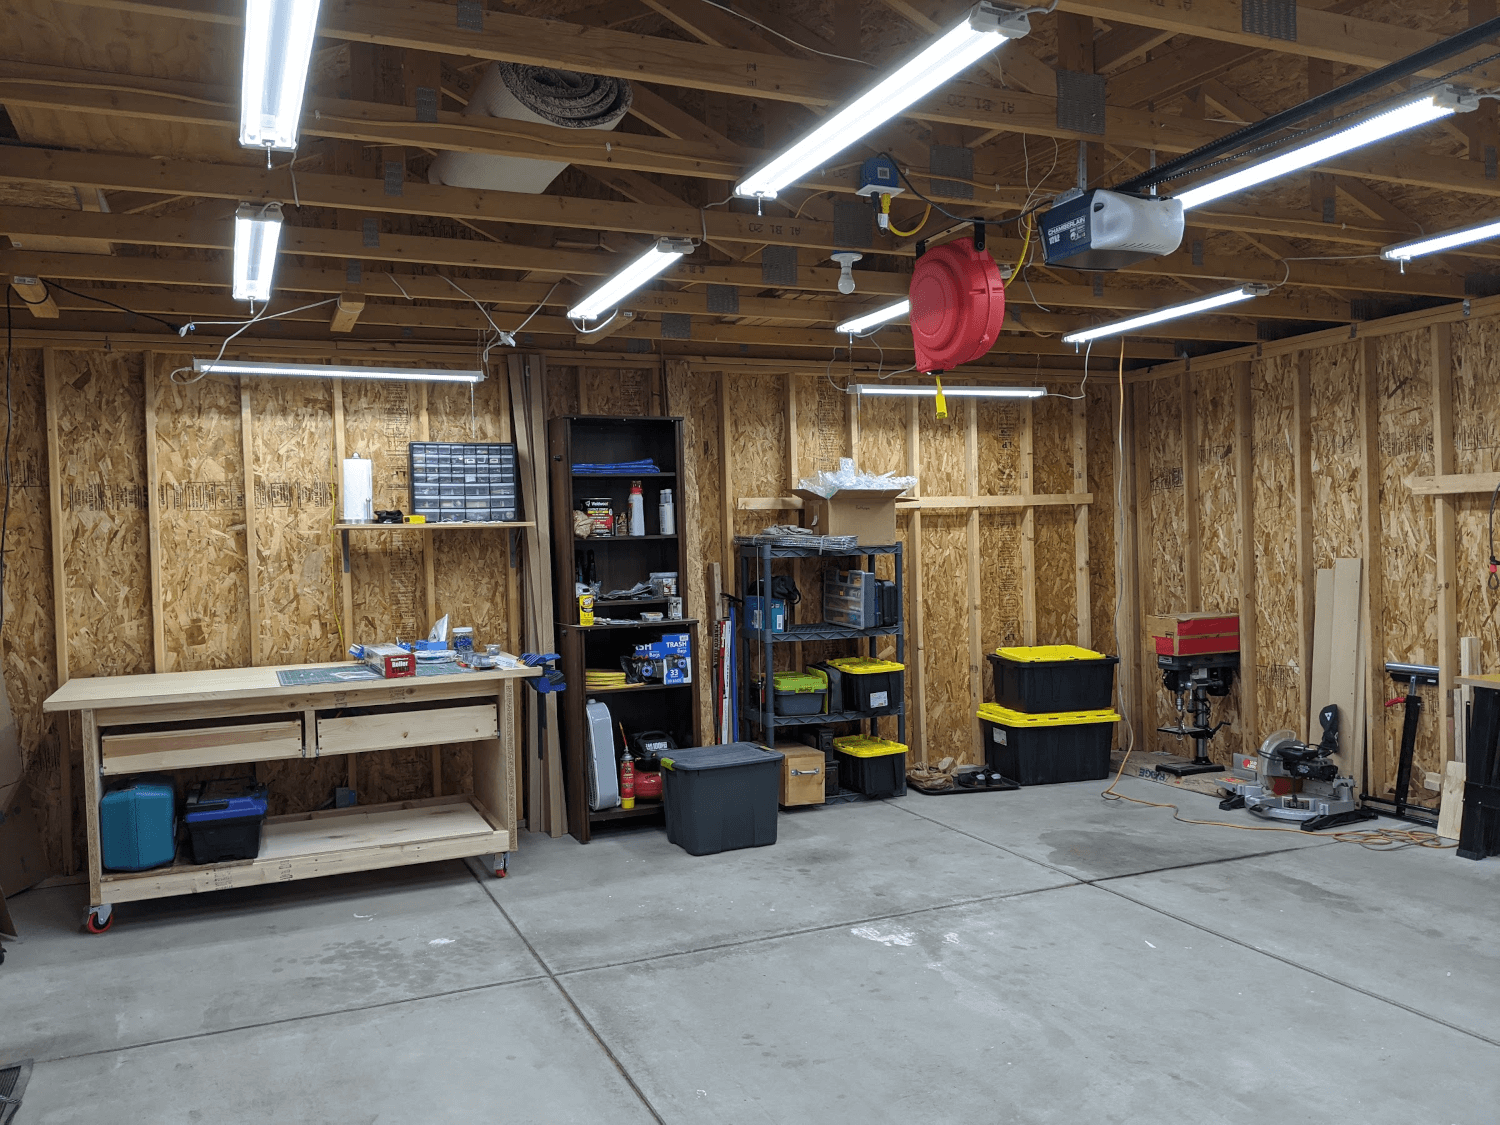
 Finished setup
Time Lapse Camera
I also set up a time lapse camera in the corner of the garage so that I can record time lapses of the build. The camera I chose was a Wyze Cam v3. This camera was chosen since it natively supports time lapses and the videos can be transferred wirelessly.
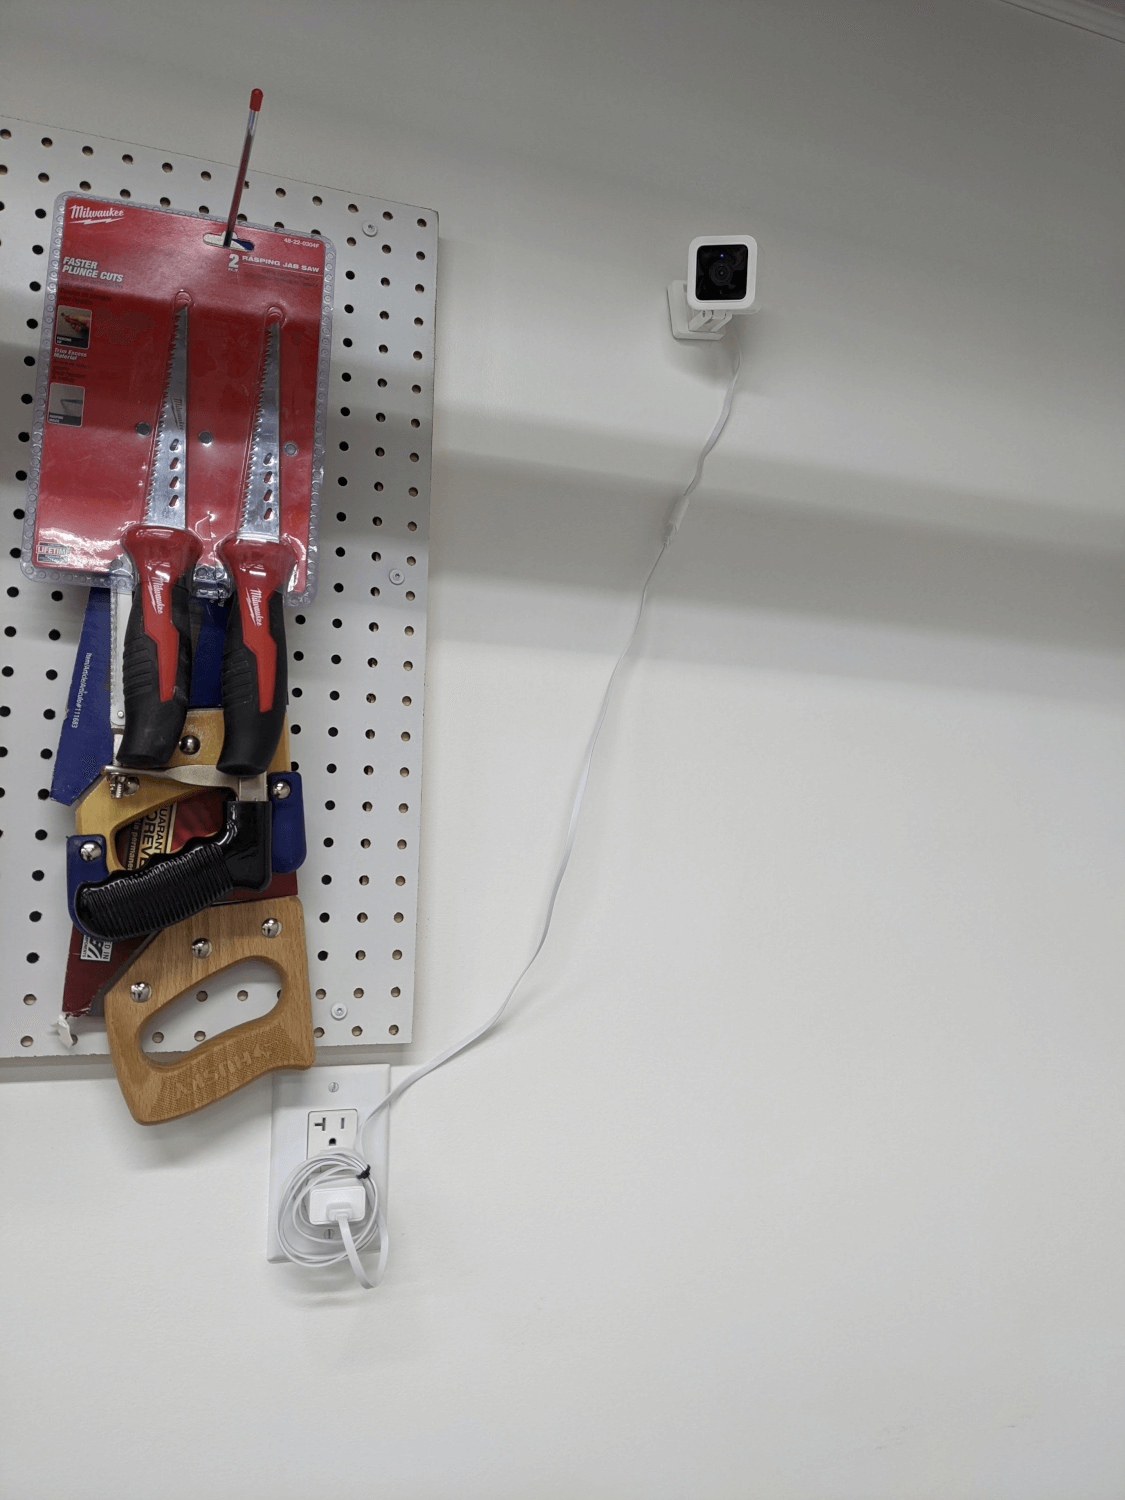 Time lapse camera