Craig came by again today to continue helping me with the leading edge skins on the right wing. We had already marked all of the center rib locations and roughly placed the leading edge skins so after verifying the position of the most outboard skin, it was time to start drilling the holes for the top line of rivets. Per the manual1 we started at the center of the outboard-most skin working our way out in order to push out all of the slack. We also waited to drill the inboard most hole until the more inboard skin was in place (since they overlap). We transferred the centerline markings for the nose ribs onto the skin and then used the provided drilling jig to get the correct (and even) distance down from the top of the skin. Before drilling with a #30 bit, we also made sure that we had a drill stop in place, the top flange of the skin was pushed all the way up against the spar, and that we had center punched the starting hole location.
This all went fine for the most outboard skin so we moved on to the next one. This was going okay too until there was a bad hole drilled for one of the intermediate ribs. Unfortunately, our mark was slightly off so the hole came out close to the outside edge of the nose rib. Our best guess is that, because the rib angles down slightly and isn’t as firm/well supported towards the edge, this acted as a bit of a ramp and pulled the bit even further over to the side. This made for a fairly ugly hole that was also too close to the edge of the nose rib. While considering what to do, I looked at the other (left) wing and realized that the part of the intermediate nose rib we were drilling into had been trimmed off on all of its intermediate nose ribs.
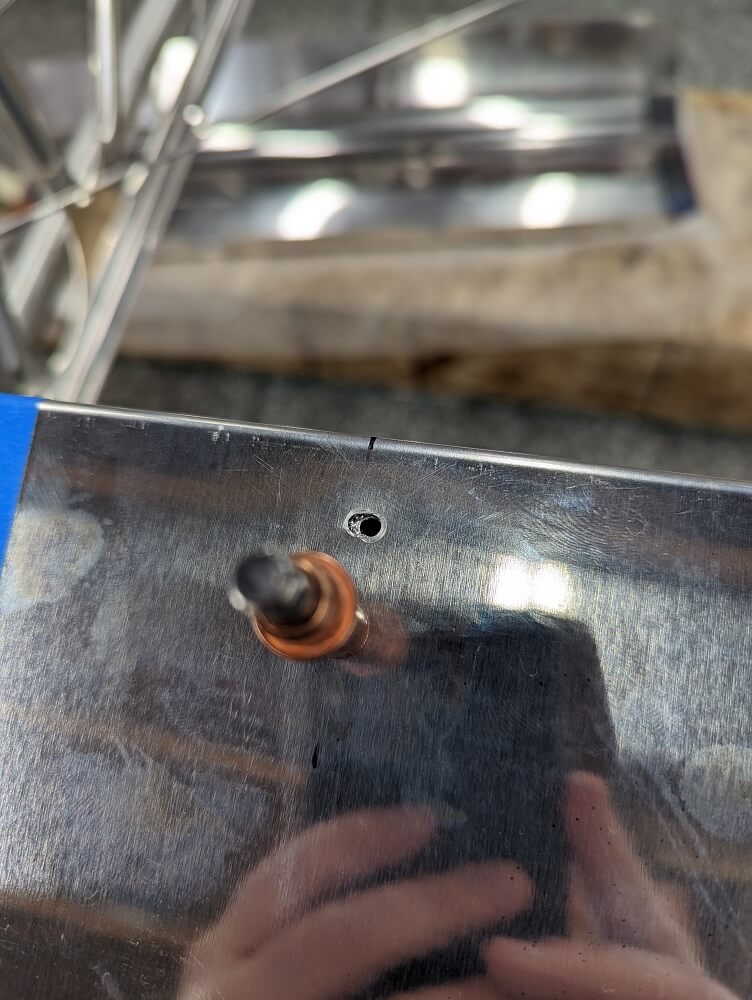 The first intermediate nose rib hole that was drilled badly
At first, this caused me to panic slightly thinking I had trimmed all of the nose ribs incorrectly (continued the tank bay trimming all the way out). Fortunately, I decided to check the previous manual version and, sure enough, I had trimmed it as specified. This meant that the new manual version specifies trimming differently. I also looked at the leading edge skin section of the old manual and, lo and behold, it says that they no longer install the top rivets into the intermediate nose ribs in the factory (hence the trimming). Unfortunately, no matter what I do the wings will mismatch now since they were built to different versions of the manual; however, this also meant that these rivets weren’t critical.
Given this information and the fact that these holes will be covered with fabric anyway, Craig and I decided to carefully adjust our rib center line and drill another hole 1” farther down (giving plenty of spacing from the other hole). It will still be possible to fill the first hole with a “large head” rivet down the line if I decide to but for now the plan we decided on is to just cover it with fabric and potentially use some tape there as chafe protection.
Unfortunately, despite our best efforts, the exact same thing occurred on the next intermediate nose rib over (although the bit didn’t go through the underlying nose rib). We addressed this in the same way as before but also decided to pilot these with a #55 bit going forward to try to check the centerline ahead of time. The good news is that there was an easy resolution to both of these and it won’t affect the plane at all (it’s visually noticeable if you know to look for it but not super obvious). That said, it is still annoying.
At this point, because of the extra decisions about what to do with the bad holes, we ran out of time to finish the rest of the skins and called it a night.
Wing Manual (EX-2/EX-3) CK-KM301 Rev B, Section 49 ↩