Organizing
Before I got started really working on the plane today Alex and Dorthy came over to see the project and Alex helped me move some stuff around. I was able to put the struts and interior panels in the place between the spars where the ailerons had been and move the ailerons under the wing I am currently working on since they are still in a wooden crate and therefore protected. This also makes the build a little easier since I will need to access the ailerons a couple times during the wing build in order to test fit them. Now that these parts have been reorganized I have plenty of space to work and walk around the wing.
I also posted the wood from the crates for free on Craigslist and pretty much immediately got emails from people who were interested. I responded to the first one and they came an hour and a half later with a trailer and took it all away. This was actually way easier than I thought it would be and kept me from having to find a way to store all of it.
Fuel Tank Straps
I installed the fuel tank straps in the left wing today. This was pretty straightforward and went relatively smoothly. The process that I found worked the best was to install a strap and tighten the lock nut to just shy of snug (while ensuring that the strap stayed square). Then I torqued the nut and used a block of wood to hold the strap up against the spar cap while bending it over by hand. I installed the bottom tank straps (which are a single piece as opposed to the 2-piece straps for the top) in the same way but I installed and torqued all of the hardware (on both sides) first and then bent them.
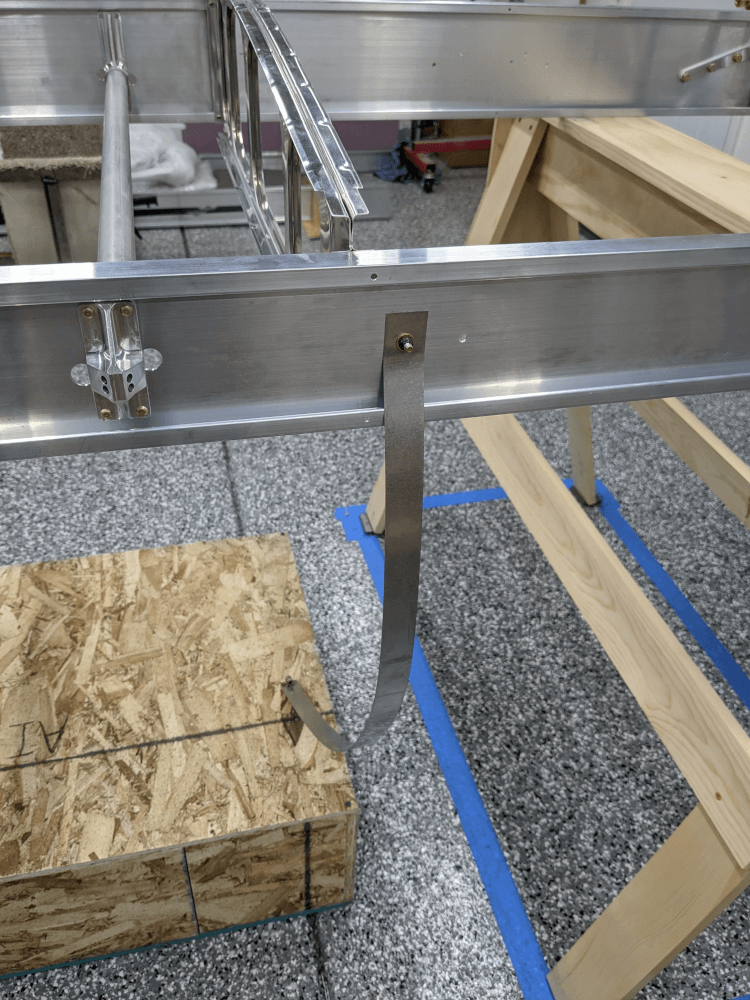 A top tank strap ready to be bent
The only part of this step that I still need to do is install the felt strips on the straps where they will eventually contact the fuel tanks. I waited to do this until this step in order to prevent getting any metal shavings on them while enlarging the holes for the drag wires. In hindsight, I probably should have installed the felt before bending the straps to make life easier. Other than applying the felt, this step (section 111) is complete.
 Fuel tank straps installed
Drag Wires
The other thing I did today was install the drag wires. Drilling the holes all the way through the lift blocks actually went pretty easily as log as I started the drill before inserting the bit too far. Enlarging the holes for the thicker drag wires also went pretty easily.
 Drag wires coming out of the holes drilled in one of the lift strut blocks
There are still 2 questions I have on this step, however. First, the drag wire from the front spar outboard to the rear spar inboard that passes rib 8 contacts the rib. This was noted in the manual and it instructs you to file out a bit of a cutout in the rib where the drag wire passes in order to provide clearance. The ribs in the manual pictures, however, are different from the ribs in my kit so I want to make sure the drag wire is going through the right spot in the rib before I do any cutting. I’ll probably try to verify this with Craig tomorrow.
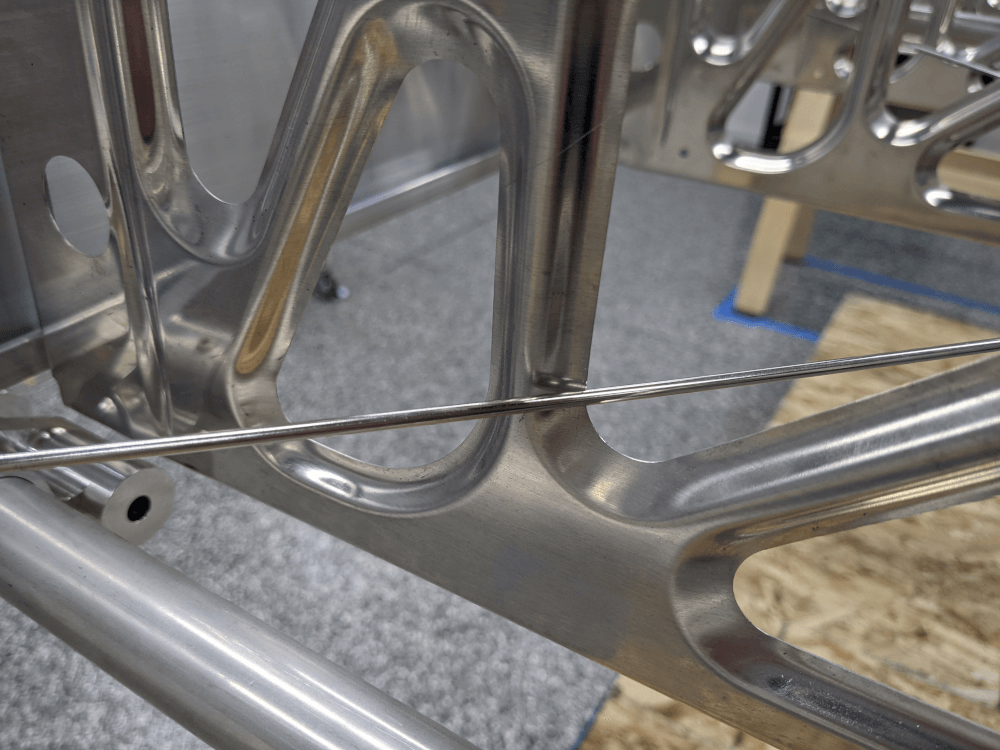 The drag wire touching rib 8
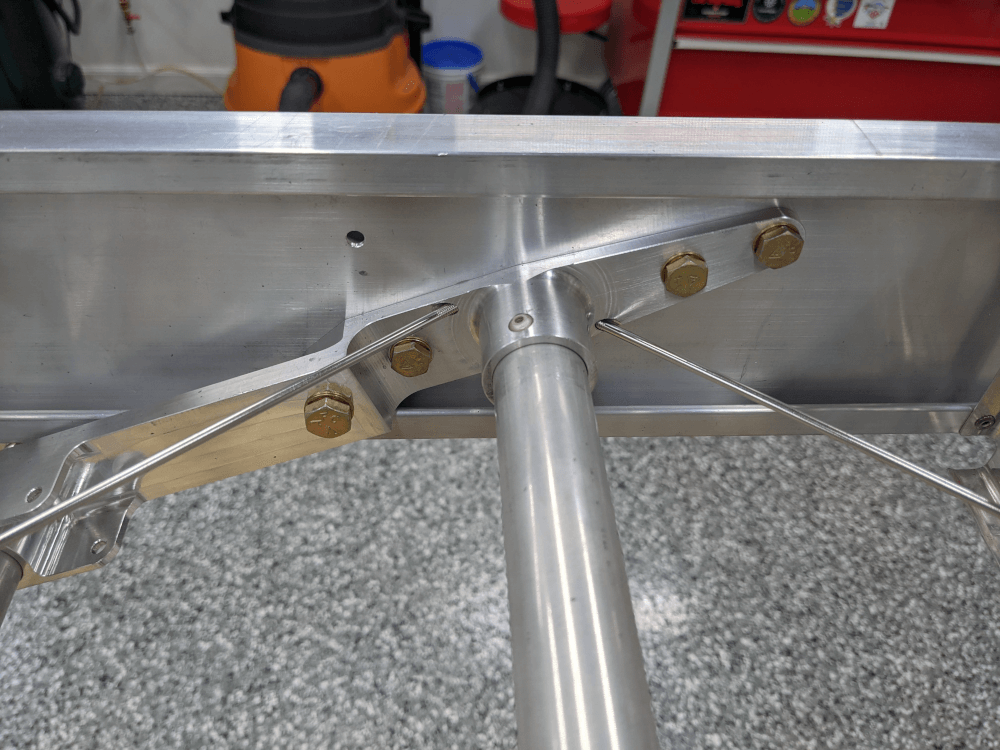
The other thing I was not sure about were the washers to be used on the thicker drag wire. The figure in the manual doesn’t call any out but it wouldn’t make since to not have any. I went ahead and installed AN960-10 washers since they seem to be the right size but will definitely verify that these should be used before I finalize the drag wire installation. Once these two things are cleared up then section 112 will be done.
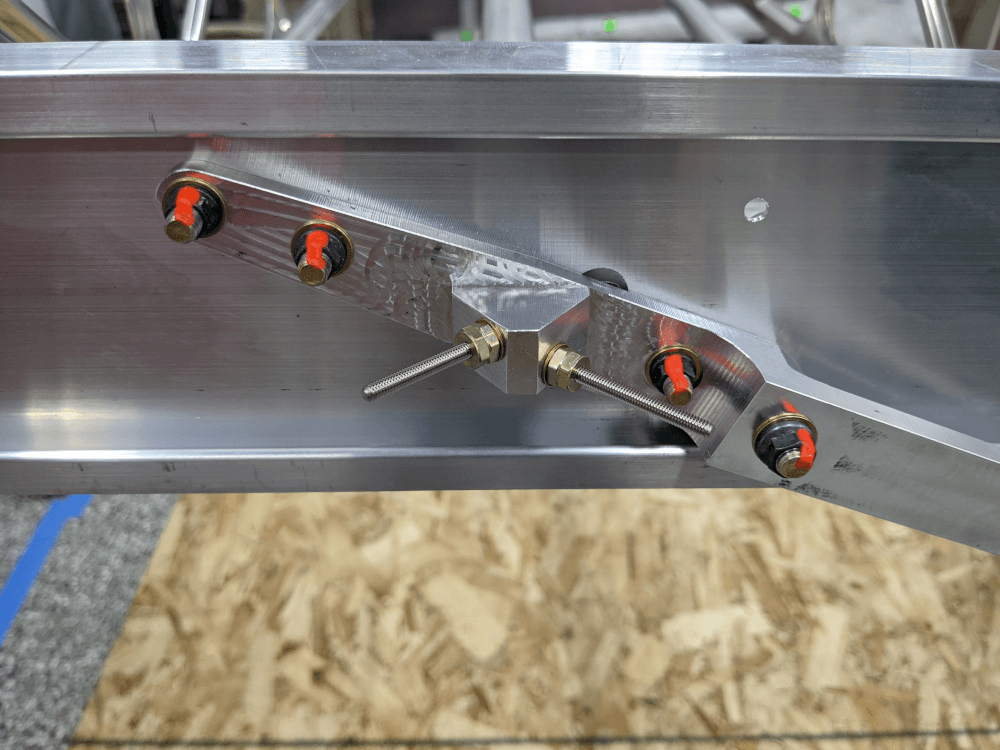 Drag wire hardware installed
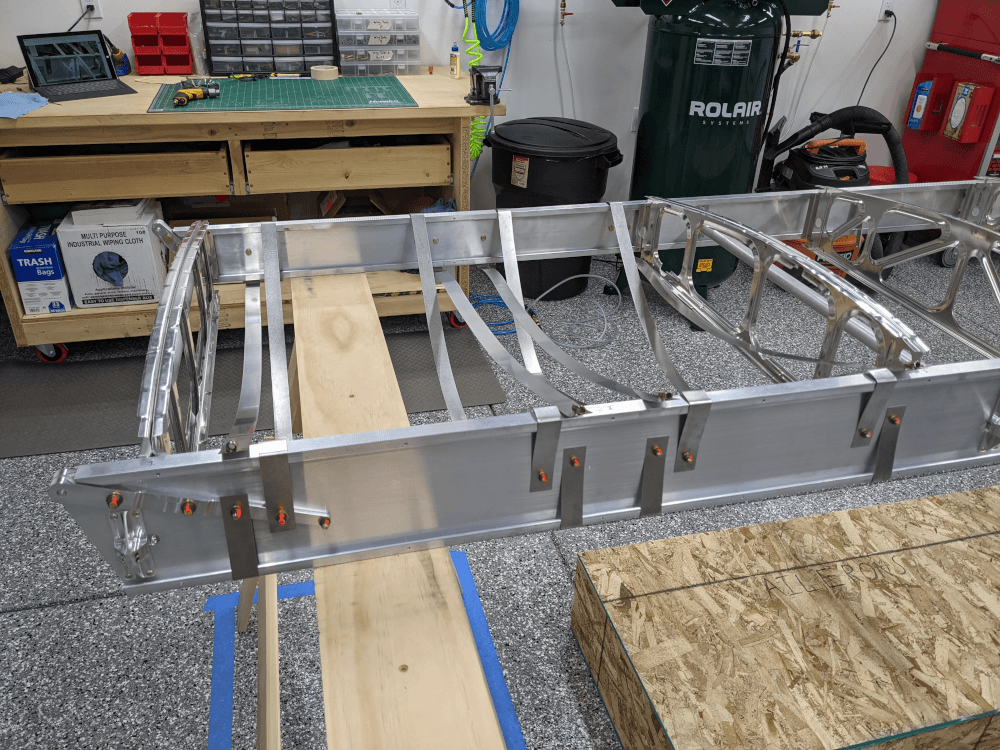
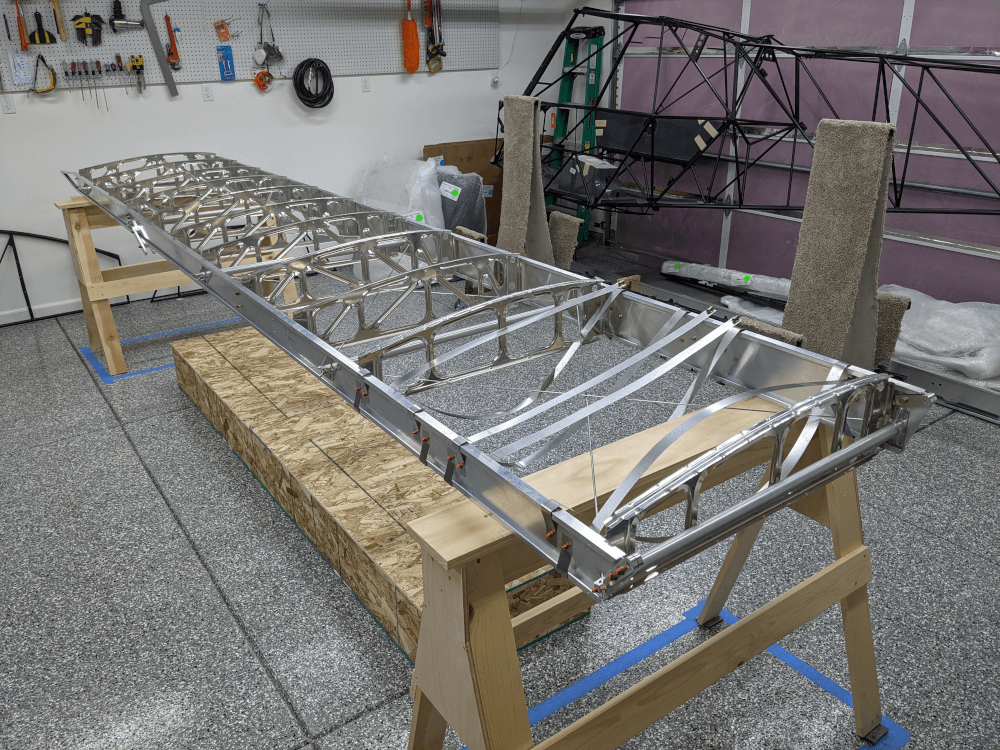 _The current state of the wing with the drag wires and tank straps installed _