Today I started the installation of the machined tail rib clips for the outboard aileron hanger/machined tail rib for rib #12. The first thing I did for this step was to determine where all of the holes should go and mark the positions on the parts. The hole positions are given in the rough drawing below.
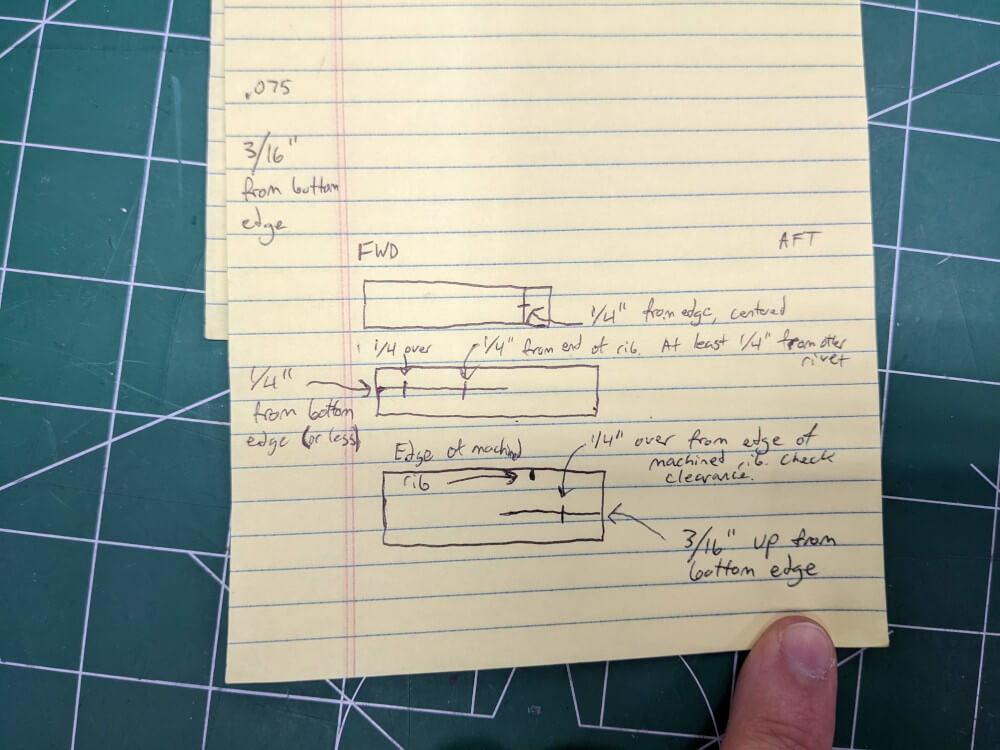 The positions I used for the holes in the #12 rib clips
With these hole positions marked, I made sure that the appropriate clearances would be maintained and was especially careful to check the position of the holes into the machined rib. Specifically, I used my calipers to make sure that the holes would be in the appropriate part of the material and not too close to either edge. I also used them to try to make sure the hole would be centered and lined up a straightedge with the pre-drilled holes for the fabric rivets to make sure it was in line with them as well (and therefore centered). The final thing I checked for was to try to make sure that the top and side rivets wouldn’t line up too closely and be hard to pull.
With the drilling marks verified, I removed the clips from the wing and center punched the position of the 2 rivets on the side of the clip that go into the center rib. I then drilled pilot holes with a #55 drill bit.
After that, I clamped the part back on the wing using a couple locking pliers and carefully verified the position.
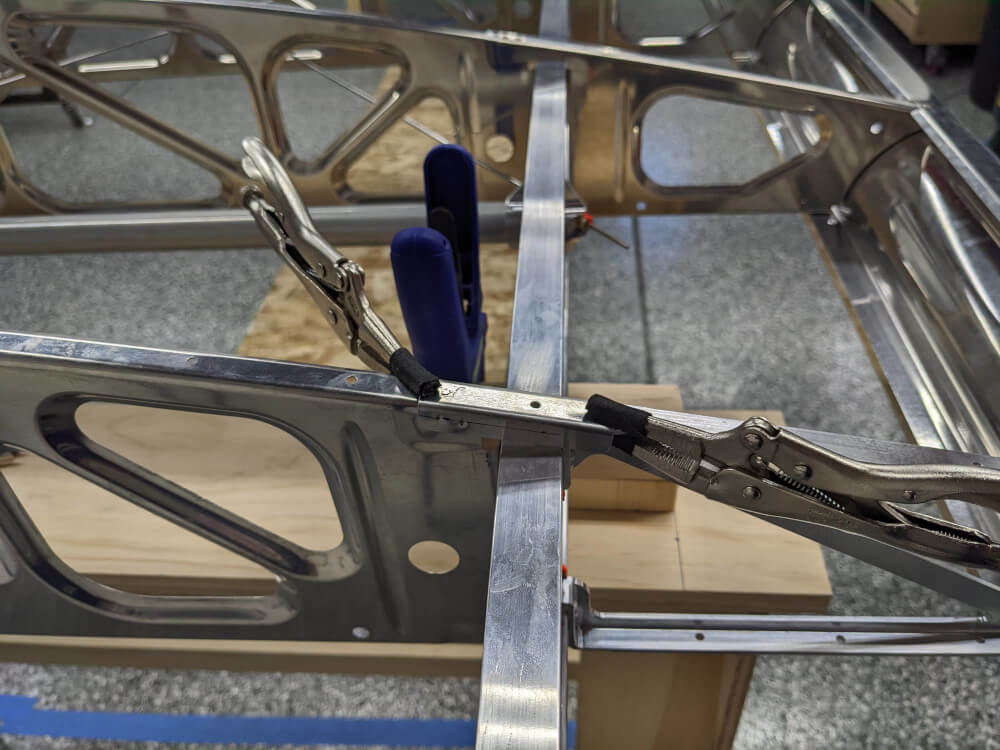 A clip clamped on to the rib and ready to be drilled
Finally, I drilled through my pilot holes into the underlying rib with a 6” long #40 bit and then a 6” long #30 bit (to slowly increase the hole size). I then removed the parts to deburr them and cleco’d them back in place.
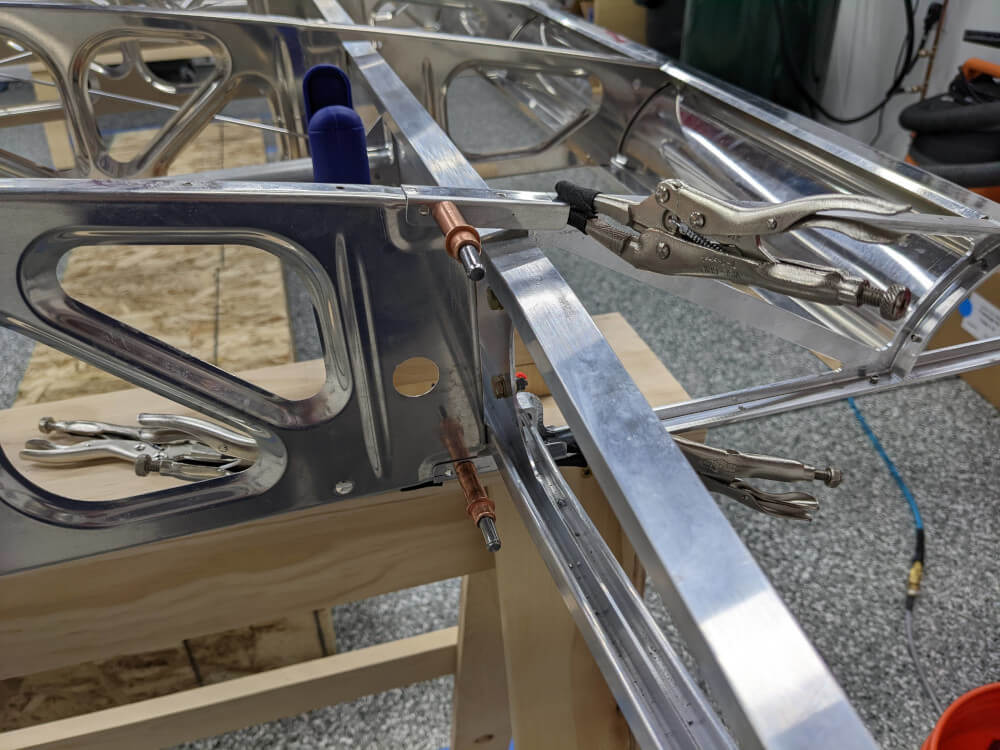 The clips drilled and cleco’d/clamped in place