The day after I worked on the plane last Craig was able to disassemble the CherryMax puller a bit more and remove the air piston. He spread the existing grease around a bit over the o-rings and re-assembled the puller. Once he did, the air leaking problem went away so we decided to go ahead and try to use it for pulling the CherryMax rivets in my wing.
He brought the puller over and we started by drilling out the top-rear stainless steel rivet in the #7 center rib. This is because this is where the hole for the spar reinforcement cap and the rib rivet line up exactly preventing the CherryMax rivet from being inserted far enough to begin pulling (it hits the rib rivet). When we were completing this step on Craig’s wing we had the same problem and discovered that both rivets did pull if you pull the CherryMax first.
Once we got the rivet drilled out we tried pulling the CherryMax in the spar reinforcement cap with the pneumatic puller. It took two “shots” of the puller (it kept doing that so we think the puller isn’t exactly fixed) but the rivet pulled correctly. We then went ahead and tried re-pulling the stainless steel rib rivet. This one really didn’t insert far through the hole but using the “pull slightly, push it down hard, and repeat” method we were able to get it to set on the first try.
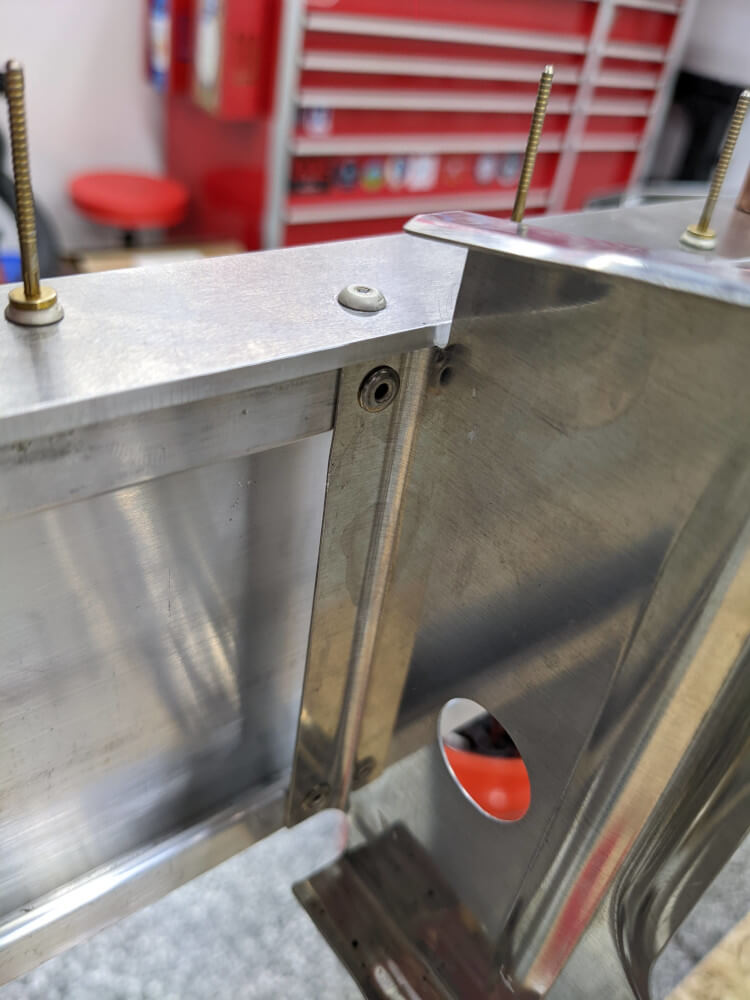 The conflicting rib and spar reinforcement cap rivets after being pulled successfully
Once these rivets were in, we were able to progress down the rest of the reinforcement cap pulling the rivets with the pneumatic puller. This was all pretty straightforward and the rivets pulled correctly.
Finally, we attempted to finish this step1 by countersinking and pulling the last reinforcement rivet. This rivet must be countersunk because it is located under the rear aileron pulley bracket. Unfortunately, when we tried to use my countersink cage with the countersinks I had we discovered that they did not thread together correctly. This was surprising since they were both high-quality aircraft tools from a reputable tool company but there was not much we could do about it. We decided to use Craig’s countersink cage the next time we worked on the build and to call it a day.
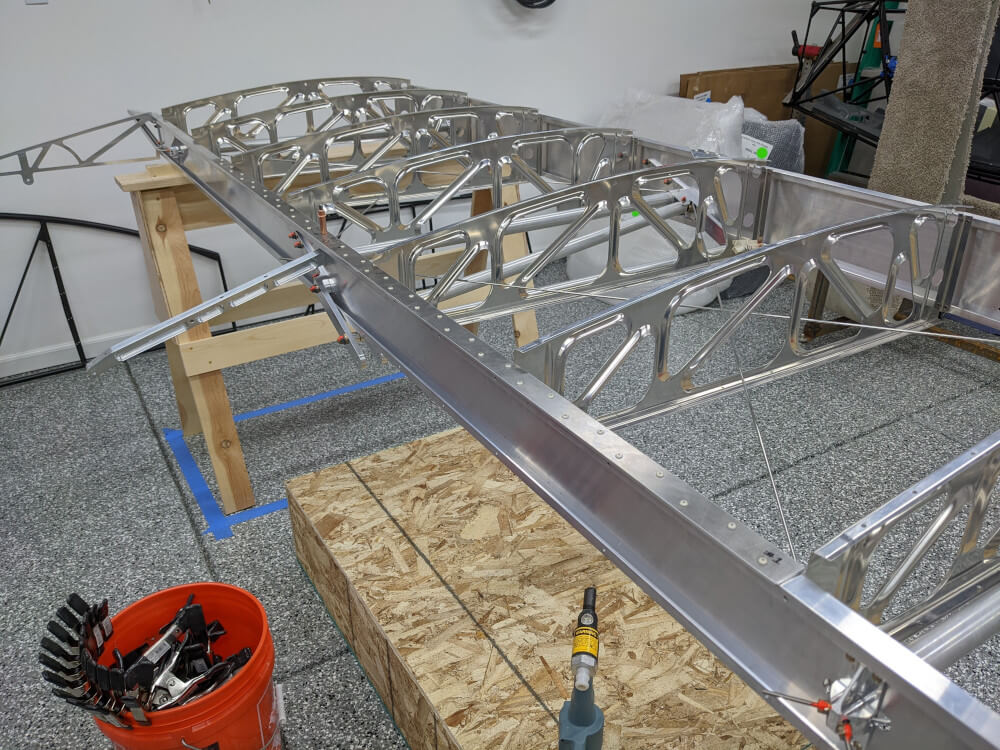 All of the rivets installed except for the countersunk rivet
Wing Manual (Extended Fuel), CCEX-004 Rev. 2.02, Pages 92-94 ↩