Front Lift Strut Fitting
Today I began by installing the rear lift strut fitting. This was the final piece to do for section 4 of the manual1. I followed the exact same process as I did for the front lift strut and once again made sure to include the AN960-616 washer between the two fittings on the AN6 bolt.
The only problem I ran into here was that an AN6-20A bolt was called for (v.s. an AN6-21A for the front fitting) and the bolts I received that are labeled AN6-20A have a smaller diameter than the other AN6 bolts. Furthermore, they are very undersized for the hole that they are supposed to go into. This leads me to believe that I received the wrong bolts. I’m going to double check based on what Craig received (his kit arrived today!) but I think I’ll need to have CubCrafters send me some new parts on Monday.
For now I just used an AN6-21A to get the alignment right while I reamed and bolted the rest of the holes. I covered it’s end in masking tape to make it obvious I need to replace it and just tightened the other bolts until snug. I’ll wait until this last bolt is installed and snug before I torque everything. Once this is done section 4 will be complete.
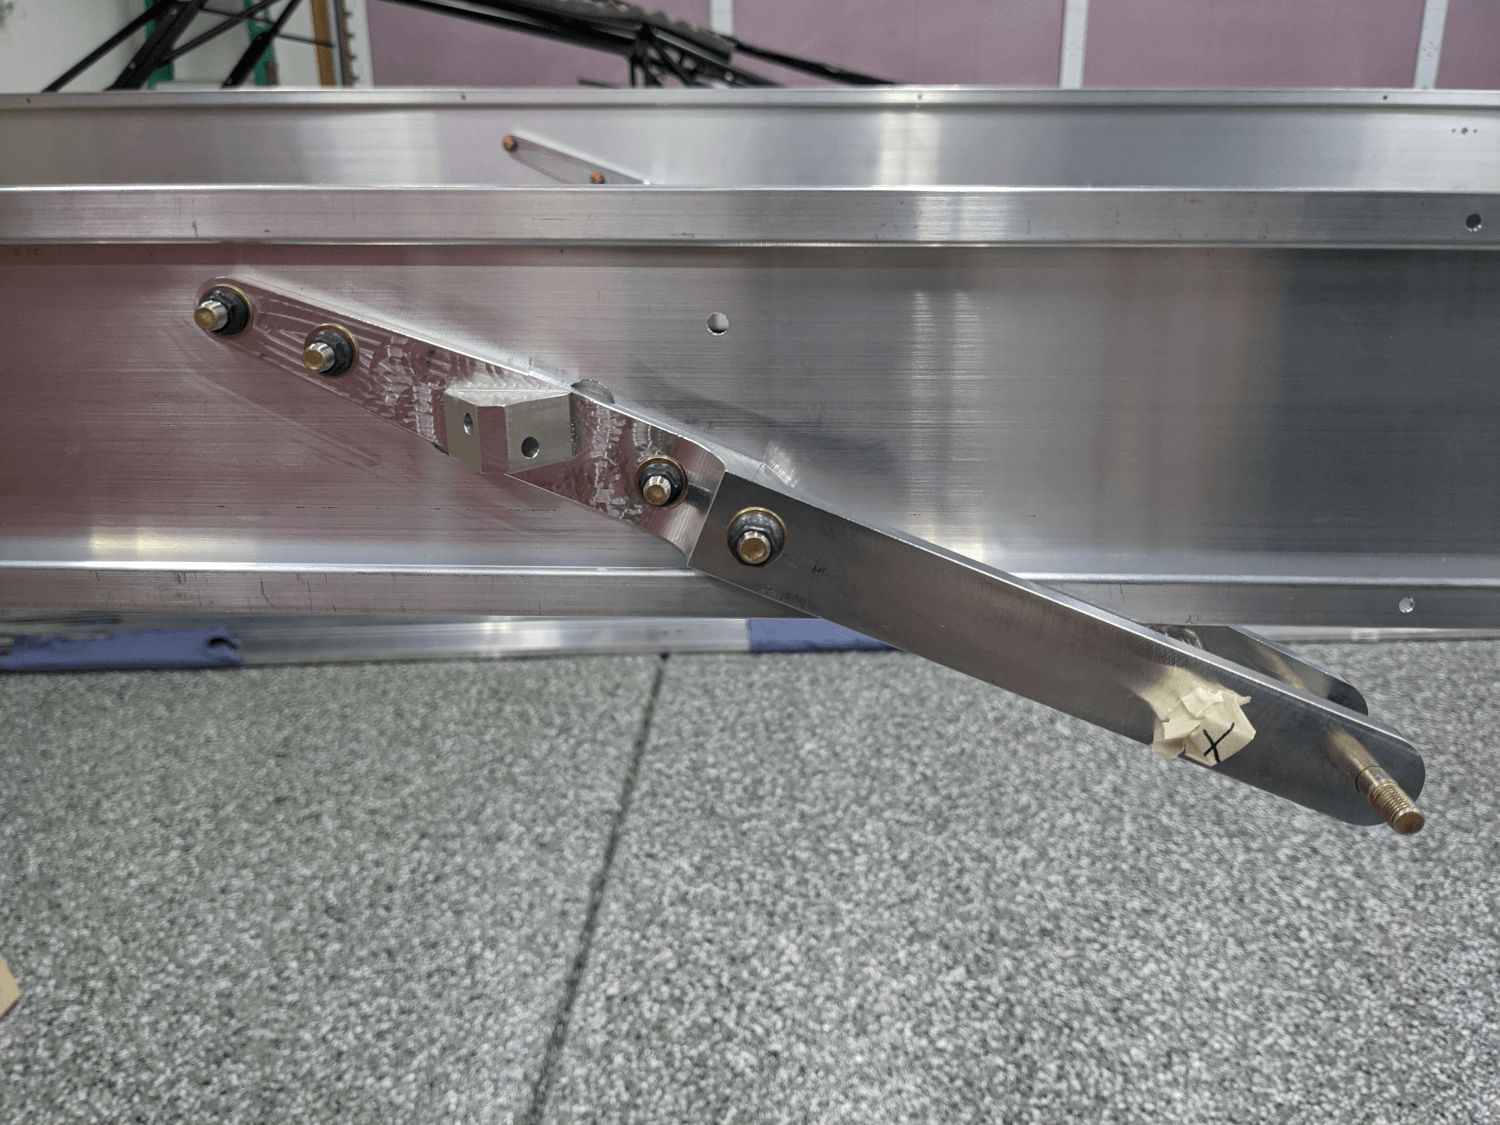 Rear lift strut fitting with tape over incorrect bolt
Prepared Double Ribs
The next section of the manual, section 52, has you prepare the double ribs. These are center ribs that, instead of just being one piece, consist of two halves glued together with methacrylate adhesive (what seems to be a 2-part epoxy). The manual has you perform this step now so that the glue has plenty of time to set.
I started by pulling all of the parts I would need and ensuring that I had all of the double ribs. I verified that I had the correct ribs for the left wing using figure W9 on page 62 of the manual (in section 8 where the center ribs are installed). This threw me for a bit of a loop at first because the text in section 5 makes it unclear whether there are two double ribs or three. It mentions preparing the two double ribs but lists 3 rib positions that receive double ribs (#1, #3, and #5). Figure W9 cleared this point up by showing double ribs in each location but the next problem I had was that I thought I was missing a couple double ribs.
The figure showed double ribs made of parts SC31047-001 and SC31047-002 in the #1 and #3 positions. This meant I should have had four of each (2 each for each wing) but I could only find two. I knew that, per the packing slips, I received all of the ribs I should have so I thought I might have been misunderstanding the instructions for a while. I eventually realized that the difference may have been the fact that I ordered extended fuel since the fuel tanks go in near the #1 and #3 ribs. Sure enough, I checked the packing slip for the extended fuel kit and saw the missing ribs. Once I figured that out it was easy to find them and bundle them with the rest of the ribs so I wouldn’t have the same problem in the future.
After I pulled all of the parts, I lightly scuffed the surface of all 6 rib-halves that would make contact with the glue (as instructed). I also removed all labels on the surfaces to ge glued and labeled the ribs on the back side using a Sharpie. Finally, I cleaned the scuffed surfaces using some denatured alcohol.
The ribs were now ready to glue but the CubCrafters instructions for using the methacrylate (that I re-read several times) strongly recommended using a respirator when using the glue. I quickly ran out to Home Depot and bought one of those along with an additional clamp to help secure the ribs. The instructions for using the methacrylate gun were pretty basic but it effectively works like a fancy caulk gun with a special mixing tip.
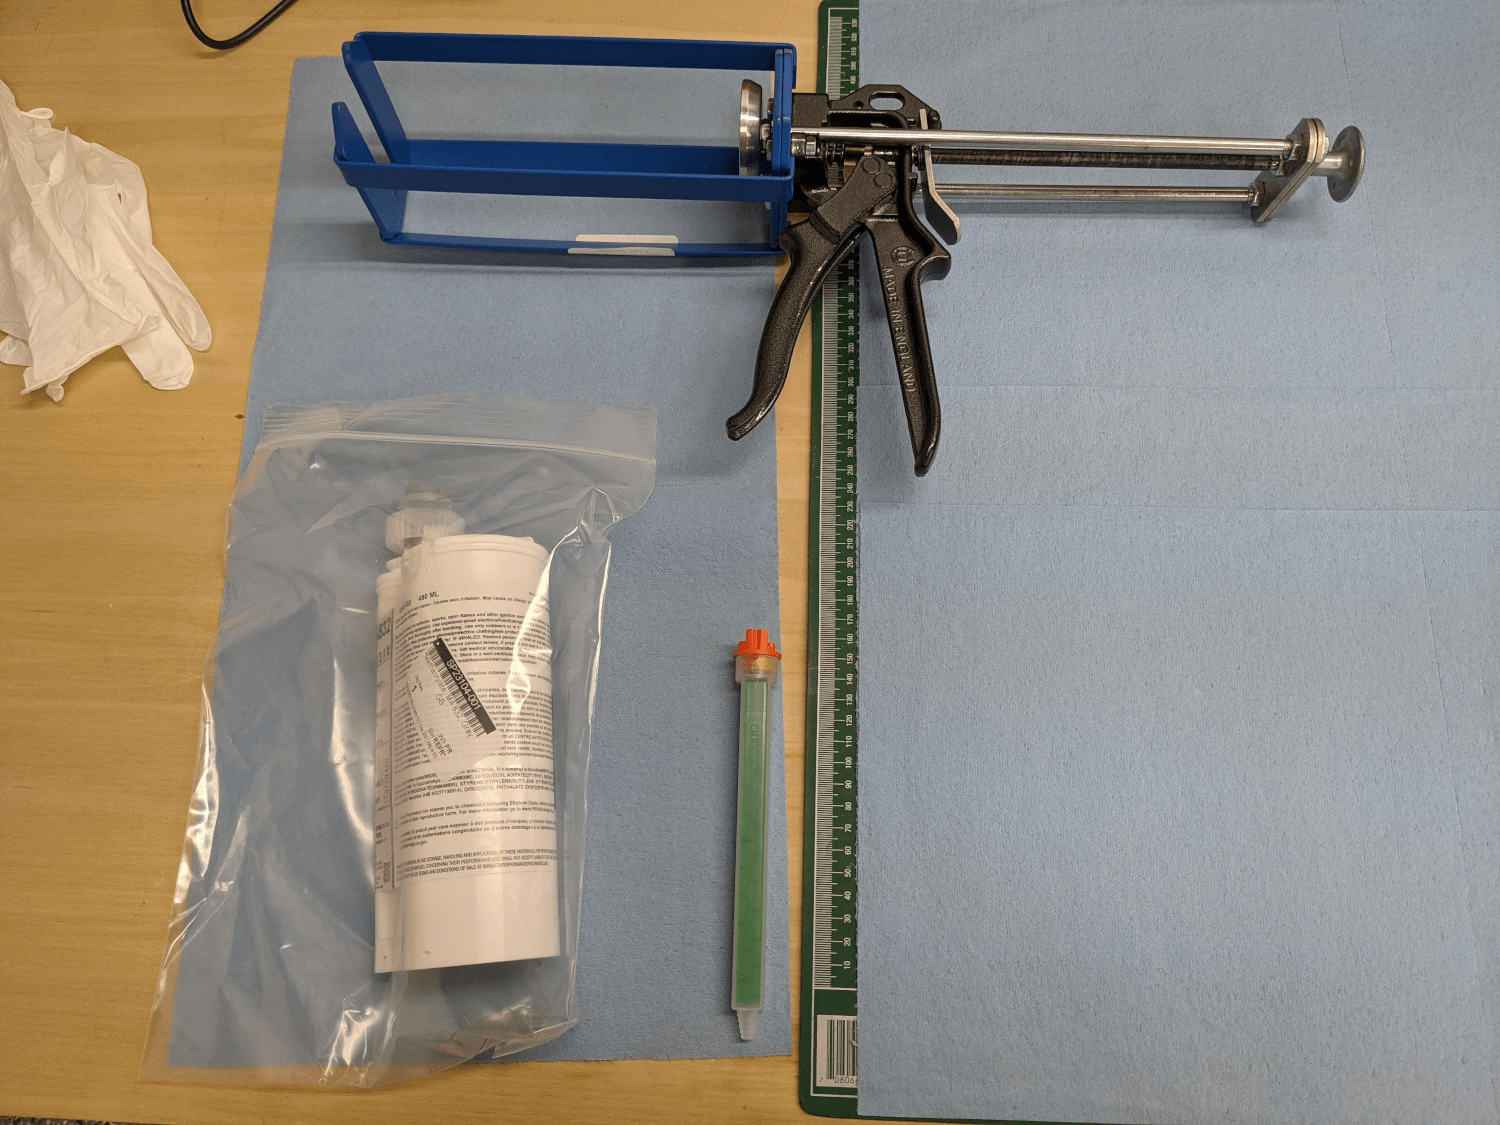 Methacrylate gun
After getting everything ready and priming the methacrylate gun (dispensing a 6+ inch segment), I laid down a thin bead of adhesive (as best I could) on one half of one double rib and then lined the other half up on top before clamping. A number of spring clamps ended up being very helpful for this as well. I tried to be very careful around the nose and tail rib flutes (as instructed). I repeated this process for each double rib and tried to wipe away any adhesive that did end up squeezing out.
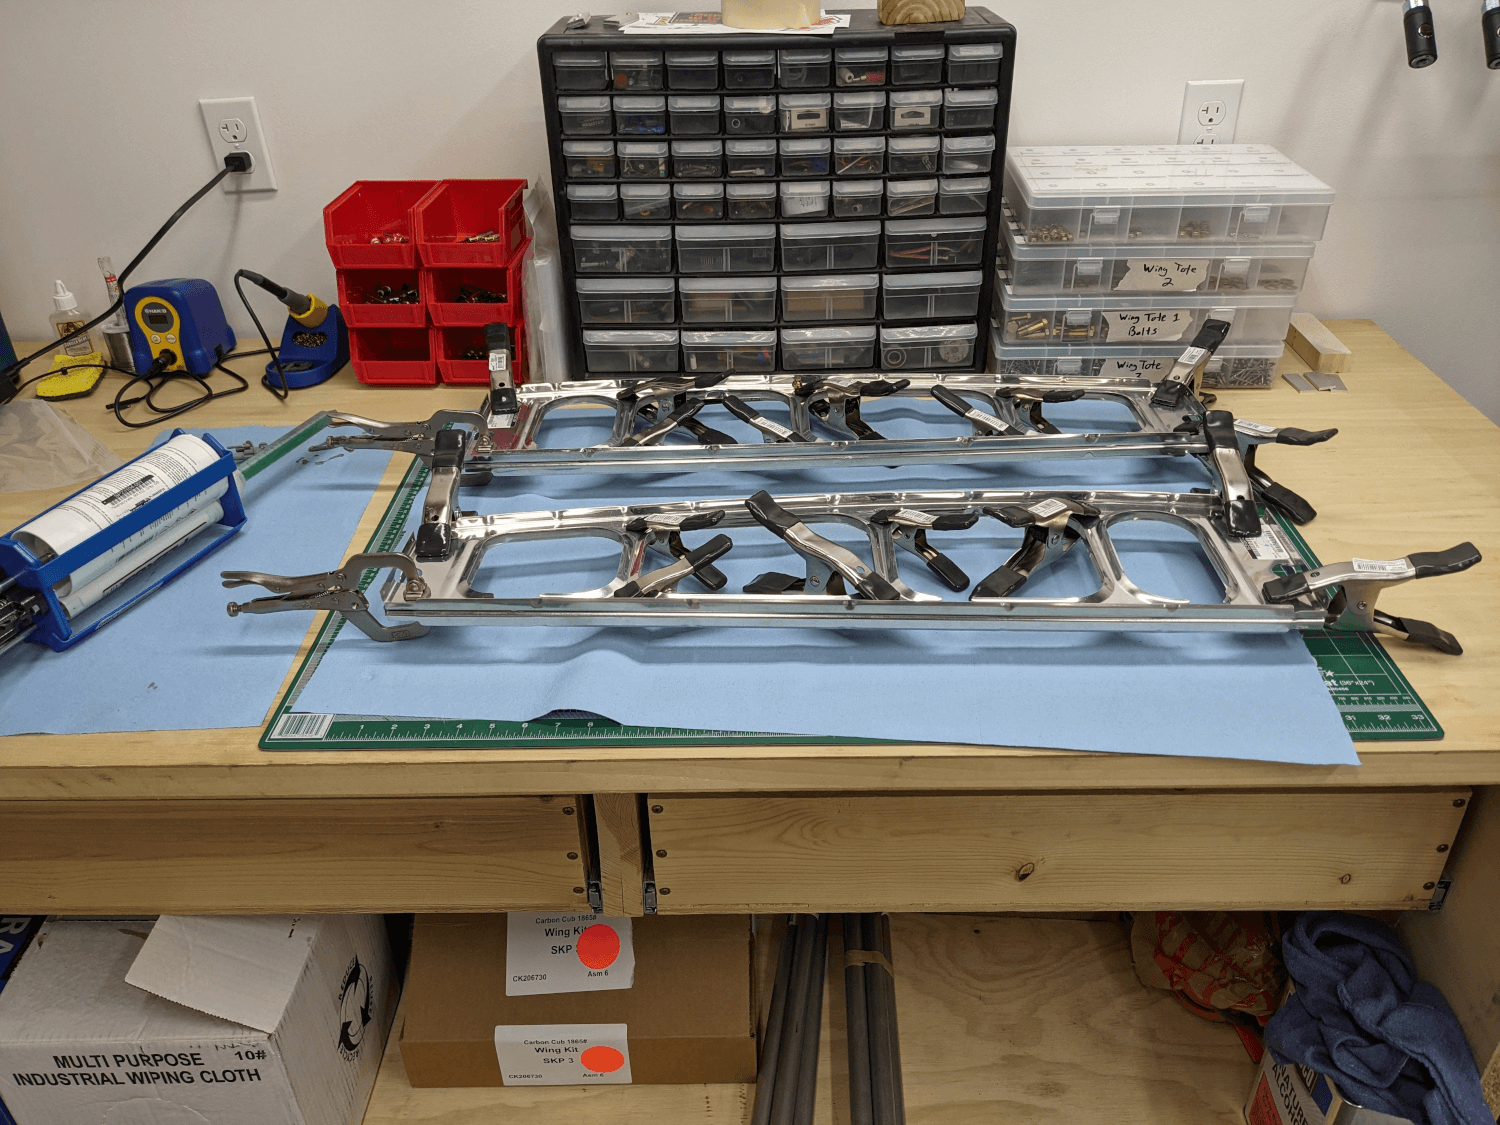 Clamped ribs
I left the ribs clamped overnight for the adhesive to cure. This completed section 5 of the manual.