Today was a quick day where I got started on section 221 of the manual, installing the flap false spar. The false spars are basically bent pieces of sheet metal that attach to the tail ribs I installed in the last section and form the trailing edge of the wing.
The first thing I did was temporarily clamp the false spar in place using some long nose locking pliers (wrapped in friction tape to prevent scratches). It fits over all of the tail ribs in the flap bay and extends from rib #1 to the aileron/flap hanger. Just clamping it on the ends was sufficient and I made sure to get the three tabs that line up on the aileron/flap hanger in roughly the right spots (and on the correct side of the pieces they rivet to).
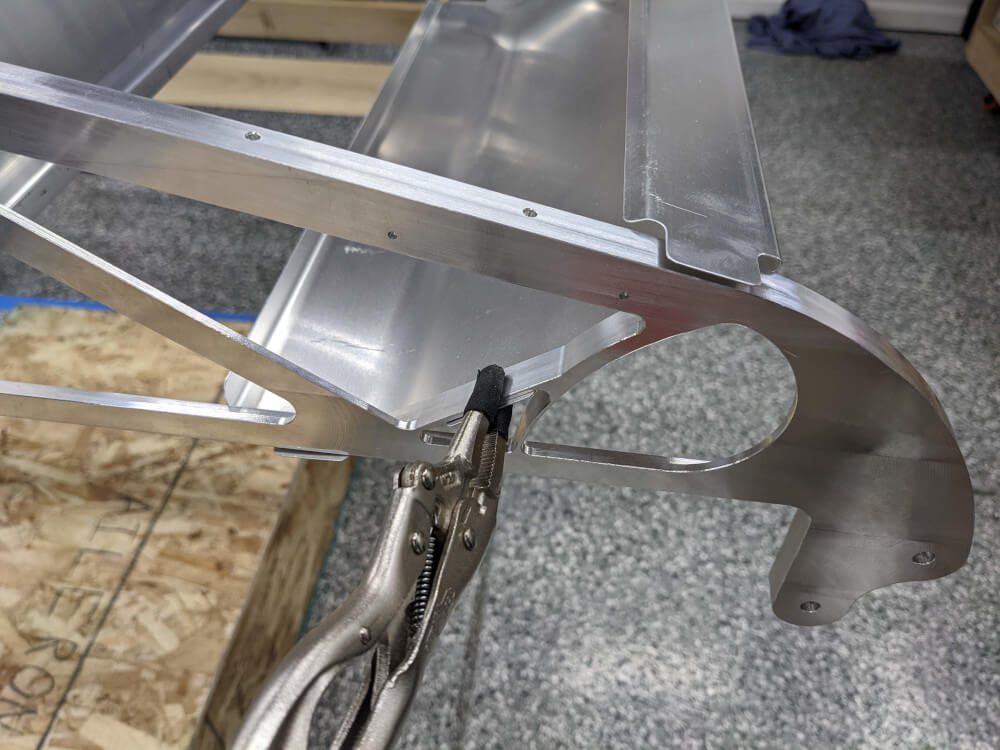 The false spar clamped to the aileron/flap hanger
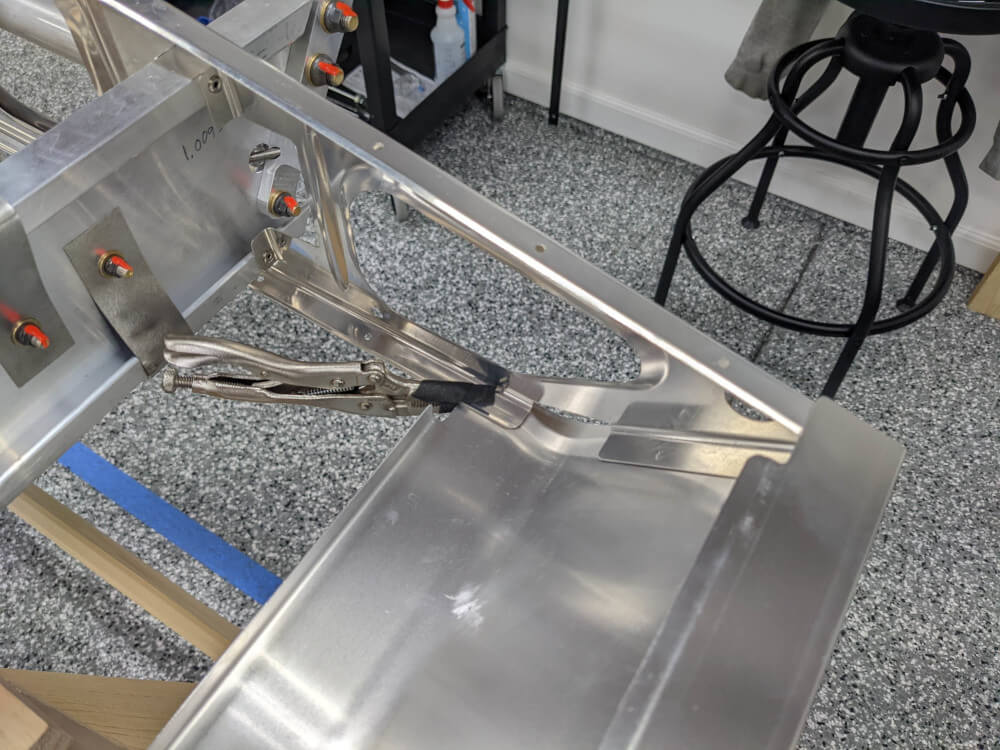 The false spar clamped to the back of rib #1
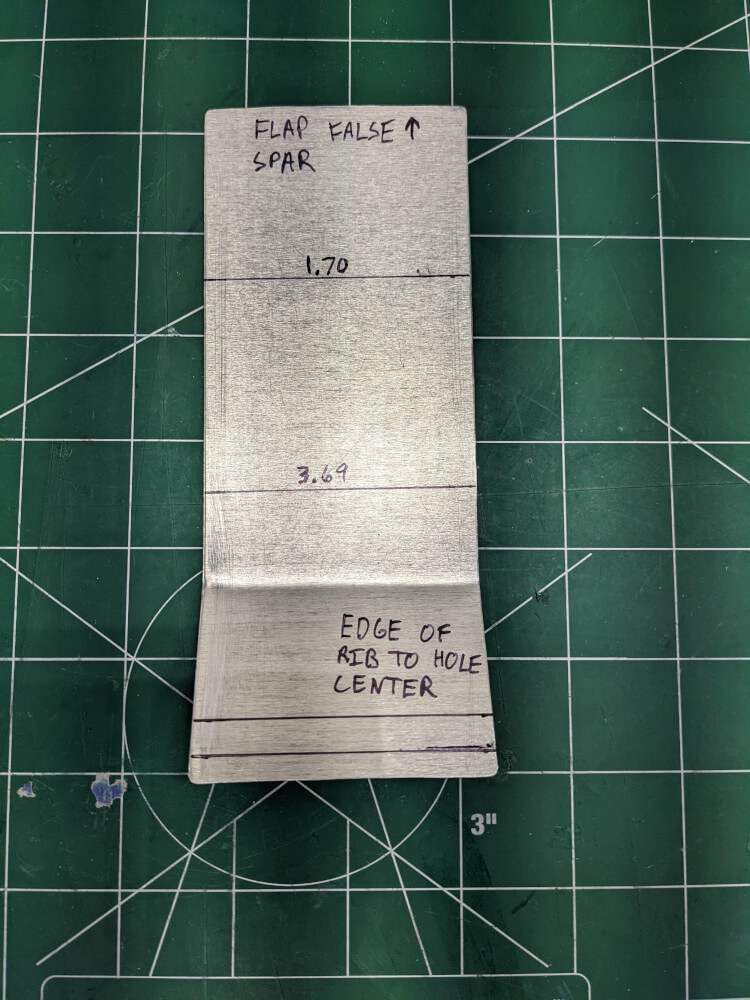
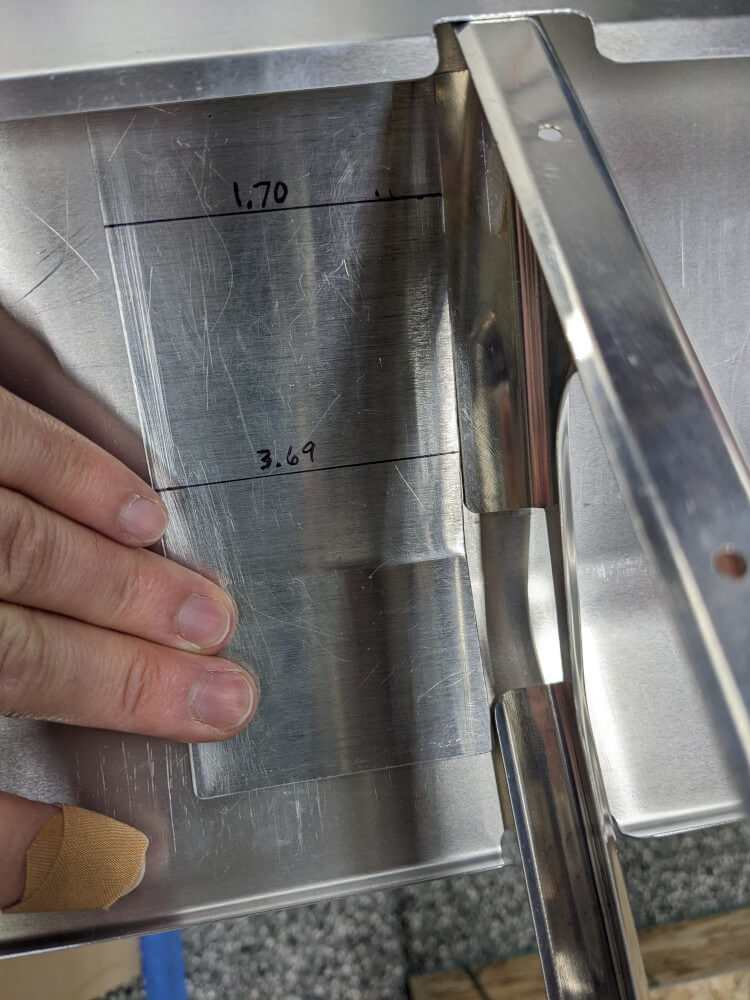
After that, I worked on making a marking template out of some scrap sheet aluminum as recommended in the manual. This lets me repeatedly mark the location of holes that will be drilled through the tail ribs and false spar to secure it in place.
 The false spar clamped to the back of rib #1
The manual provides the exact distances from the top edge of the false spar so I just have to push it up against it and then mark next to the lines on the tool. In addition to saving time this also provides more repeatable results for a (hopefully) more uniform looking rivet pattern in the finished wing.
 The false spar clamped to the back of rib #1
Wing Manual (Extended Fuel), CCEX-004 Rev. 2.02, Pages 103-105 ↩