Riveting Blocks and Fittings
I finally got to work on the plane again! It’s been a little while for a couple reasons. The first is that I’ve just been busy with other things going on in my life and the second is that I was still trying to figure out how to get those tricky rivets installed in the last block/fitting pair on the front spar (that I mentioned in my last build log entry). I posted on the builder’s Facebook group to see if anyone had any hints and all of the responses I got were telling me to buck those rivets because it is easier.
I borrowed a rivet gun and bucking bar set from Craig and tried to practice bucking rivets in some practice material; however, I wasn’t able to consistently get good rivets. I think I would have especially struggled in the somewhat tight spot where the rivets in question were located. I did receive some advice that it may be easier to rivet with a second person holding the bucking bar (so we could each keep our tool square a little more easily) and it sounds like I may have been using too low of a pressure at the rivet gun. In the end I wasn’t feeling confident with the rivet gun and was having a hard time getting better with it without someone local who could show me the ropes.
I ended up playing around some more with the squeezer and the two different yokes I had and figured out that the nose (side opposite from the handles) of the squeezer would fit where I needed it to if I flipped the rivet around (so the factory head was inboard). While it did clear everything and let me hold the squeezer straight it did not quite reach the factory head of the rivet. I used a few small washers to shim up the factory head side of the squeezer so that it would reach the rivet. Since the orientation of the rivets does not matter I was able to install the two remaining rivets this way and finish installing the blocks and fittings.
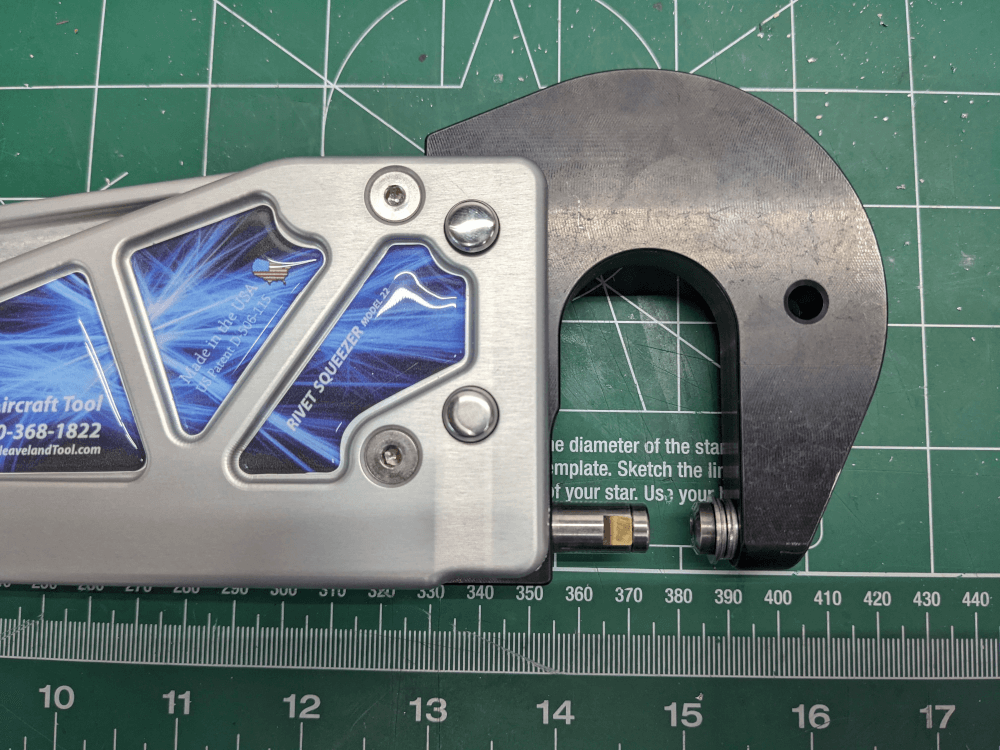 The rivet squeezer with washers shimming up the factory head side
I did talk to Clyde about this problem and realized that I could use the squeezer in the opposite orientation (factory head on the moving part of the squeezer and shop head on the stationary side) without any problems. I think that, if I had used the same yoke I went with but had reversed the squeezer orientation, I would have been able to put the rivets in with the factory heads facing outboard (the initial orientation) and squeezed them using a longer flat squeezer piece (for the shop head) that I have. This would have made my life a little easier but what I did accomplished the same result and now I know for the next wing!
At this point all of the blocks and fittings were installed and I was done with section 71 of the manual.
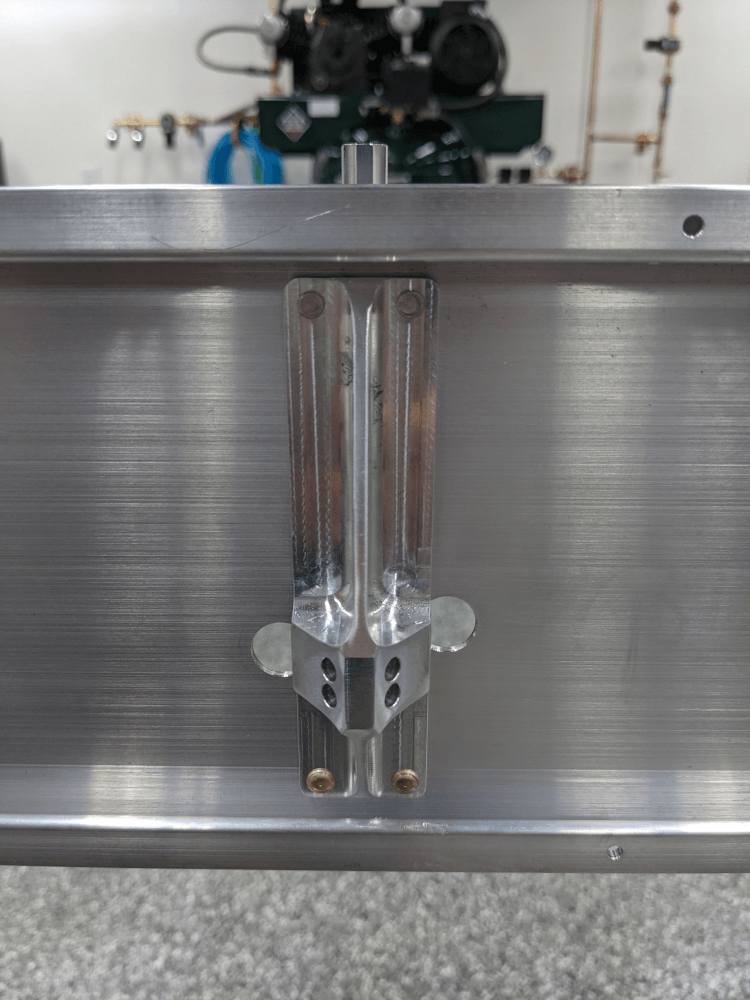 The last block/fitting installed
Placing the Center Ribs
I then moved on to section 82 of the manual which has the builder install the center ribs. I labeled each rib position along the front spar (as suggested in the manual) to help me make sure I was installing everything in the right spot. I then got ready to install the double rib in the #1 position.
The #1 rib requires that you first trim out a notch in the wing root side so that it clears a hinge block bolt head. I had previously done that step but touched up the cut area a bit more to make sure all the edges were smooth and all the corners were rounded. Then I temporarily installed it on the spars with clecos.
After rib #1 was done I placed the bolts and washers needed to attach one of the machined tail ribs (aileron hangers) through the spar behind rib #5 and then temporarily installed ribs #3 and #5 with clecos. These were the other two double ribs and I paid special attention to ensure that I installed the correct side of the rib in the existing holes (the other side of the rib will be match drilled into the spar and then riveted).
From there I installed the other set of machined tail rib bolts/washers behind the #12 rib and cleco’d the rest of the ribs in place (excluding the #4 and #6 ribs so that I would have more room to work when match drilling the double ribs). While doing this I installed a cleco in the bottom hole on the forward spar for rib #8 and covered it with masking tape (with the word “NO” written on it) so that I would remember that this hole does not get riveted at this time.
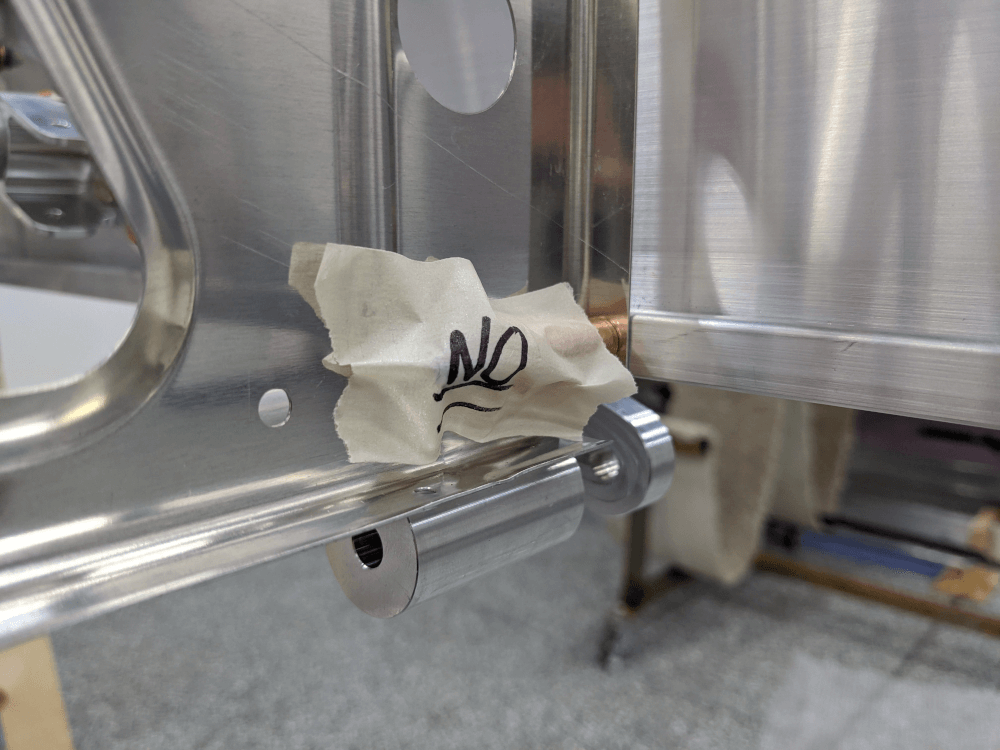 Tape over a cleco so I remember not to install a rivet yet
Finally, I went back over each rib to ensure that it was the correct part number for that bay, the cleco in the hole I should not install a rivet in had tape, the machined tail rib bolts were installed, and the double ribs were installed in the correct side.
The only things left to do to finish section 8 are match drilling the holes in the spars and riveting in all of the ribs (including the final two that have not been placed yet). Even though they are not yet permanently installed this was an exciting step because it makes it start to look a lot more like a wing!
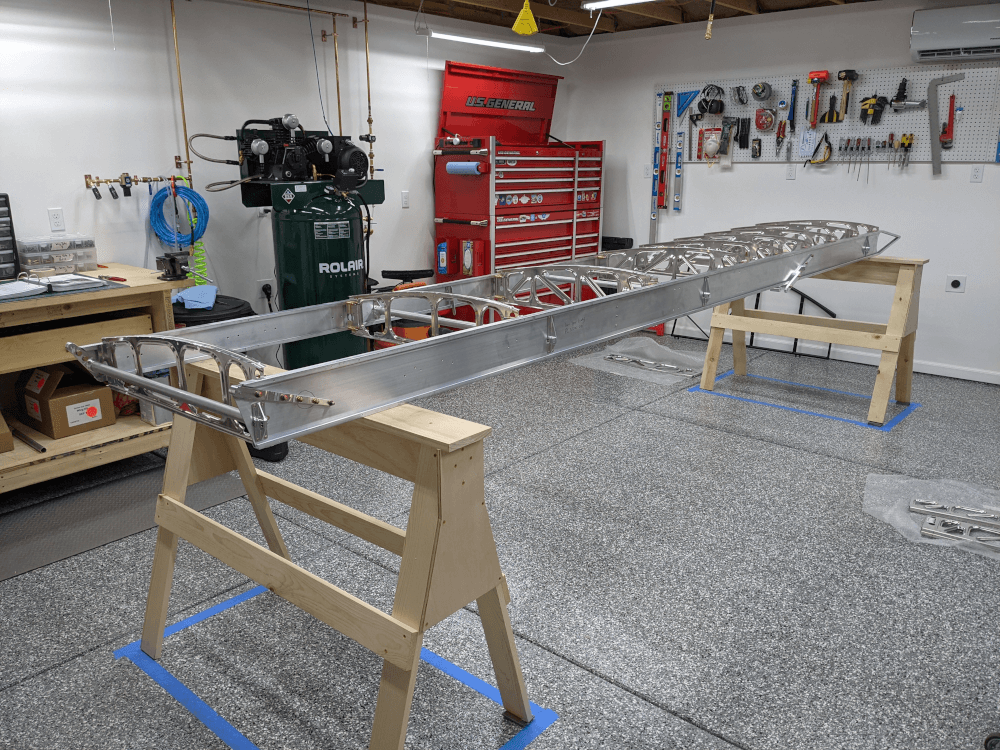 The center ribs placed in the wing
Checking the Center Ribs
When the center ribs are glued together you have to be very careful not to get any glue in the flutes that hold the nose and tail ribs. I wanted to be confident that I had done this correctly before I riveted in any ribs so I trimmed the hydro forming tabs off of a nose rib per section 133 of the manual. I did this using a nibbler and then a fine sanding drum on my Dremel tool to smooth out the edges and corners.
 Trimming the nose rib
After this I was able to test fit the nose rib on each double rib and they all worked just fine which means that the gluing was okay (I visually inspected the flutes for the tail ribs).
 Test fitting the nose rib on the #1 double rib
Spar Inspection
Last but not least I went ahead and skipped to section 94 and performed the spar inspection. This step in the manual just has you make sure that the holes in the spar web that are used to attach the fuel tank strap bolts are present and has you drill them if they are not. Fortunately, all of mine were present so section 9 is now complete and I’ll be ready to move on to section 10 (installing the tank straps) as soon as I finish getting the center ribs permanently installed.