It’s been a long time since I’ve been able to work on the plane for a number of factors. Included among those was the fact that we discovered that the leading edge clamps we had weren’t quite right and that we needed to CNC a new set. This is now done and the first leading edge skin on Craig’s plane is done so it’s time to start on mine.
Tonight, I just started prepping for the leading edge skin installation by first aligning (squaring) the nose ribs per section 451 using some PVC that we cut slots into with the correct spacing. The idea behind this is to hold the nose ribs square without having to leave tape in the wings. Square is a bit of a difficult target here since each of the nose ribs is a bit twisted but the PVC does a reasonable job. Due to the proximity of my wing and the wall we had to start the PVC out the window (Martha’s idea) and bend it a bit as we fed the first 10” or so into the nose ribs but it worked out.
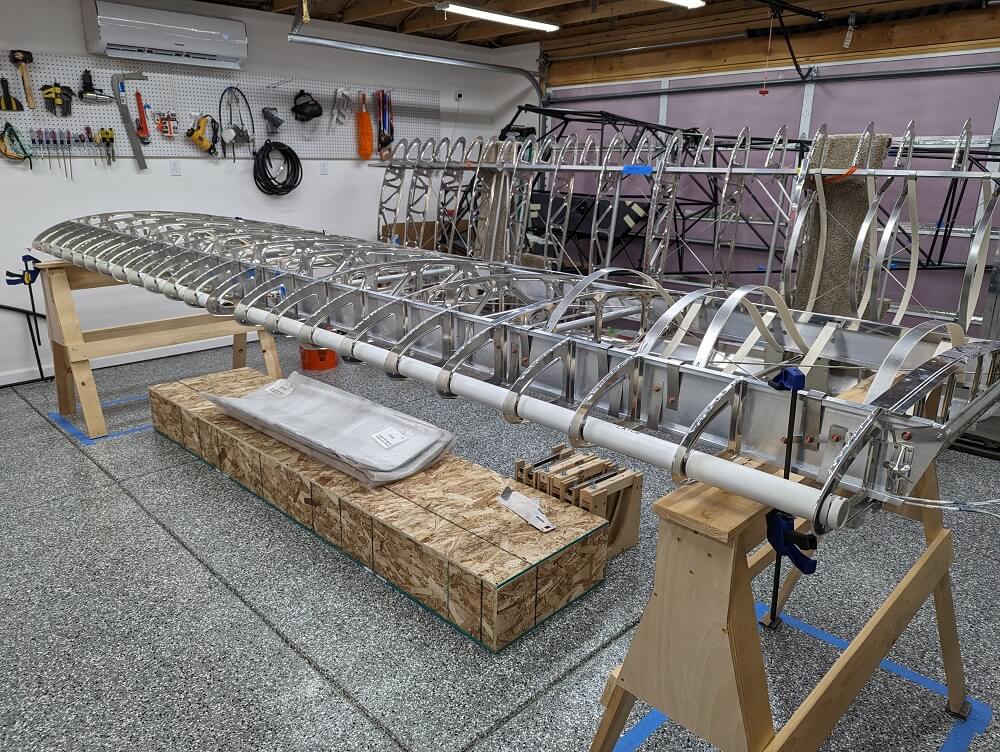 PVC in the nose ribs holding them in place
After that, I retrieved the landing light housing for the right wing and confirmed that the prep steps in section 462 were already done. This let me move on to section 493, the beginning on the leading edge skin installation for the EX2. Tonight, all I did was mark the center lines of the nose ribs onto their attached center ribs. These will be used to mark the center lines on the leading edge skins down the road for drilling of the top row of rivets. I’ll need Craig’s help later but we will still need to mark the positions of the intermediate nose ribs.