Today I continued working on section 8 of the manual1, installing the center ribs. I started by confirming that everything was installed in the correct place and that I wasn’t missing any steps here. That included making sure that the correct rib was being installed in each position, the double ribs were installed correctly (the correct side was cleco’d in the pre-existing holes), the machined tail rib bolts were installed behind ribs 5 and 12 properly, and that everything generally looked correct.
After that it was time to match drill the remaining holes in the double ribs. Since these consist of two ribs that are glued together with one side fully cleco’d in, all I had to do was drill into the spar straight through the remaining holes on the other rib. The most important thing to do here was to use a drill stop to prevent the drill from going in too far and nicking something it isn’t supposed to on the back side. I also used a 12” long drill bit since the clearance between the rib and the hole is tight - this let me get everything much straighter than if I had used a shorter bit.
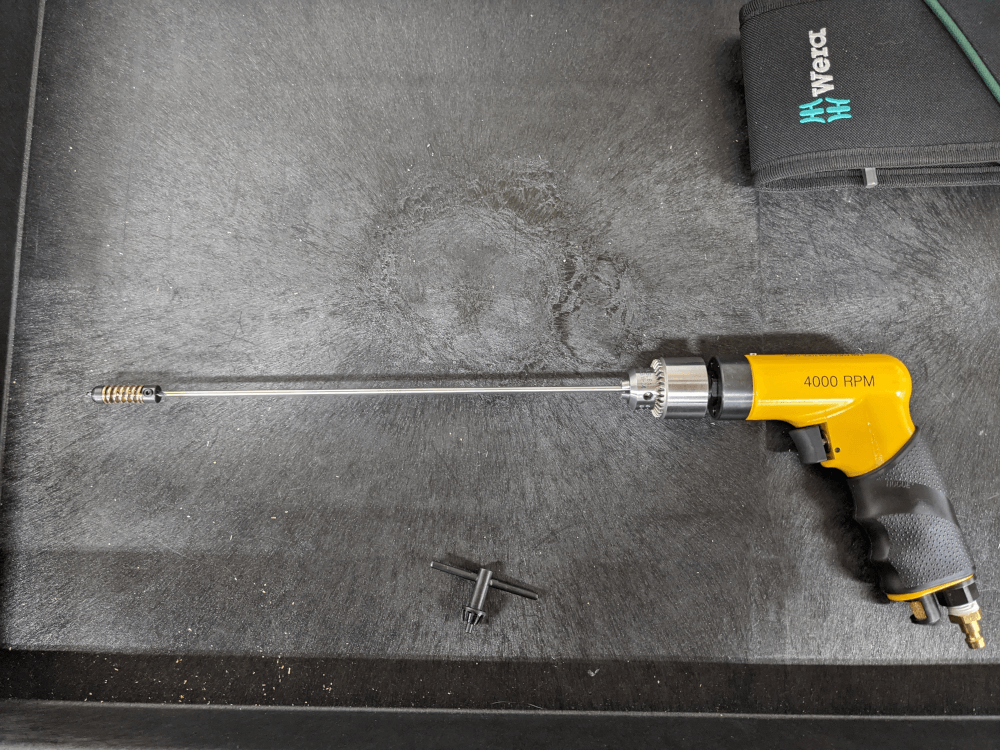 The drill with a 12” long #30 bit and drill stop in place
After the holes were match drilled they needed to be deburred on both the front and back. I wasn’t sure how to get to the back of the holes since they were within a very confined space on the spar. Instead, I decided to skip those holes for now and rivet in the other ribs first.
Unfortunately, I ran into another problem here which was the fact that the holes were close enough to the rib itself that I couldn’t get the rivet puller in straight. Instead, the rivet puller (and therefore the rivet) had to go in at a fair bit of an angle. This would cause thr rivets to set crooked which is not right. The manual had mentioned the need to modify a rivet puller by grinding it down to make it lower clearance. I had thought this was just needed for the upcoming rivets in the machined tail ribs but I now realize it is needed for the ribs as well. I had already purchased a second puller with the intention of “modifying” it so I went ahead and did that by placing it in my bench vise and using an angle grinder to remove material.
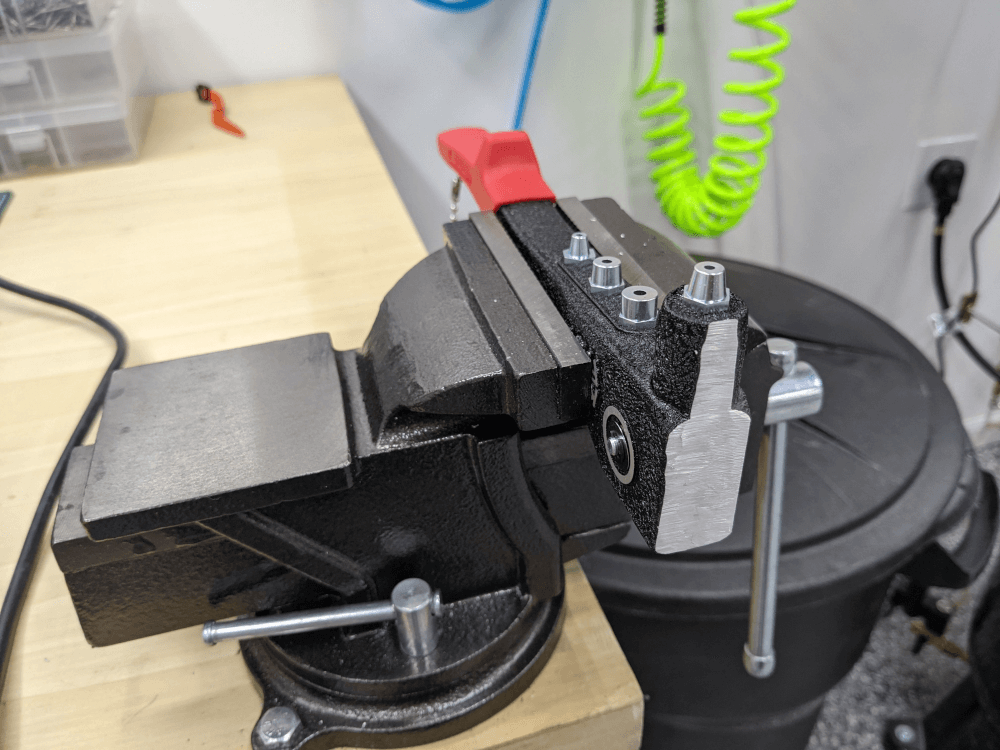 Rivet puller in the process of being shaved down
I ended up removing quite a bit of material and got to the point where I don’t think I can take any more off without affecting the function of the tool significantly. Unfortunately, it still doesn’t quite fit flush on some of the rivets because of the shape of the bends in some of the ribs. I’m planning on asking around to see if I can get any advice on how to get the puller in straight before trying to pull these rivets.
 Modified rivet puller
Wing Manual (Extended Fuel), CCEX-004 Rev. 2.02, Pages 60-64 ↩