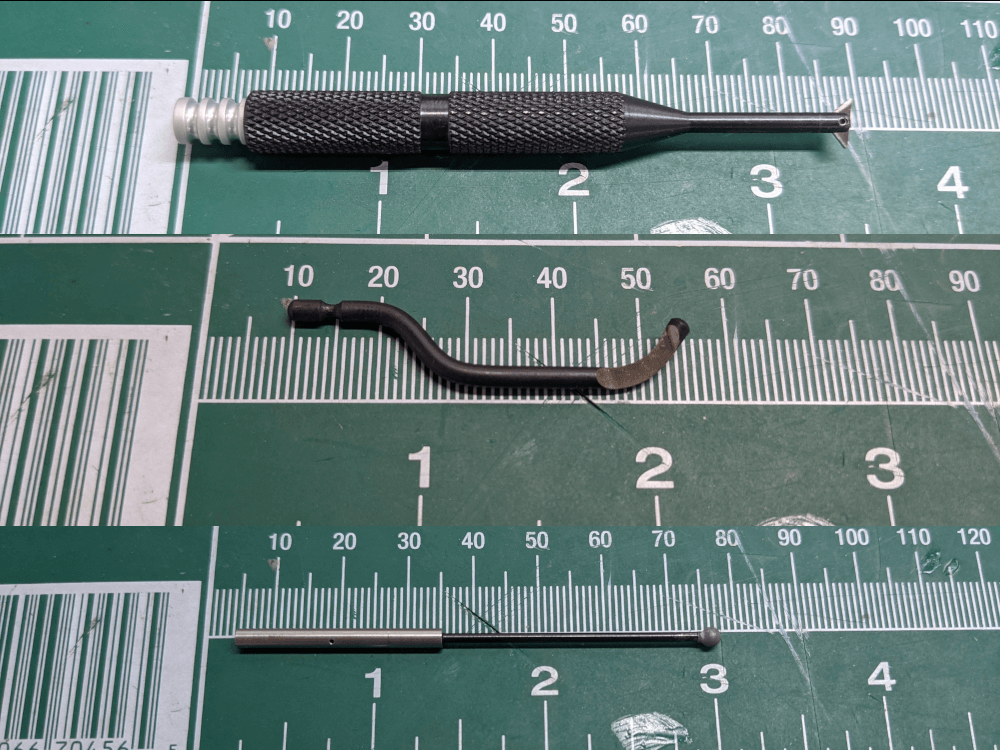
Today I worked on deburring the problem hole on rib #3 so that I could get the last rivet installed for that rib. I purchased a small hole deburring scraper and a back edge deburring scraper blade from McMaster-Carr along with a fine grit rotary deburring bit from a local machinist supply house and an assortment of picks from the hardware store.
 Deburring tools
I used a small inspection mirror so that I could see what I was doing and used the deburring scraper and back edge deburring scraper blade to try to carefully remove the burr. I focused on the bottom and side edges of the hole in order to avoid getting too close to the spar bulb and accidentally damaging it. While I made the most progress with these tools, I also used the rotary deburring bit (rotated by hand) and the picks to try to smooth off the back of the hole and remove any final burrs.
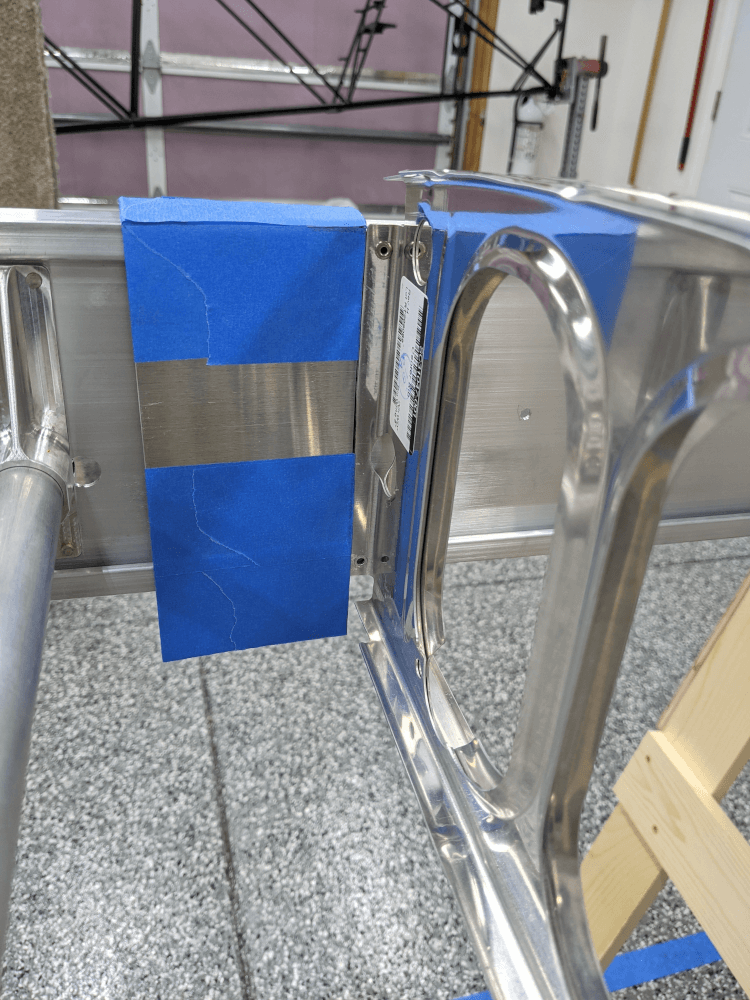
After about 45 minutes of carefully working on the burr I thought it was as good as it was going to get so I decided to try the rivet again. Before I did, however, I made a shield out of sheet metal that I could hang over the top of the spar to protect it from any accidental knocks from the rivet puller when the rivet stem breaks off (credit goes to Craig for this idea). I used my hand nibbler to cut out a piece of aluminum about 8.75” long from a sheet of scrap and bent it using my bench vise and the edge of my plastic service cart. I also rounded all the corners using my Dremel tool and added a layer of masking tape to it where it would contact the spar to prevent any scratches.
 Spar shield
With the shield in place, I pulled the rivet on rib #3 and this time it pulled without any problems. With that done, I installed the rivets for rib #4 and inspected all of the ribs to ensure that rivets were installed (except for the rivet on rib #8 that is not supposed to be installed yet) and that they were installed correctly. This finished section 81 of the manual. Since I already completed section 9 I can now move on to section 10 (installing the tank straps) when I get a chance to work again.
 Wing with center ribs installed
Before I quit for the day, I also removed all of the stickers/labels from the ribs now that they are permanently installed and removed any residual adhesive using a shop towel and some denatured alcohol.
Wing Manual (Extended Fuel), CCEX-004 Rev. 2.02, Pages 60-64 ↩